How To: Manage Load Balancing
From the Load Balancing page in NodeWorx, administrators can manage the Load Balancer status, and add new Load Balanced Services
Note
The load balancer will show as stopped upon initial set up. Services must be added to the load balancer before it will start. See To Add a New Load Balanced Service.
Contents
To Manage the Load Balancer
Checking the Load Balancer Status
Log into NodeWorx from the browser on the Cluster Manager (https://ip.ad.dr.ess:2443/nodeworx)
In NodeWorx, navigate to Clustering > Load Balancing

Under Load Balancer Control, the Status bar indicates the current status of the service
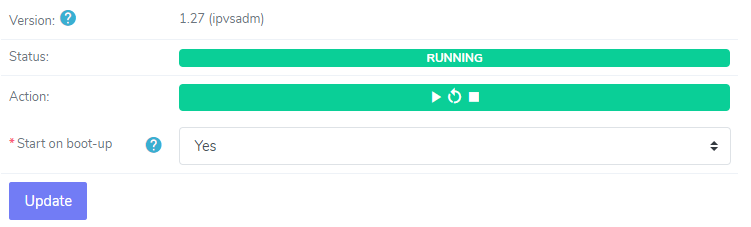
It is also possible to control the status of the service from this interface:
Play starts the service
Arrow restarts/refreshes the service
Stop stops the service
Setting Load Balancer Start-On-Boot Options
Log into NodeWorx from the browser on the Cluster Manager (https://ip.ad.dr.ess:2443/nodeworx)
In NodeWorx, navigate to Clustering > Load Balancing
Under Load Balancer Control, select either Yes or No from the Start on Boot-up dropdown
Click Update
To Add a New Load Balanced Service
Log into NodeWorx from the browser on the Cluster Manager (https://ip.ad.dr.ess:2443/nodeworx)
In NodeWorx, navigate to Clustering > Load Balancing
Under Load Balanced Service, click +. This opens the Add New Service form
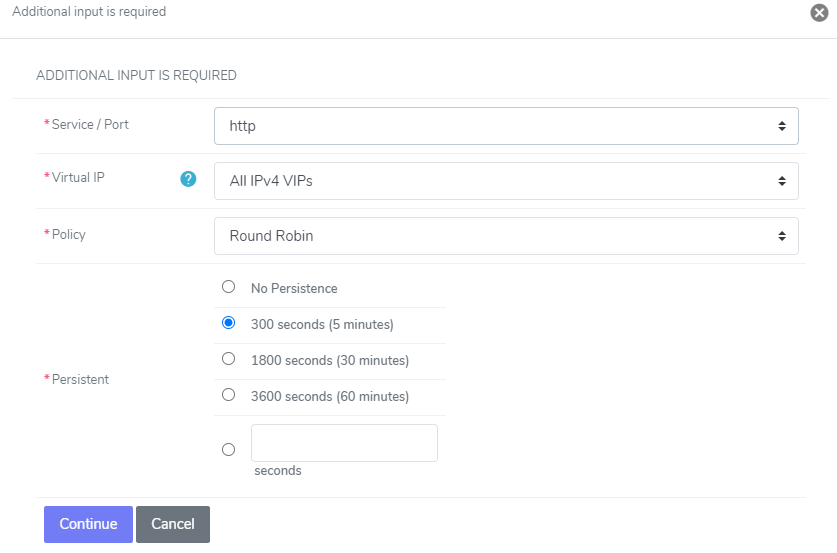
Update the required fields:
Service/Port: The service to load balance. Options include http, https, and both secure and insecure mail services
Virtual IP: The virtual IP will be shared and load-balanced
Policy:
Round Robin: Default load balancer policy. Incoming traffic is rotated sequentially to each server. After each server has received a connection, the load balancer repeats the list in the same order
Weighted Round Robin: Builds on simple Round-robin load balancing to account for differing application server characteristics. The administrator assigns a weight to each server, which determines the order of the rotation
Least Connection: Dynamic load balancing, where client requests are distributed to the server with the least number of active connections at the time the request is received
Weighted Least Connection: Builds on Least Connection load balancing to account for differing application server characteristics. The administrator assigns a weight to each server based on the server’s traffic-handling capability
Locality-Based Least Connection: Each IP, or group of IP addresses is attached, not to individual servers, but to the entire server group. Requests are sent to the server under the lightest load. If all of the servers in the native group are overloaded, then another under-loaded server from the cluster is picked up and added to the group servicing the IP the request came from. The server with the lightest load will then be deleted from the group
Persistent: The length of time a client will remain connected to the same server in a session
Click Continue. This opens the Confirmation form
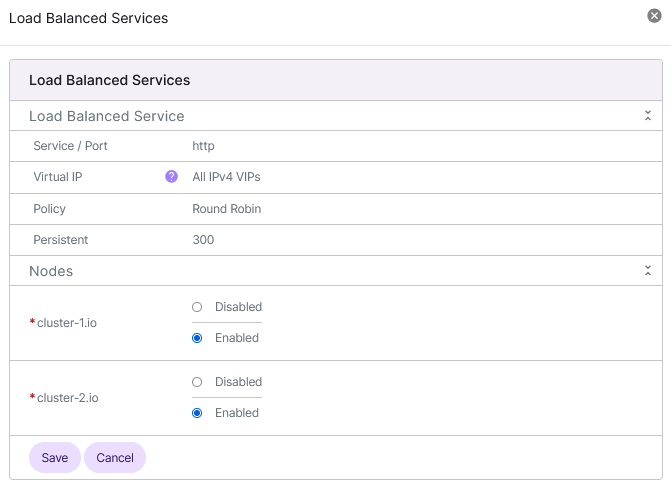
Click Save
To Edit a Load Balanced Service
Log into NodeWorx from the browser on the Cluster Manager (https://ip.ad.dr.ess:2443/nodeworx)
In NodeWorx, navigate to Clustering > Load Balancing
Under Load Balanced Services, click the Pencil next to the service to edit. This opens the Load Balanced Services form

Update the desired fields
Click Save
To Delete a Load Balanced Service
Log into NodeWorx from the browser on the Cluster Manager (https://ip.ad.dr.ess:2443/nodeworx)
In NodeWorx, navigate to Clustering > Load Balancing
Under Load Balanced Services, click the Trashcan next to the service to edit. This opens the Confirmation form
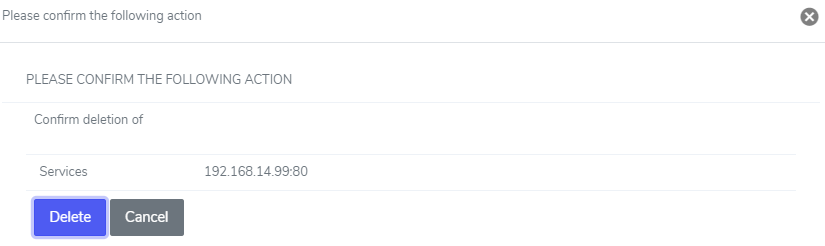
Click Delete