Note
You are viewing the documentation for an older release of Interworx (8.0). To see documentation for the current generally available release of Interworx, click here: 8.2.
How To: Install and Use the Acronis Plugin for InterWorx
Note
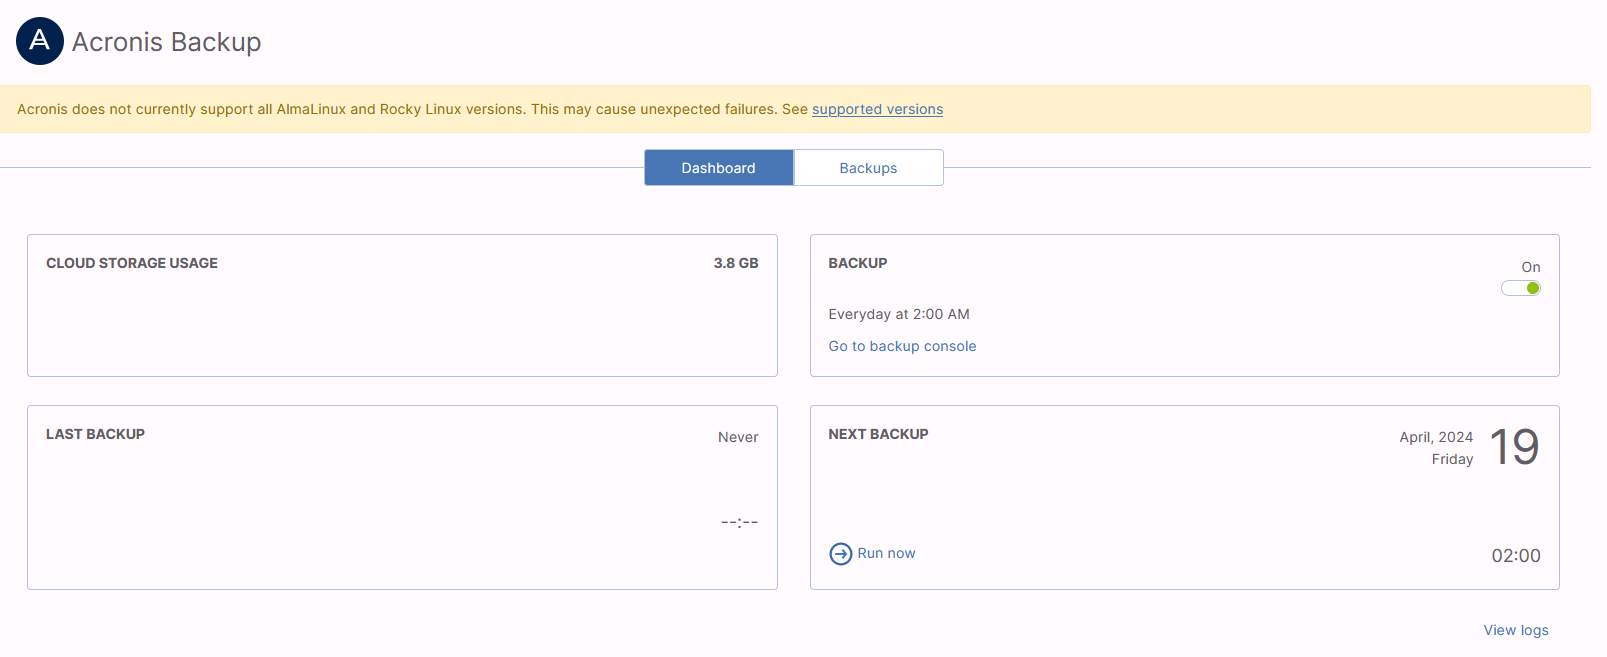
Acronis does not currently support all AlmaLinux and Rocky Linux versions. Supported OS versions can be found at the official Acronis documentation here.
Prerequisites
User must be an administrator within the customer group
The following ports must be open on the server: 443, 8443, 44445, 5060, and 7770-7800
The Acronis Backup Cloud: Connection Verification Tool can be used to verify that all necessary ports are open
How to Install the Acronis Plugin
Log in to the server at the command line as root, either via SSH or from the terminal
Run:
yum install interworx-plugin-acronis
How to Activate the Acronis Plugin
Log into NodeWorx from the browser (https://ip.ad.dr.ess:2443/nodeworx)
In NodeWorx, navigate to NodeWorx > Plugins
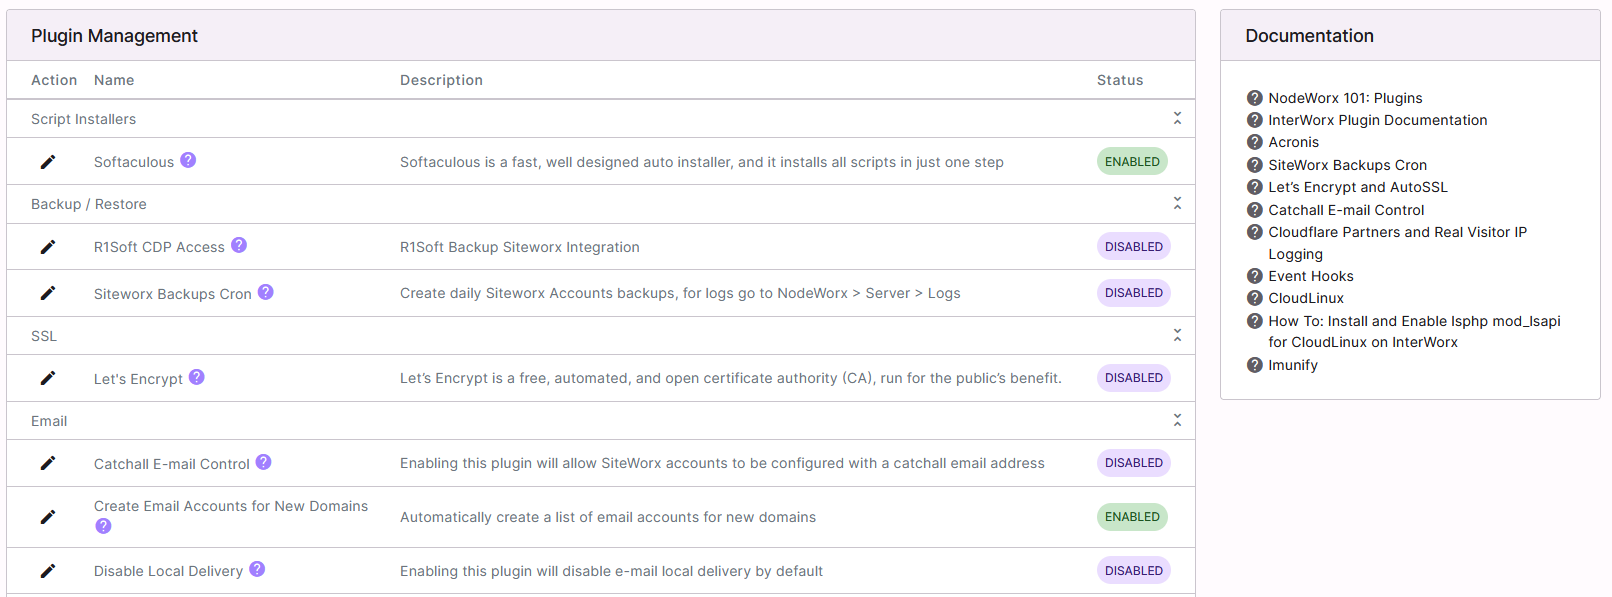
Under Backup/Restore, click the Pencil next to Acronis. This opens the Edit Plugin form

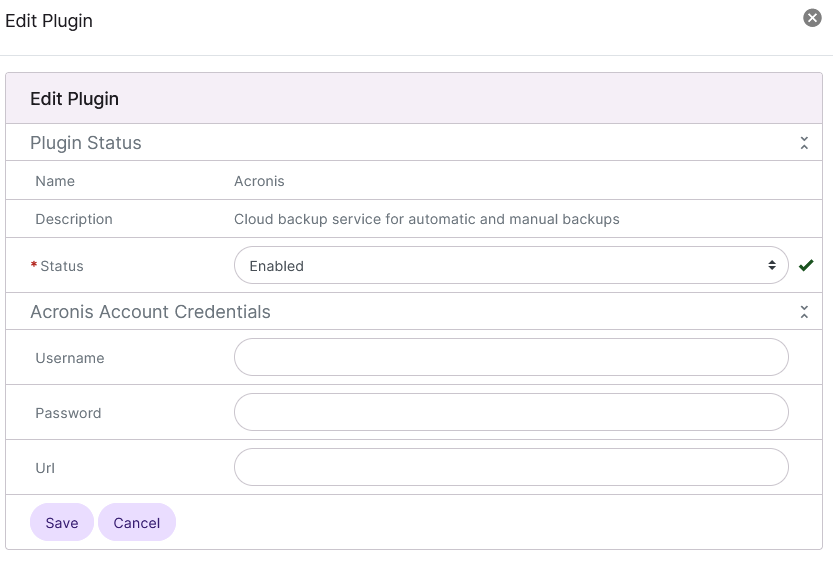
Update the required settings:
Status: Enables or disables the plugin
Username: The Acronis username
Password: The user’s password
URL: The Acronis site
Click Save
Refresh the browser. After doing soa new menu item named ‘Acronis’ will be listed under the Server tab
In NodeWorx, navigate to Server > Acronis
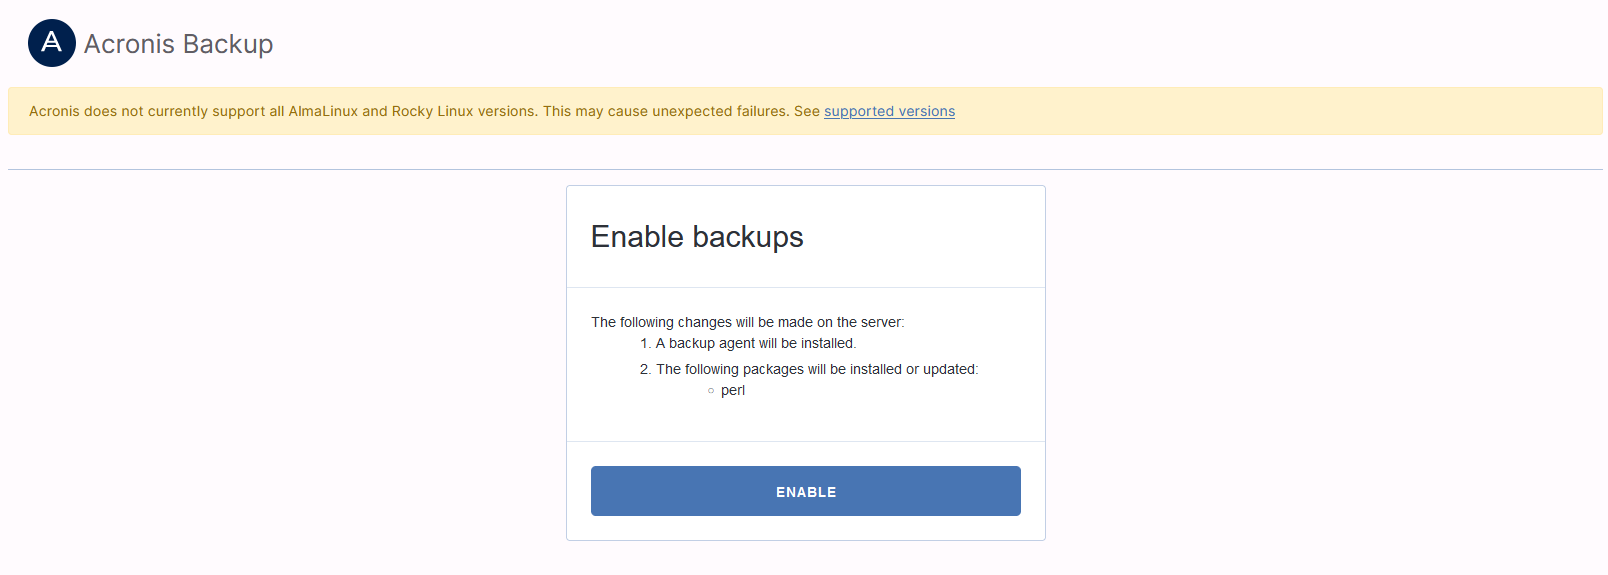
Under Enable Backup, click Enable. This automatically installs the backup agent and enables backups
If the backup agent has been installed manually, clicking Enable Backup will make sure that all configuration files are located in the right directory
Once the Installation is complete, click the on/off toggle next to Backup. This will set up the Acronis backup plan for the server
CLI
Interworx CLI Utility
The CLI utility provides the same functionality as the web interface. More information on how to use the InterWorx CLI can be found here.
Other Commands
To install the backup agent:
~iworx/bin/php /home/interworx/plugins/acronis/bin/acronisinstaller.php --install
To uninstall the backup agent:
~iworx/bin/php /home/interworx/plugins/acronis/bin/acronisinstaller.php --uninstall
Plugin Functionality
The Acronis plugin for InterWorx provides the following features:
Additional information
Full Account Restore
Restoring SiteWorx Account Structure and Settings
Note
This step includes the basic email and domain configuration, as well as databases schema and privileges. It recreates the basic structure of the SiteWorx account.
It does not include the email files, domain data, or database tables.
This step is required if the SiteWorx account no longer exists on the server. If the account does not need to be recreates, the step can be skipped.
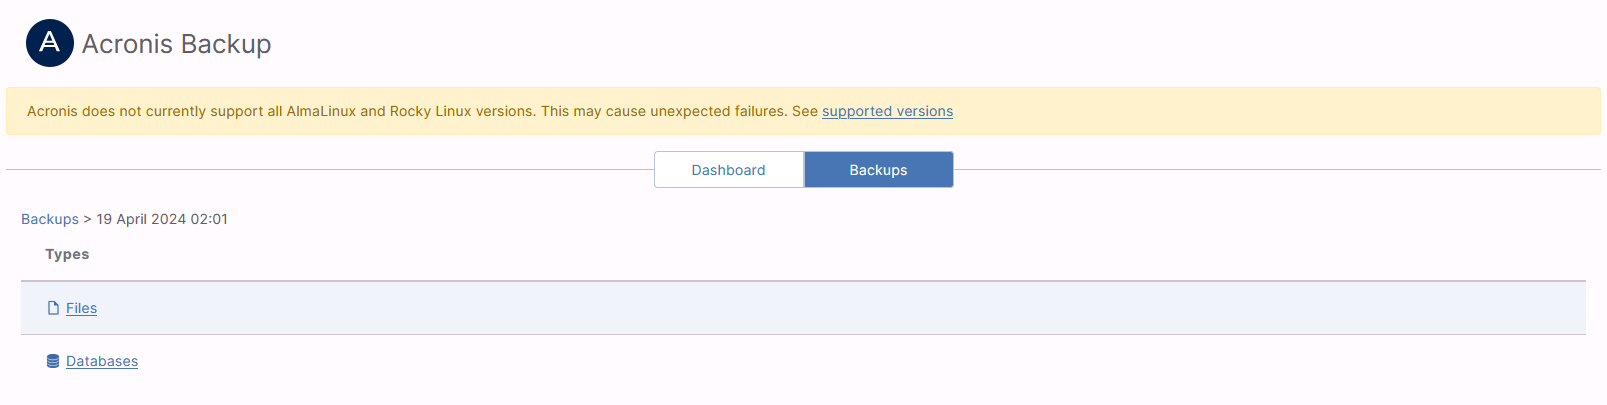
In NodeWorx, navigate to Server > Acronis Backup
Click Backups. This opens the backup list

Click the backup date. This opens a file directory
Navigate to files > chroot > home > .acronis_tmp
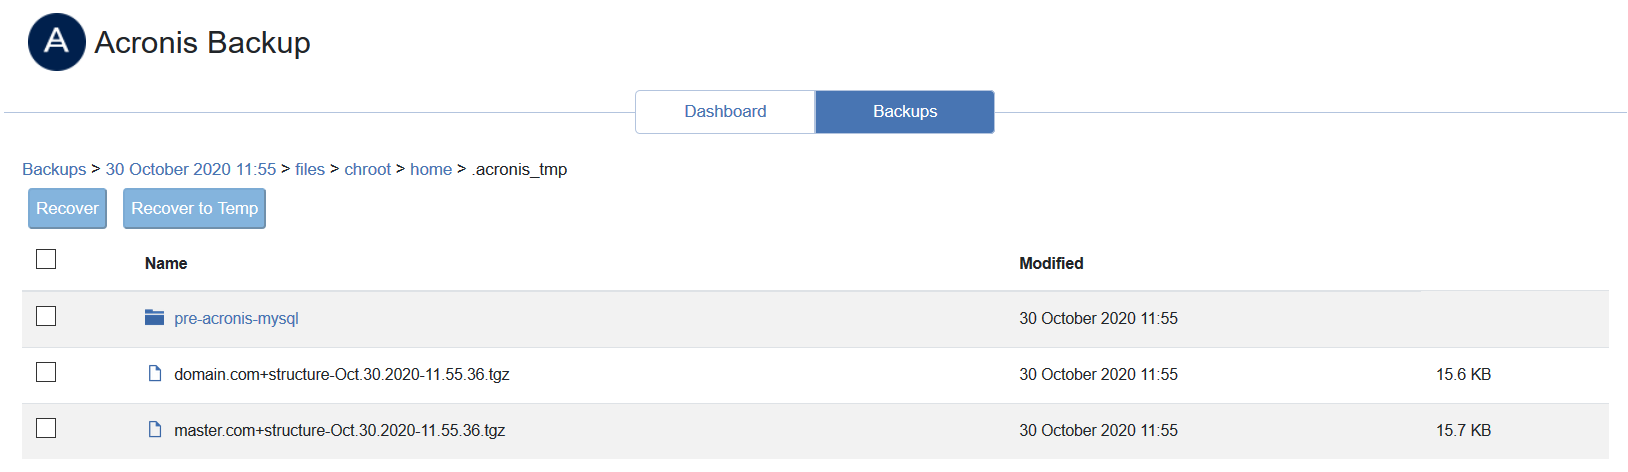
Check the box next to the backup file
Click Recover. This opens the confirmation popup
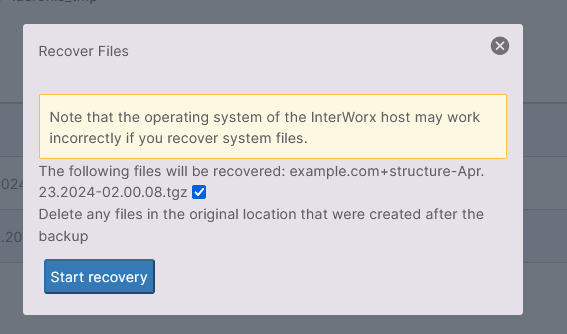
Select the checkbox and click Start recovery. This recovers the backup file, and sends it to
/chroot/home/.acronis_tmpTo import the backup file, log in to the server at the CLI as root, either via SSH or from the terminal
At the CLI, run the following command, replacing {ip-address} and {archive-file} with the corresponding information
Warning
This will delete the account if it already exists
/usr/local/interworx/bin/import.pex --control-panel siteworx --ipv4 {ip-address} --archive /home/.acronis_tmp/{archive-file} --force
Example:
/usr/local/interworx/bin/import.pex --control-panel siteworx --ipv4 123.45.67 --archive /home/.acronis_tmp/example.com+structure-Apr.23.2024-02.00.08.tgz --force
Restoring Database Tables
In NodeWorx, navigate to Server > Acronis Backup
Click Backups. This opens the backup list
Click the backup date. This opens a file directory
Click Databases. This opens a list of account databases
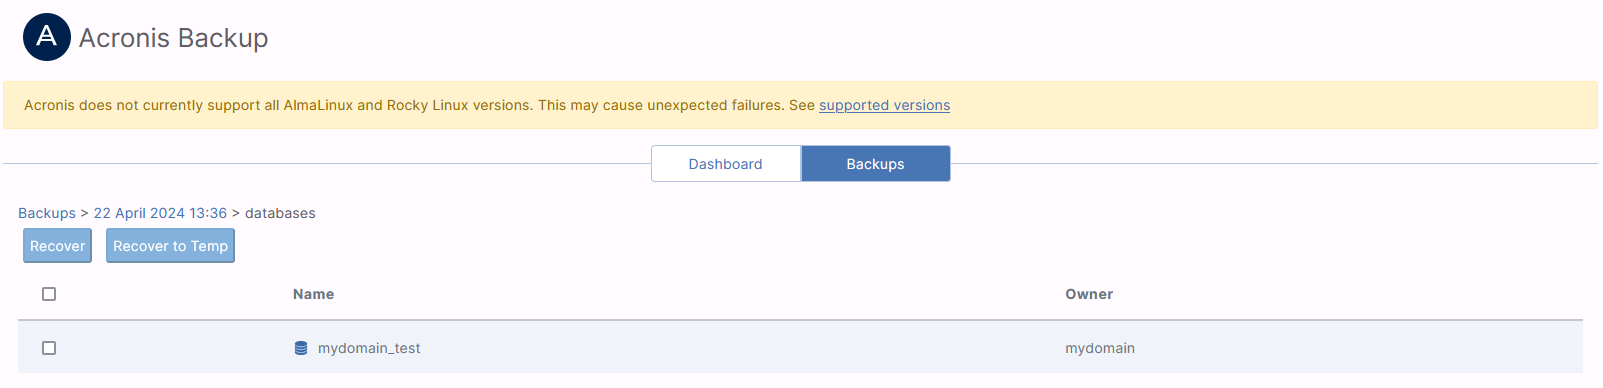
Check the box next to the database
Click Recover. This opens a confirmation popup
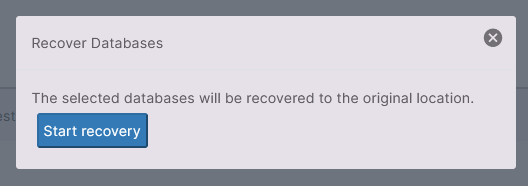
Click Start recovery
Restoring Email and Domain files
In NodeWorx, navigate to Server > Acronis Backup
Click Backups. This opens the backup list
Click the backup date. This opens a file directory
Navigate to files > chroot > home

Check the box next to the user account
Click Recover. This opens a confirmation popup
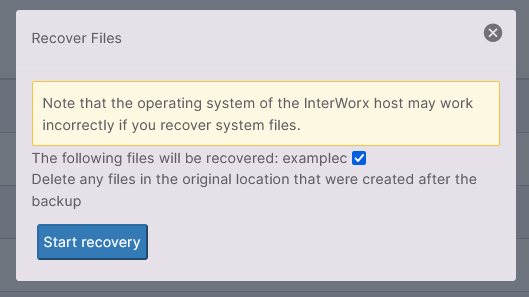
Select the checkbox and click Start recovery. This restores the home directory for the domain, located at
/home/{unixuser}, replacing{unixuser}with the corresponding information
If the UID and or GID of the account has changed, the account user and group ownership may need to be corrected.
Log in to the server at the CLI as root, either via SSH or from the terminal
At the CLi, run the following commands, replacing
{unixuser},{incorrect UID}and{incorrect GID}with the corresponding information:find /chroot/home/{unixuser} -user {incorrect UID} -exec chown -h {uniuser} {} \; find /chroot/home/{unixuser} -group {incorrect GID} -exec chgrp {unixuser} \;
Troubleshooting
If authentication fails, make sure that the user meets the requirements for using the plugin:
User group: customer
User role: admin
If encountering issues when activating the plugin, make sure that the data center URL is correct, and that it does not contain a trailing /
For example,
https://cloud.acronis.comwill work, whilehttps://cloud.acronis.com/may result in an errorAlso, make sure to use
https://vshttp://
The required packages should install automatically when enabling the plugin. However, if the installation fails, it is recommended to verify manually that the following packages are installed:
Packages for building kernel modules:
kernel-devel elfutils-devel elfutils-libelf-develMake sure that the package version matches the kernel version:
yum list installed | grep kernel-devel
cat /proc/version
If versions do not match, update the kernel and reboot:
yum update kernel
reboot
GNU Compiler Collection (
GCC) compiler systemGCCversion must be the same as the version used to compile the kernel:Gcc -v cat /proc/version
Maketoolmake -v
More detailed information and troubleshooting steps can be found in the Acronis Knowledge Base.