Note
You are viewing the documentation for an older release of Interworx (8.0). To see documentation for the current generally available release of Interworx, click here: 8.2.
How To: Set Up a New Clustered Node
Note
A fully configured Cluster Manager must be set up in order to add the Node. Instructions on designating an InterWorx server to act as the Cluster Manager can be found here.
Servers that will be used as Nodes must have the same version of InterWorx installed as the Cluster Manager, at least one IP Address, and not have any SiteWorx accounts. Also, the Cluster Manager and all of the nodes must be on the same network segment, and in the same physical location.
In InterWorx clustering, the Node is an NFS share to the Cluster Manager. Site data is not duplicated, though vhost files for the sites are created on the Nodes.
Once a Node is added to the cluster, it is no longer an independent server, and can only function within the cluster. New SiteWorx accounts cannot be added on the Nodes. New accounts must be created on the Cluster Manager.
To Designate an InterWorx Server as a Node
Log into NodeWorx from the browser on the server that will act as the Cluster Manager (https://ip.ad.dr.ess:2443/nodeworx)
In NodeWorx, navigate to Clustering > Setup
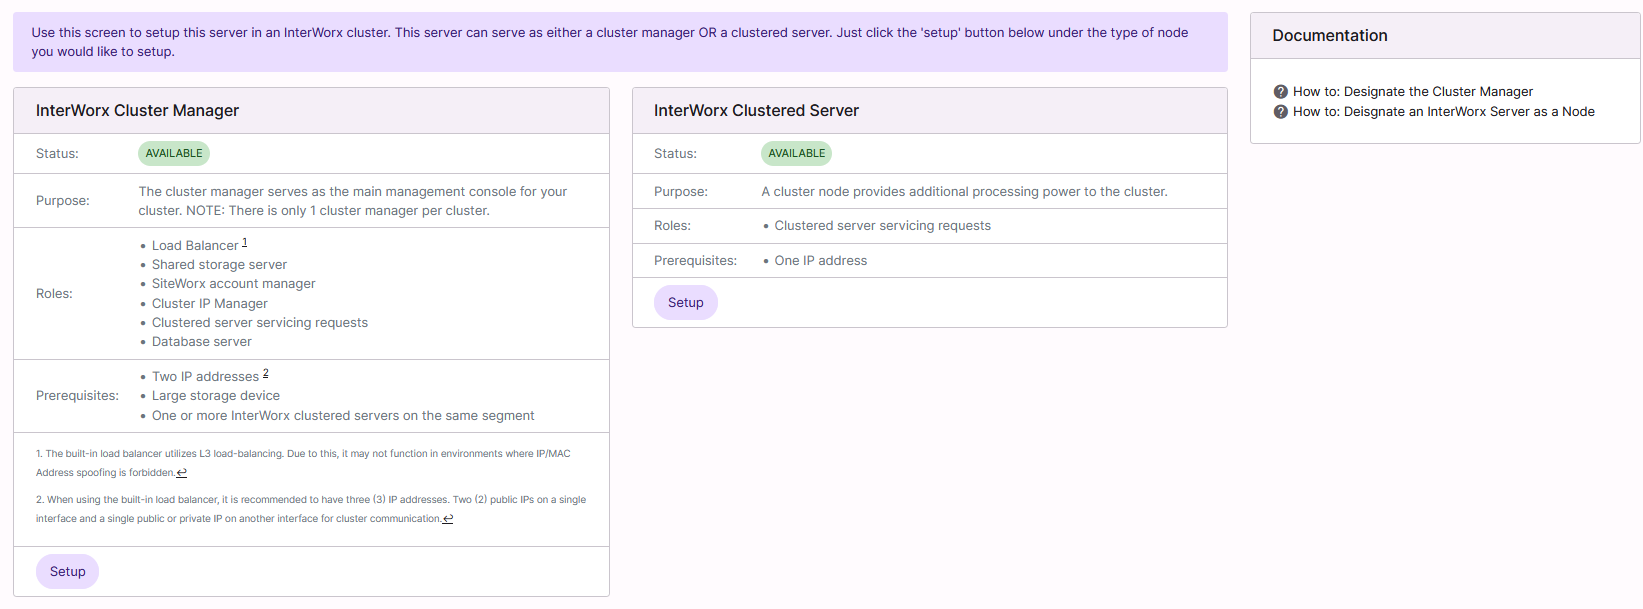
Under InterWorx Clustered Server, click Setup. This opens the Clustering Setup page
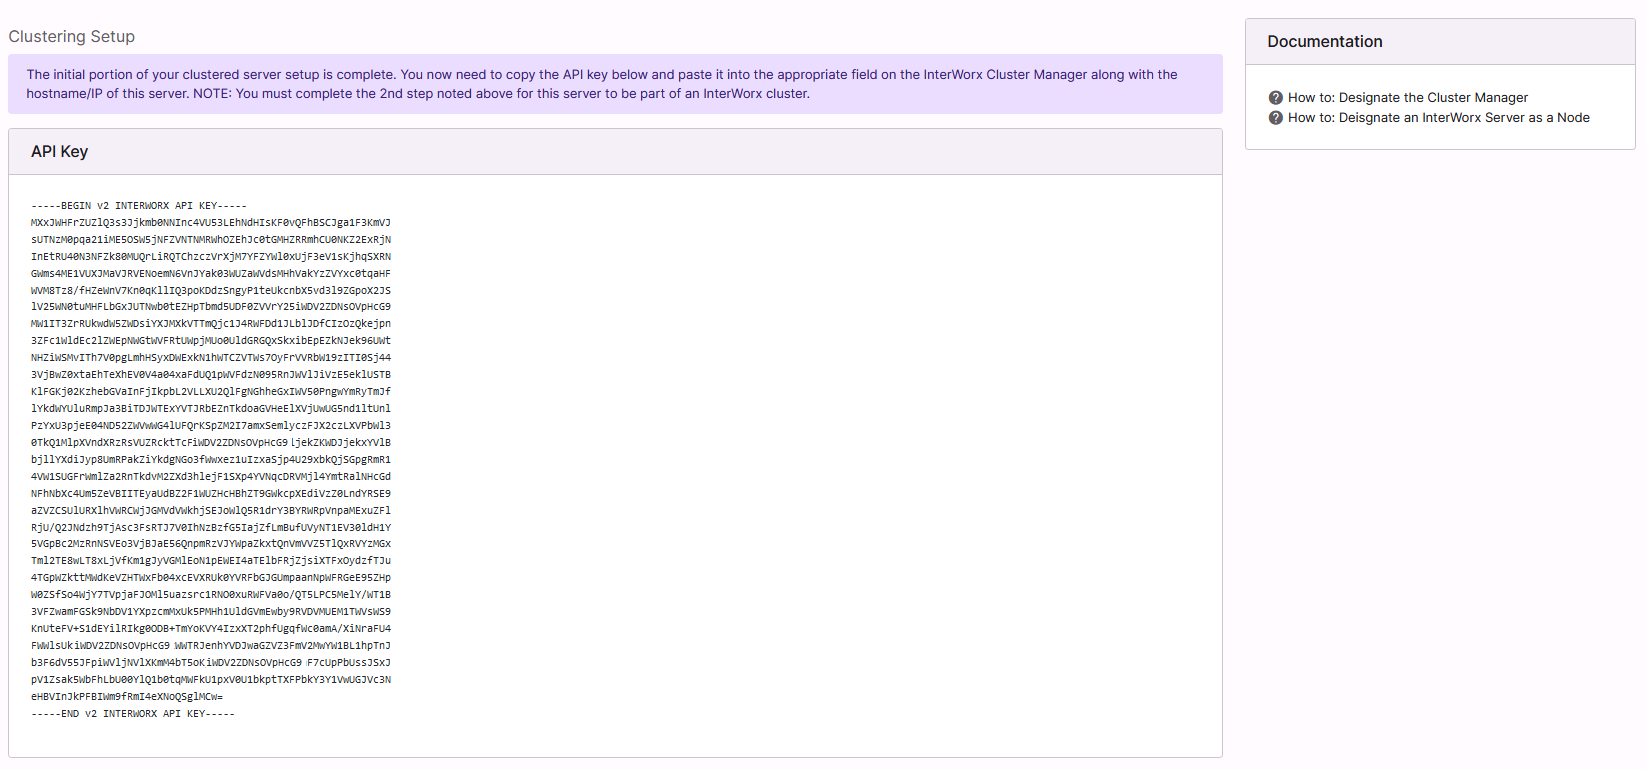
Copy the provided API key text blob to the local clipboard. It will be needed to add the node to the Cluster Manager
To Add a Clustered Node to the Cluster Manager
Note
Adding a Node may take from several seconds to many minutes, depending on the network speed and Manager/Node server speeds
Log into NodeWorx from the browser on the server that will act as the Cluster Manager (https://ip.ad.dr.ess:2443/nodeworx)
In NodeWorx, navigate to Clustering > Nodes
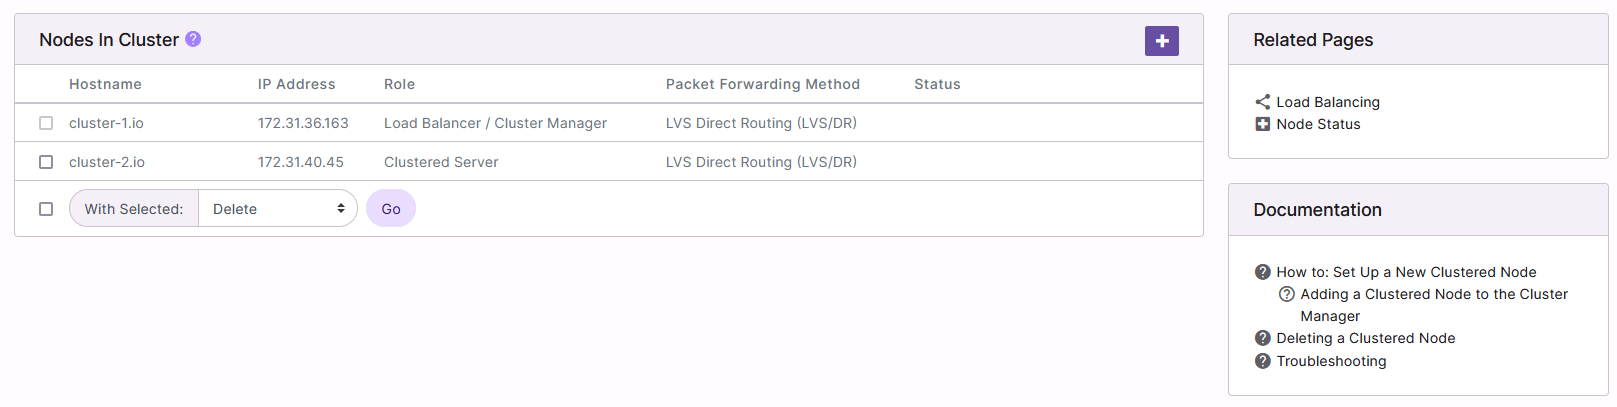
Click +. This opens the Add Node form
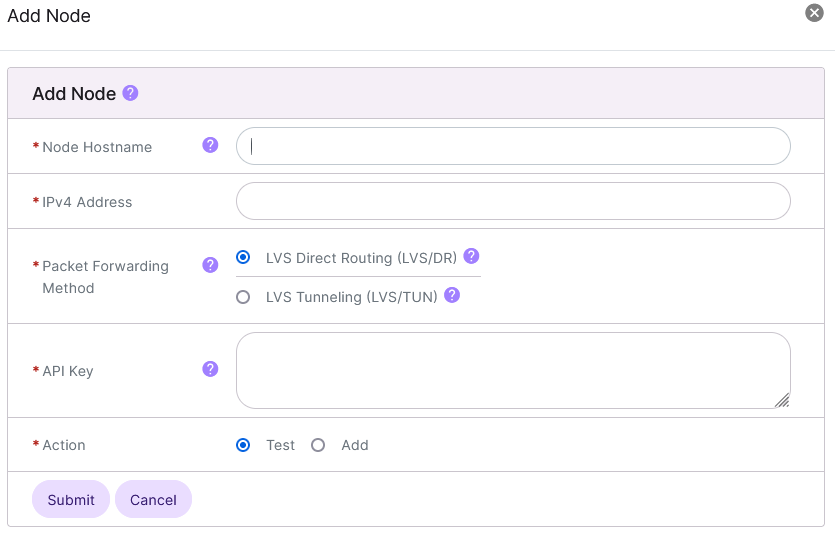
Update the required fields:
Node Hostname: The hostname or IP address server that will be used as the Node
IPv4 Address: The IP address of the server that will be used as the Node. This will generally be autofilled after adding the hostname
Packet Forwarding Method: The packet forwarding method is the method of load balancing that the system will use to load balance requests to the Node
LVS Direct Routing (LVS/DR): LVS/DR stands for “Direct Routing” aka “gatewaying”, which requires that the Node be on the same network as the Load Balancer (which is the Cluster Manager, unless External Load Balancing is enabled)
LVS Tunneling (LVS/TUN: LVS/TUN stands for “Tunneling” aka “ipip”, where the load balanced requests are sent to the Node via an IPv4 tunnel. LVS-TUN does not require that the Load Balancer/Cluster Manager and the Node be on the same network segment
API Key: The API key that was provided after following the steps To Designate an InterWorx Server as a Node
Action: Choosing Test will run a test of adding the node, first, to check for potential issues. Choosing Add will add the node
Click Submit
Troubleshooting
The following are some of the most common errors that occur when adding a node:
Node already exists: There is a Node already known to the Cluster Manager that has the same hostname or IP address. Verify that the same Node has not been added twice to the Cluster Manager
Invalid node hostname: The hostname provided does not appear to be valid, nor does it resolve to an IP address. Verify that the hostname is correct, and that it is resolvable to an IP, and can be pinged from the Cluster Manager
Could not resolve hostname: The hostname given is not resolvable to an IP address, or cannot be pinged from the Cluster Manager. Verify that the hostname is resolvable to an IP, and can be pinged from the Cluster Manager before proceeding
Node not on same physical network segment: The new Node is not on the same physical network segment as the Cluster Manager. This error is inferred from the IP configuration on the Cluster Manager (IP address, netmask, etc.). Verify that the IP configuration is correct, and that both the Cluster Manager and the Node are on the same segment
Node is already clustered: The Node is already set up for clustering, either with this Cluster Manager or another. The Node must be un-clustered before proceeding to re-cluster it on the current Manager
Node already has SiteWorx accounts present: The Node has SiteWorx accounts present on the box. All SiteWorx accounts must be removed from the Node before it can be added to the cluster
NFS export failed : /chroot/home => {ip.ad.re.ss}: Clustering requires that
/homebe a symlink to/chroot/home, on both the Cluster Manager, and the Nodes. If/homeis the mount point for an individual file system, this error may occur./homewill need to be unmounted, and reassigned as a symlink to/chroot/home.The following steps may be helpful for performing that task:
Note
Outside of the first and final steps, which are stopping and starting InterWorx, the following are general steps for unmounting and mounting a file system, copying files, and creating a symlink. Any guide you may find online for these tasks may also be used, as long as InterWorx is stopped, beforehand.
Log in to the server at the CLI as root, either via SSH or from the terminal
At the CLI, stop the InterWorx service:
service iworx stop
Navigate to the
/directorycd /
Create the
/chroot/homedirectorymkdir -p /chroot/home
Check that the directory was successfully created
ls -la /chroot/home
Copy the contents of
/hometo/chroot/homersync -av /home/ /chroot/home/
Check that the contents of
/chroot/homematch the contents of/homels -la /chroot/home ls -la /home
Unmount
/homeumount /home
Note
When unmounting
/home, it is possible that there may be an error stating that the filesystem is busy:umount: /mnt/dir: device is busy
To resolve this error, run the following–this performs a “lazy” unmount of the filesystem. The mount is removed from the filesystem namespace, but stays mounted, so programs accessing the filesystem may continue to do so. The file system with automatically unmount when the last process accessing it exits.
umount -l /home
Remove the
/homemountpointrm -rf /home
Create the symlink
ln -s /chroot/home /home
Check that the symlink was created
ls -la /home
It should look similar to the following:
[root@server /]# ls -la /home
lrwxrwxrwx 1 root root 12 May 11 15:17 /home -> /chroot/home
[root@server /]#
Using a text editor, open
/etc/fstabfor editing. The following uses the vim text editor:vim /etc/fstab
Change the entry for
/hometo/chroot/home. Example:Before:
UUID=e75e52e6-efa5-42e0-af1b-65b0d8d1 /                       xfs     defaults        0 0
UUID=1a5c48bd-6c67-4a05-9255-da2a4d97 /boot                   xfs     defaults        0 0
UUID=0CED-D146  /boot/efi               vfat    defaults,uid=0,gid=0,umask=077,shortname=winnt        0 2
UUID=3fe4dae2-7f24-4bf4-8f7b-c4035255  /home  xfs  loop,defaults  0  2
After:
UUID=e75e52e6-efa5-42e0-af1b-65b0d8d1 /                       xfs     defaults        0 0
UUID=1a5c48bd-6c67-4a05-9255-da2a4d97 /boot                   xfs     defaults        0 0
UUID=0CED-D146  /boot/efi               vfat    defaults,uid=0,gid=0,umask=077,shortname=winnt        0 2
UUID=3fe4dae2-7f24-4bf4-8f7b-c4035255  /chroot  xfs  loop,defaults  0  2
Save the changes and exit the text editor
Mount the
/chrootdirectorymount /chroot
Restart InterWorx
service iworx stop
Make sure that all iworx services restarted, correctly
service iworx status
It should look similar to the following:
[root@server /]# service iworx status
iworx-web is running...                                    [  OK  ]
iworxphp82-php-fpm is running...                           [  OK  ]
iworx-db is running...                                     [  OK  ]
[root@server /]#