How To: Manage SSL Certificates For System Services
The InterWorx Control Panel provides a simple to use interface for managing SSL Certificates for system services. These services include the InterWorx internal web server, FTP, SMTP, and Dovecot.
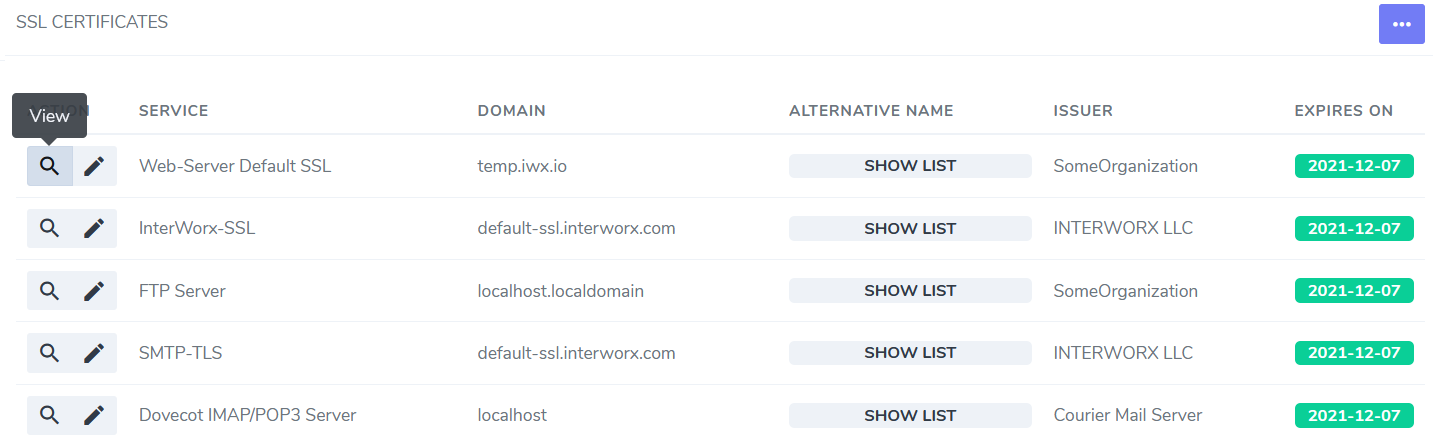
From the SSL Certificates page in NodeWorx, it is possible to view and edit a service’s SSL Certificate, generate a self signed SSL Certificate, add an SSL certificate purchased from a Certificate Authority, Generate Let’s Encrypt certificates for system services, apply a SiteWorx account’s SSL certificate to system services, and update all services in a single step.
To View a Service’s SSL Certificate
Log into NodeWorx from the browser (https://ip.ad.dr.ess:2443/nodeworx)
From NodeWorx, navigate to Server > SSL Certificates

Click the Magnifying Glass next to the service. This opens the specific SSL certificate
To Edit a Service’s SSL Certificate
Log into NodeWorx from the browser (https://ip.ad.dr.ess:2443/nodeworx)
From NodeWorx, navigate to Server > SSL Certificates
Click the Pencil next to the service. This opens the Edit an SSL Certificate form

Update the required fields:
Private Key: The private key
SSL Certificate: The SSL certificate
Chain Certificate: (Optional) The chain certificate
SSL Cipher Suite: (Optional) The OpenSSL cipher specifications to configure the Cipher Suite the client is permitted to negotiate in the SSL handshake phase. This will most likely not need to be edited
Restart Services: Most services require that they be restarted before the SSL Certificates will be applied. The service restarts are usually very fast, and there should not be any significant service interruption
Click Save
Updating the SSL Certificate for System Services
InterWorx allows the ability to update all system service SSL certificates at one time. The service SSL certificates may be updated with any of the following:
Generating a self-signed certificate
Copy and pasting an SSL certificate purchased from a Certificate Authority
Using the SSL certificate of a SiteWorx account
Generating a Let’s Encrypt certificate for the hostname domain
To Generate a Self-Signed SSL Certificate
Log into NodeWorx from the browser (https://ip.ad.dr.ess:2443/nodeworx)
From NodeWorx, navigate to Server > SSL Certificates
Click the three vertical dots. This opens an options form

Select Generate a Self-Signed SSL Certificate. This opens the Generate Self-Signed SSL Certificate form
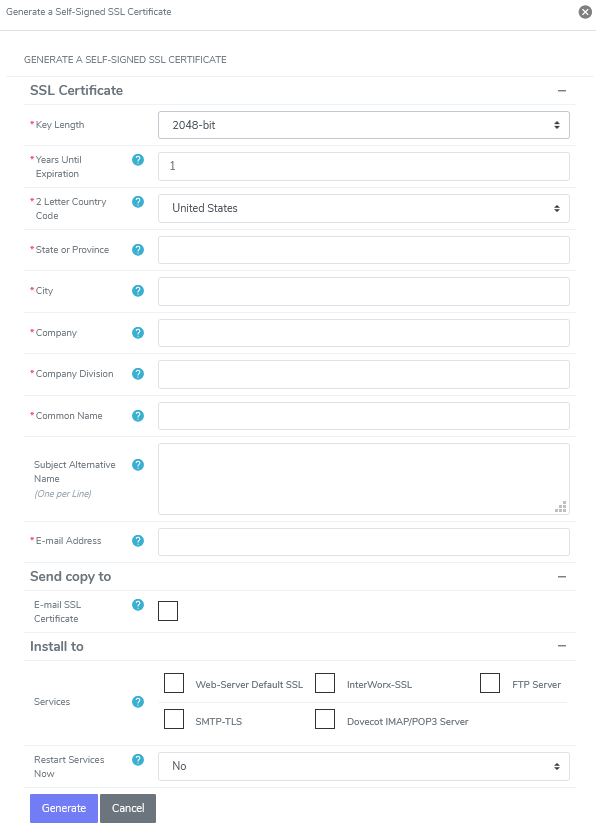
Update the required fields. These include:
Key Length: 2048 is the standard
Years Until Expiration: Determines when the SSL certificate will expire
Common Name: The domain name the certificate will use. Note that www.domain.com is not the same as domain.com. A wildcard domain (which begins with an asterisk) is a valid option and applies to all subdomains
For example, a Common Name of *.domain.com would create a CSR that is valid for domain.com, sub1.domain.com, sub2.domain.com, etc
Subject Alternative Name: (Optional) List of alternative domain names to associate with the certificate
Email Address: Email address that is associated with the certificate
Select the Email SSL Certificate checkbox to receive a confirmation email
Select the checkboxes next to the services the SSL Certificate will be installed for automatically upon generation
Select Yes or No from the Restart Services Now dropdown
Most services require that they be restarted before the SSL Certificates will be applied. The service restarts are usually very fast, and there should not be any significant service interruption
Click Generate
To Use an SSL Certificate Purchased From a Certificate Authority
Log into NodeWorx from the browser (https://ip.ad.dr.ess:2443/nodeworx)
From NodeWorx, navigate to Server > SSL Certificates
Click the three vertical dots. This opens an options form
Select Update All Services. This opens the Update Service Certificates form
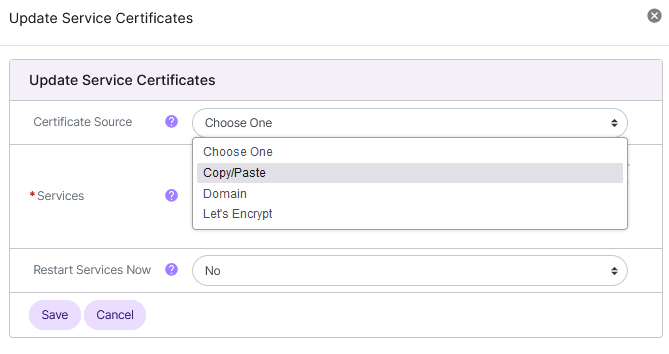
Select Copy/Paste from the Certificate Source dropdown. This expands the form
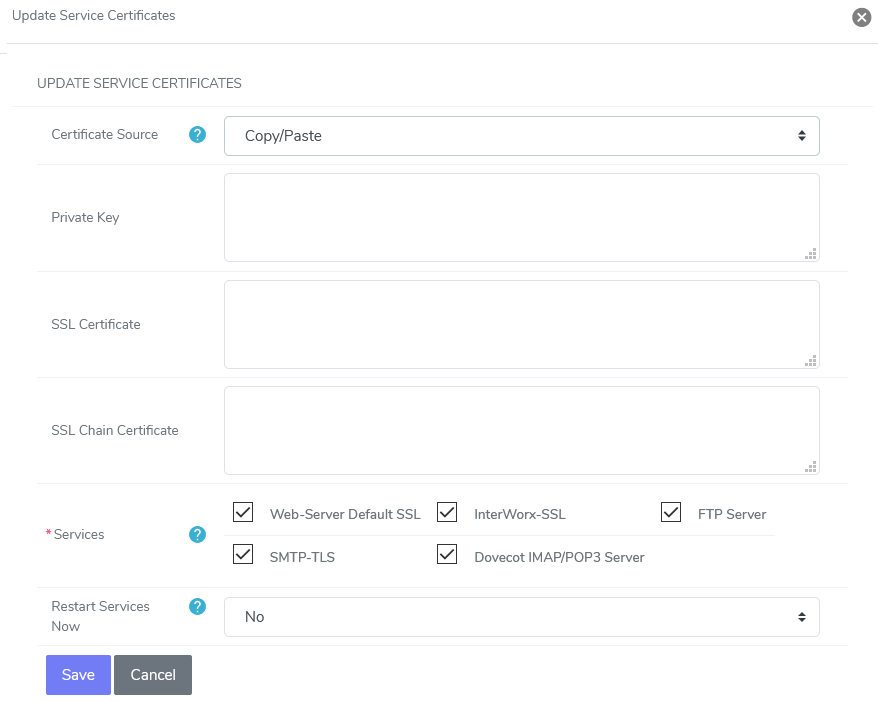
Update the Required Fields:
Private Key: The private key proved by the Certificate Authority (CA)
SSL Certificate: The SSL certificate provided by the CA
Chain Certificate: (Optional) The chain certificate, if one was provided by the CA
Select the checkboxes next to the services the SSL Certificate will be installed for automatically upon generation
Select Yes or No from the Restart Services Now dropdown
Most services require that they be restarted before the SSL Certificates will be applied. The service restarts are usually very fast, and there should not be any significant service interruption
Click Save
To Use the SSL Certificate of a SiteWorx Account
Note
To avoid domain mismatch security errors in browsers, it is recommended, if using this option, to create SiteWorx account for the hostname domain. The domain is also required to resolve to the server. More information on creating a SiteWorx account can be found here.
Log into NodeWorx from the browser (https://ip.ad.dr.ess:2443/nodeworx)
From NodeWorx, navigate to Server > SSL Certificates
Click the three vertical dots. This opens an options form
Select Update All Services. This opens the Update Service Certificates form
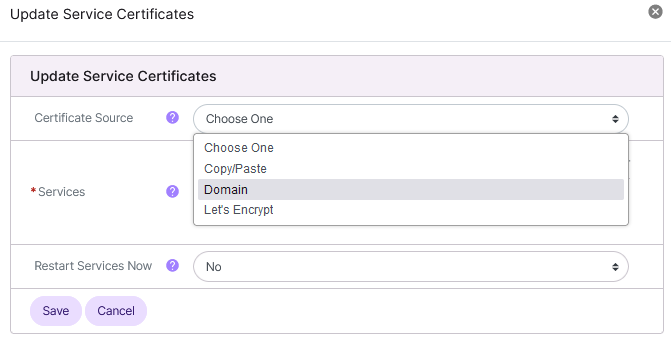
Select Domain from the Certificate Source dropdown. This expands the form

Select the domain from the Certificate From dropdown
Select the checkboxes next to the services the SSL Certificate will be installed for automatically upon generation
Select Yes or No from the Restart Services Now dropdown
Most services require that they be restarted before the SSL Certificates will be applied. The service restarts are usually very fast, and there should not be any significant service interruption
Click Save
To Generate System Service SSL Certificates using Let’s Encrypt
Note
Using Let’s Encrypt for system service SSL certificates requires that the hostname domain both resolves to the server, and is not attached to a SiteWorx account.
Log into NodeWorx from the browser (https://ip.ad.dr.ess:2443/nodeworx)
From NodeWorx, navigate to Server > SSL Certificates
Click the three vertical dots. This opens an options form
Select Update All Services. This opens the Update Service Certificates form
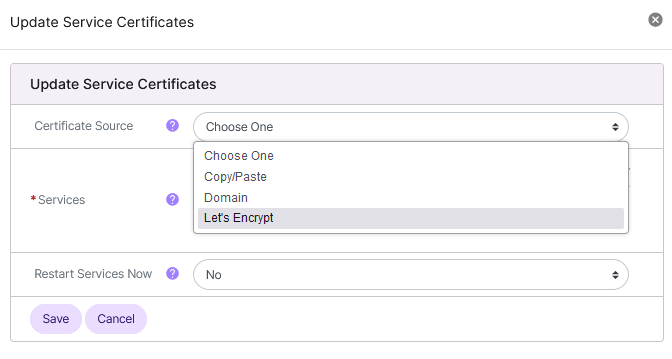
Select Let’s Encrypt from the Certificate Source dropdown. This expands the form
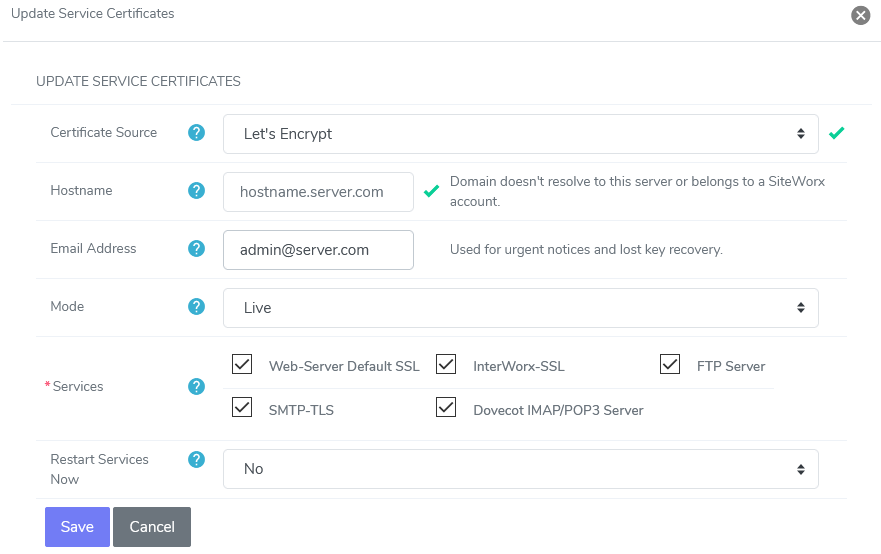
Update the required fields:
Hostname: The hostname domain of the server
Email Address: Email address associated with the certificate
Mode: Let’s Encrypt rate limits attempts of generating a Let’s Encrypt certificate. If generating a Let’s Encrypt certificate for a domain fails too many times, attempts are locked out for a period of time. Because of this limitation, there are two options for SSL certificate generation. More information on Let’s Encrypt rate limiting can be found here
Live: Will attempt to generate a live certificate. Failed attempts counts against rate limit
Staging: Recommended before attempting a Live services. Will attempt to generate a test certificate. Failed attempts do not count against rate limit
Select the checkboxes next to the services the SSL Certificate will be installed for automatically upon generation
Select Yes or No from the Restart Services Now dropdown
Most services require that they be restarted before the SSL Certificates will be applied. The service restarts are usually very fast, and there should not be any significant service interruption
Click Save