How To: Create and Manage SiteWorx Accounts
The InterWorx Control Panel is divided into two main tools: NodeWorx and SiteWorx. NodeWorx is the server administrator and reseller interface, and SiteWorx is the website administrator interface.
When the server administrator or reseller wants to create a website, they create a SiteWorx Account. Each SiteWorx account is mapped to an IP and a unique unix user on the server. A SiteWorx account can be permitted to have multiple domains.
From the NodeWorx interface, the server administrator or reseller can also log directly into a SiteWorx account and bypass authentication.
SiteWorx accounts are accessed via https://domain.com:2443/siteworx. If DNS for the domain does not yet
resolve to the server, the server’s IP address or hostname can be used in place of the domain to access the
interface.
Note
Accessing the server over port 2443 automatically uses the SSL certificate for the internal InterWorx
webserver. Because of this, using https://domain.com:2443/siteworx to access SiteWorx may result in a
security warning in the browser, even if the domain has its own SSL certificate. Using the server IP or
hostname in place of the domain will work around that warning.
To Add a SiteWorx Account
Log into NodeWorx from the browser (https://ip.ad.dr.ess:2443/nodeworx)
In NodeWorx, navigate to SiteWorx > Accounts

Click + or Add SiteWorx Account. This opens the SiteWorx Account Management form

Update the required fields. These include:
Master Domain: The SiteWorx account master domain
Note
The domain name should be entered without the ‘www’ prefix. The ‘www’ prefix will be properly dealt with by the underlying system.
IP Address: The IP Address used by the domain
Database Server: The database server associated with the SiteWorx account
Unix User Name: The unix user that will own the SiteWorx account’s content. By default, this is automatically generated based on domain name. It can be manually selected, as well
Nickname: (Optional) The name that will appear in the list of SiteWorx accounts
E-mail Address: The e-mail address of the SiteWorx account owner. This is the SiteWorx login and point of contact for the account
Password: The password for the SiteWorx account owner
Requires Password Change: If selected, the SiteWorx account owner will be prompted to change their password upon first login
Language: The default language of the SiteWorx account
Billing Day: The day of each month that the billing cycle starts. This is also the day the bandwidth counter resets each month for the SiteWorx account
Additional IP Addresses: Additional IP addresses that may be assigned to domains under the SiteWorx account
PHP Version: The PHP version that domains under the SiteWorx account will use by default
Available PHP Versions: Selected PHP versions will be available for domains under the SiteWorx account
Package Features: If SiteWorx Packages have been created, they can be selected from the Package Template dropdown. This will auto-fill the Package Features and Package options for the account
If a package has not been created, the options will have to be manually set. However, checking the Create New Package box will create a new package from the manually selected options
For details about each SiteWorx Package Feature, see SiteWorx Package Overview
Access to Softaculous: Whether the account is able to use Softaculous as a package installer
If No is selected, the SiteWorx account will not have access to Softaculous
Click Save
To Log Into a SiteWorx Account from NodeWorx
Log into NodeWorx from the browser (https://ip.ad.dr.ess:2443/nodeworx)
In NodeWorx, navigate to SiteWorx > Accounts
Click the Door next to the SiteWorx Account. This opens the SiteWorx account in a new window
To Edit a SiteWorx Account
Log into NodeWorx from the browser (https://ip.ad.dr.ess:2443/nodeworx)
In NodeWorx, navigate to SiteWorx > Accounts
Click the Pencil next to the SiteWorx account. This opens the SiteWorx Accounts Management form

Modify the desired values
Click Save
To Suspend a SiteWorx Account
Note
InterWorx 8.2.0 added new options for suspending SiteWorx accounts, including disabling the user’s shell, killing active and scheduled processes, and disabling MySQL users.
What Happens When a SiteWorx Account is Suspended
Default Behavior
SiteWorx account access:
Because the SiteWorx account is marked “Inactive”, SiteWorx users are blocked from logging into the account
Domain access:
The DocumentRoot in all associated vhosts is changed to
/usr/local/interworx/var/errors/disabledWhen accessing all associated domains, the index file located under
/usr/local/interworx/var/errors/disabledis served, instead of the domain’s index pageInformation on customizing the index file for disabled domains can be found here
Email and FTP:
If
allow_email_and_ftp_while_suspendedis disabled in~iworx/iworx.ini, when the SiteWorx account is suspended,_offis appended to the password hash of all email and FTP accounts for each domain in the accountThis blocks access to users’ FTP and email accounts
allow_email_and_ftp_while_suspendedis disabled by default in~iworx/iworx.ini
Email messages will continue to be sent to email addresses associated with the suspended SiteWorx account. Users will just be unable to log into those email inboxes while the SiteWorx account is suspended
If Mailman is installed, all mailing lists for the account are suspended
Optional Settings
Disable Shell: Disables the shell account for the master SiteWorx user. If multiple SSH is enabled, shell access for all secondary SiteWorx users is also disabled
Disable MySQL Users: If the MySQL server is capable of account locking, all MySQL username/hostname combinations are locked
Account locking is possible on servers running MySQL 8, MariaDB 10.4 with minor versions greater than 7, and all MariaDB versions greater than 10.5.8
Disable Scheduled Processes: Disables
atandcronfor the user, and removes existing scheduled jobs for those servicesCron:
The user is added to
/etc/cron.denyto ensure they cannot modify the current crontabThe user’s crontab is removed, so that no additional jobs will run
The crontab is backed up, and is restored when the account is unsuspended
At:
The user is added to
/etc/at.denyto ensure they cannot modify or create any additionalatjobsThe user’s
atjobs are removed, so no additional jobs will runThe
atjobs are backed up and, if the time they should have run has not already passed, are restored when the account is unsuspended
Kill Active Processes: Runs
killall -9 -u {unix_user}to end all currently running processes for the user, including all SSH and FTP connections, systemd-timers, mail scripts, etcNote: This option should be used with caution
From the Accounts List
Log into NodeWorx from the browser (https://ip.ad.dr.ess:2443/nodeworx)
In NodeWorx, navigate to SiteWorx > Accounts
Click the three vertical dots next to the SiteWorx account. This opens an options form

Select Suspend. This opens the Confirm Suspension form

(Optional) Select or update the desired options:
Message: This message is displayed to users when they attempt to login to SiteWorx. It is also visible in NodeWorx
Disable Shell: Disables the shell account for the master SiteWorx user. If multiple SSH is enabled, shell access for all secondary SiteWorx users is also disabled
Disable MySQL Users: Locks all MySQL users in the account
Disable Scheduled Processes: Disables
atandcronfor the user, and removes existing scheduled jobs for those servicesKill Active Processes: Runs
killall -9 -u {unix_user}to end all currently running processes for the user
Click Suspend
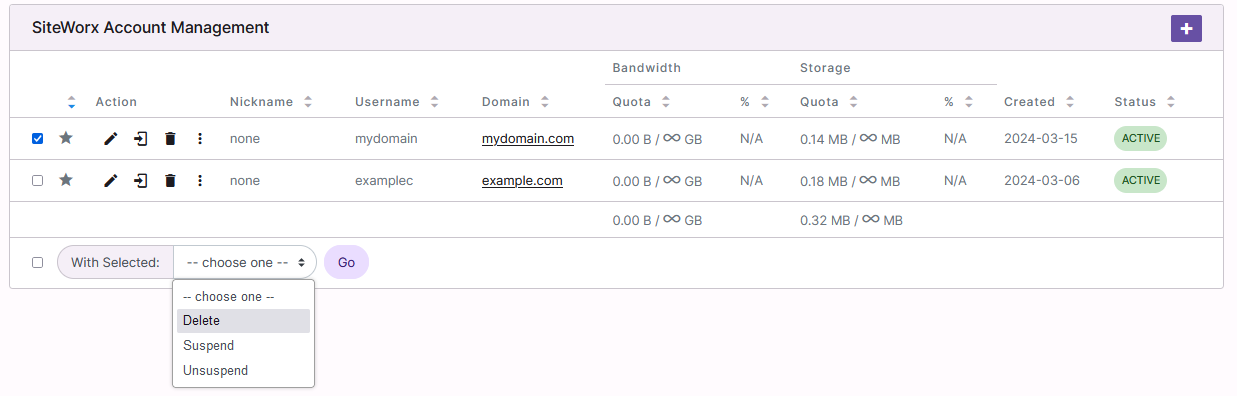
From the With Selected Dropdown
Log into NodeWorx from the browser (https://ip.ad.dr.ess:2443/nodeworx)
In NodeWorx, navigate to SiteWorx > Accounts
Select the checkbox next to the SiteWorx account(s)
Selecting the checkbox next to the With Selected dropdown will automatically select all accounts
Select Suspend from the With Selected dropdown at the bottom of the page
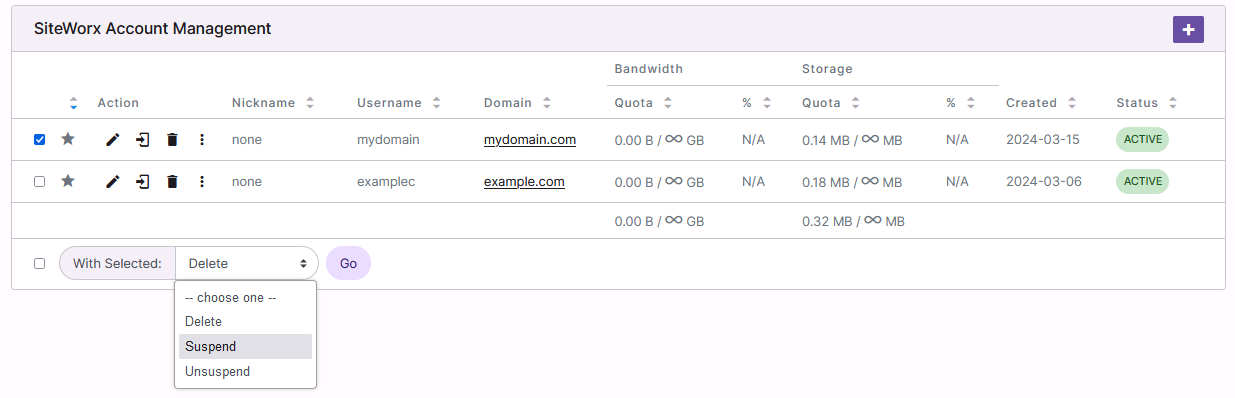
Click Go. This opens the Confirm Suspension form
(Optional) Select or update the desired options:
Message: This message is displayed to users when they attempt to login to SiteWorx. It is also visible in NodeWorx
Disable Shell: Disables the shell account for the master SiteWorx user. If multiple SSH is enabled, shell access for all secondary SiteWorx users is also disabled
Disable MySQL Users: Locks all MySQL users in the account
Disable Scheduled Processes: Disables
atandcronfor the user, and removes existing scheduled jobs for those servicesKill Active Processes: Runs
killall -9 -u {unix_user}to end all currently running processes for the user
Click Suspend
To Unsuspend a SiteWorx Account
Note
Access to the account will be granted after the next fively cron runs. As such, it may take up to five minutes for the account to be accessible.
If access is desired sooner, this step can be manually completed by running the cron at the CLI:
~iworx/cron/iworx.pex --fively
From the Accounts List
Log into NodeWorx from the browser (https://ip.ad.dr.ess:2443/nodeworx)
In NodeWorx, navigate to SiteWorx > Accounts

Click the three vertical dots next to the SiteWorx account. This opens an options form
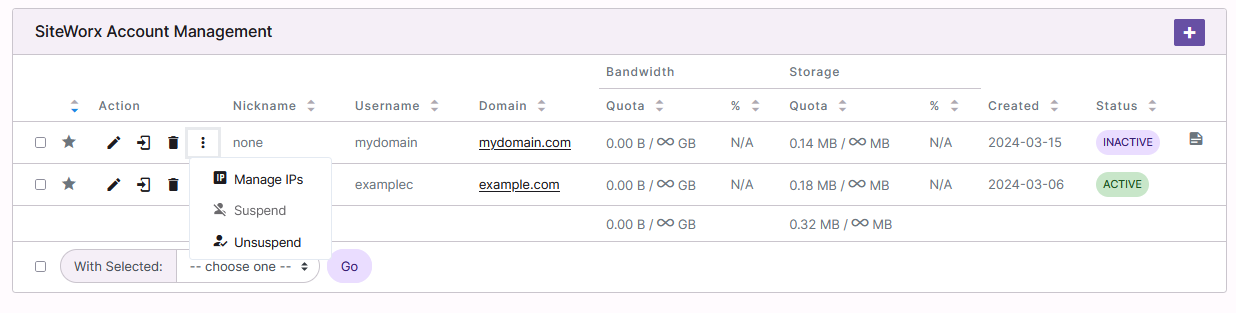
Select Unsuspend. This opens the Confirmation form
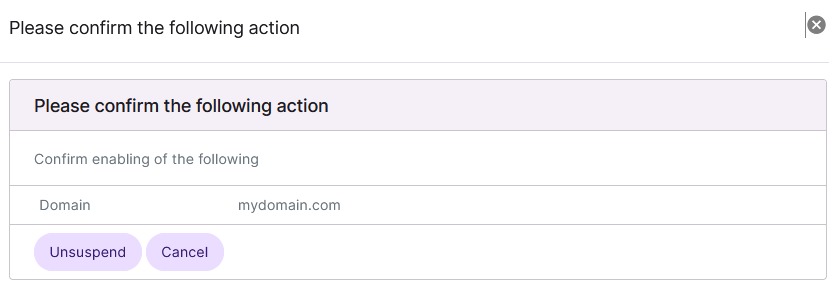
Click Unsuspend
From the With Selected Dropdown
Log into NodeWorx from the browser (https://ip.ad.dr.ess:2443/nodeworx)
In NodeWorx, navigate to SiteWorx > Accounts
Select the checkbox next to the SiteWorx account(s)
Selecting the checkbox next to the With Selected dropdown will automatically select all accounts
Select Unsuspend from the With Selected dropdown at the bottom of the page
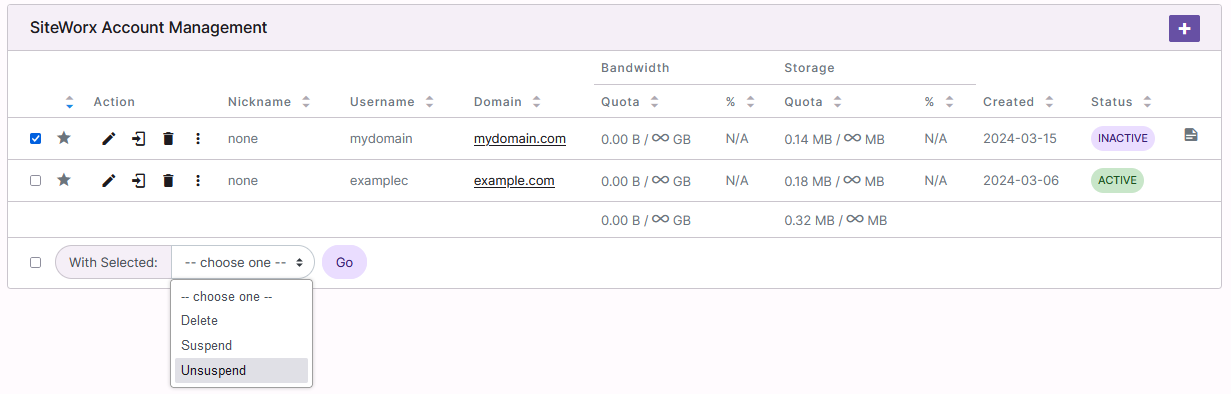
Click Go. This opens the Confirm Suspension form
Click Unsuspend
To Delete a SiteWorx Account
Warning
Note: Deleting a SiteWorx account will delete all of the files and data associated with that account.
From the Accounts List
Log into NodeWorx from the browser (https://ip.ad.dr.ess:2443/nodeworx)
In NodeWorx, navigate to SiteWorx > Accounts
Select the Trashcan next to the account. This opens the Confirm Deletion form

Select the Confirm Action checkbox
Click Delete
From the With Selected Dropdown
Log into NodeWorx from the browser (https://ip.ad.dr.ess:2443/nodeworx)
In NodeWorx, navigate to SiteWorx > Accounts
Select the checkbox next to the account(s)
Selecting the checkbox next to the With Selected dropdown will automatically select all accounts
Select Delete from the With Selected dropdown
Click Go. This opens the Confirm Deletion form
Select the Confirm Action checkbox
Click Delete