How To: Manage IP Addresses in NodeWorx
InterWorx Control Panel provides a simple-to-use interface for managing the IP address(es) on a server. From the System IPs page, IP addresses may be added or removed from the server, made available to resellers, and given the ability to be assigned to multiple SiteWorx accounts.
Contents
To Add an IP Address
Log into NodeWorx from the browser (https://ip.ad.dr.ess:2443/nodeworx)
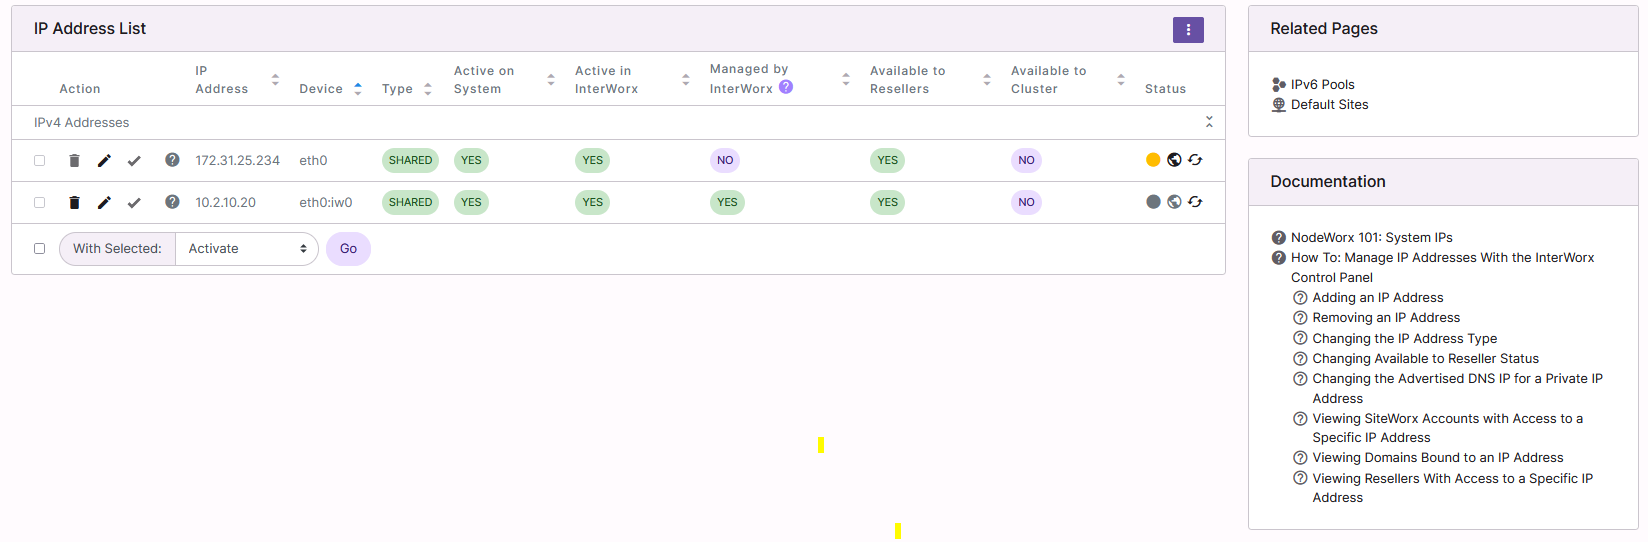
From NodeWorx, navigate to Server > IP Management > System IPs
Click the three vertical dots. This opens an options form
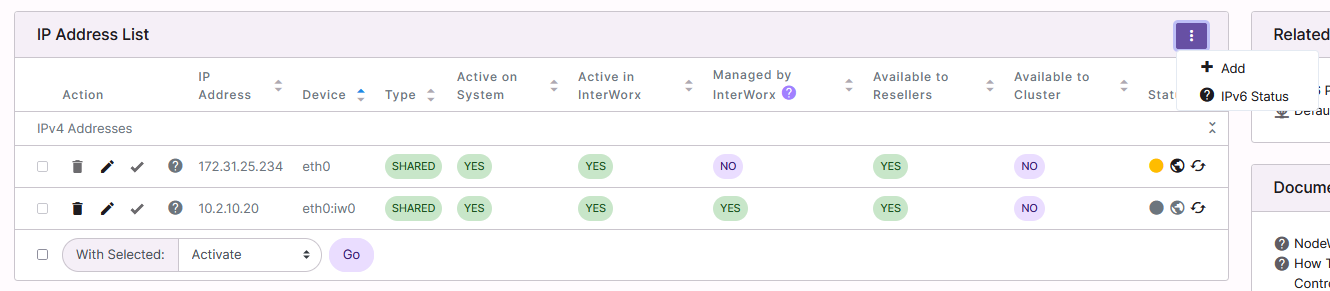
Select Add. This opens the Add IP Addresses form

Update the required fields:
IP Range Start: The beginning of the IP range
IP Range Stop: The end of the IP range
IP Range Start and IP Range Stop fields may have the same value
Netmask: The netmask of the IP
Device: The network device the IP should be assigned to
Type: There are two options
Dedicated: May only be assigned to a single SiteWorx Accounts
Shared: May be assigned to more than one SiteWorx Accounts
Available to resellers: Determines whether Resellers may assign the IP to their SiteWorx accounts
Click Add
To Remove an InterWorx-Managed IP Address From NodeWorx
Note
The IP address must first be removed from all SiteWorx Accounts. If any SiteWorx accounts are assigned to the IP address, the delete option will be greyed out.
Note
The following instructions can only be used to remove IP addresses that were added using InterWorx and are marked as Yes in the Managed by InterWorx column. To remove IP addresses that are not managed by InterWorx, see To Remove a Network-Managed IP Address From NodeWorx.
From the List of IPs
Log into NodeWorx from the browser (https://ip.ad.dr.ess:2443/nodeworx)
From NodeWorx, navigate to Server > IP Management > System IPs
Click the Trashcan next to the IP address. This opens the confirmation form
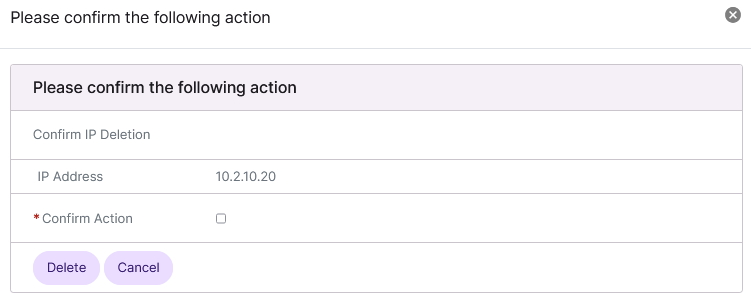
Select the Confirm Action checkbox
Click Delete to confirm
From the With Selected Dropdown
Note
The ability to remove IPs via the With Selected dropdown was added in 8.1.10.
Log into NodeWorx from the browser (https://ip.ad.dr.ess:2443/nodeworx)
From NodeWorx, navigate to Server > IP Management > System IPs
Select the checkbox next to the IP(s)
Selecting the checkbox next to the With Selected dropdown will automatically select all IPs that are managed by InterWorx and do not have associated SiteWorx accounts
Select Delete from the With Selected dropdown
Click Go. This opens the Confirm Deletion form
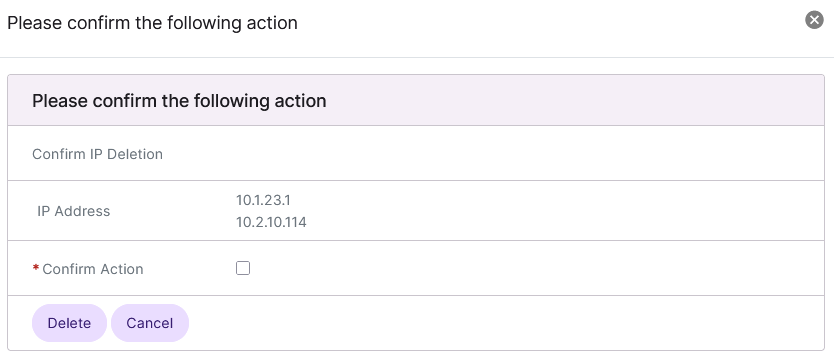
Select the Confirm Action checkbox
Click Delete
To Remove a Network-Managed IP Address From NodeWorx
Note
If the IP address is marked as Locked on the IP Management page, the Locked dropdown for that IP must first be set to No before the IP address can be removed from NodeWorx.
IP addresses that were added via the OS-level Network Manager must be removed via the Network Manager. Once that task is complete:
Log in to the server at the CLI as root, either via SSH or from the terminal
At the CLI, run
~iworx/cron/ip.pex --sync
To Change the IP Address Type
Log into NodeWorx from the browser (https://ip.ad.dr.ess:2443/nodeworx)
From NodeWorx, navigate to Server > IP Management > System IPs
Click the Pencil next to the IP Address. This opens the Edit IP Address form

Select the desired type from the Type dropdown:
Dedicated: May only be assigned to a single SiteWorx Accounts
Shared: May be assigned to more than one SiteWorx Accounts
Click Save
To Change Available to Resellers Status
Note
It is only possible to edit whether an IP address is available to resellers if it is not already assigned to a reseller.
Log into NodeWorx from the browser (https://ip.ad.dr.ess:2443/nodeworx)
From NodeWorx, navigate to Server > IP Management > System IPs
Click the Pencil next to the IP Address. This opens the Edit IP Address form

Select either Yes or No from the Available to Resellers dropdown
Click Save
To Change the Advertised DNS IP for a Private IP Address
When using InterWorx behind a NAT device on a local LAN, it is still necessary to associate that local IP with a public IP for the purposes of DNS.
Log into NodeWorx from the browser (https://ip.ad.dr.ess:2443/nodeworx)
From NodeWorx, navigate to Server > IP Management > System IPs
Click the Pencil next to the IP Address. This opens the Edit IP Address form
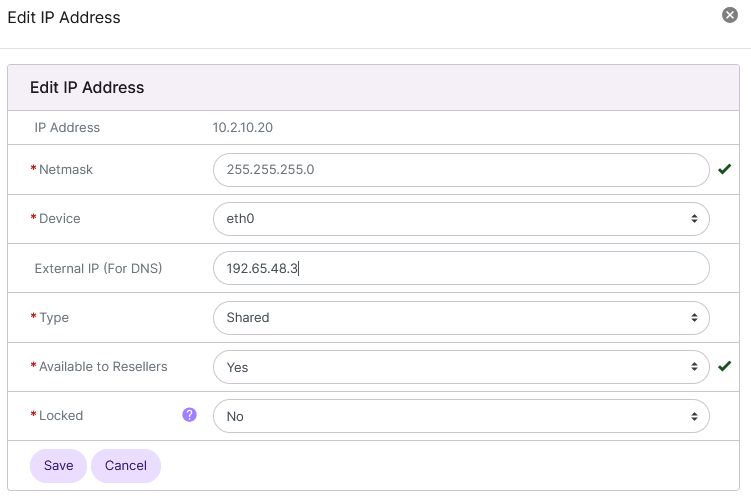
Update the External IP (for DNS) field with the public IP Address
Click Save
To View SiteWorx Accounts with Access to a Specific IP Address
Log into NodeWorx from the browser (https://ip.ad.dr.ess:2443/nodeworx)
From NodeWorx, navigate to Server > IP Management > System IPs
Click the Dot next to the IP Address. This opens a popup listing all of the SiteWorx accounts with access to the IP Address. SiteWorx accounts are listed by the SiteWorx user email address


To View Domains Bound to an IP Address
Log into NodeWorx from the browser (https://ip.ad.dr.ess:2443/nodeworx)
From NodeWorx, navigate to Server > IP Management > System IPs
Click the Globe next to the IP Address. This opens a popup listing all of the domains assigned to that IP Address


To View Resellers With Access to a Specific IP Address
Log into NodeWorx from the browser (https://ip.ad.dr.ess:2443/nodeworx)
From NodeWorx, navigate to Server > IP Management > System IPs
Click the Arrow Circle next to the IP Address. This opens a popup listing all of the resellers with access to that IP Address

