How To: Manage MTA Settings
The Mail Transfer Agent (MTA) is transfers email messages from one server to another using SMTP.
From the MTA page in NodeWorx, server administrators may manage the SMTP service, including editing the mail server hostname, bounce message options, inbound and outbound connections, email blacklists, and SMTP routes.
Note
The SMTP settings on this page only refer to port 25.
SMTP settings for port 587 and 465 are managed via the MSA Settings page in NodeWorx.
Contents
To Manage the SMTP Inbound and Outbound Service
SMTP inbound corresponds to the qmail-smtpd program. This service listens to TCP port 25 and receives mail from other MTAs.
SMTP outbound corresponds to the qmail-send program. This service receives mail from the qmail-smtpd program and delivers it to the correct local mailbox. It also receives mail injected from a local mailbox and sends it to the remote delivery program.
Checking SMTP Inbound and Outbound Status
Log into NodeWorx from the browser (https://ip.ad.dr.ess:2443/nodeworx)
In NodeWorx, navigate to System Services > Mail Server > MTA Settings
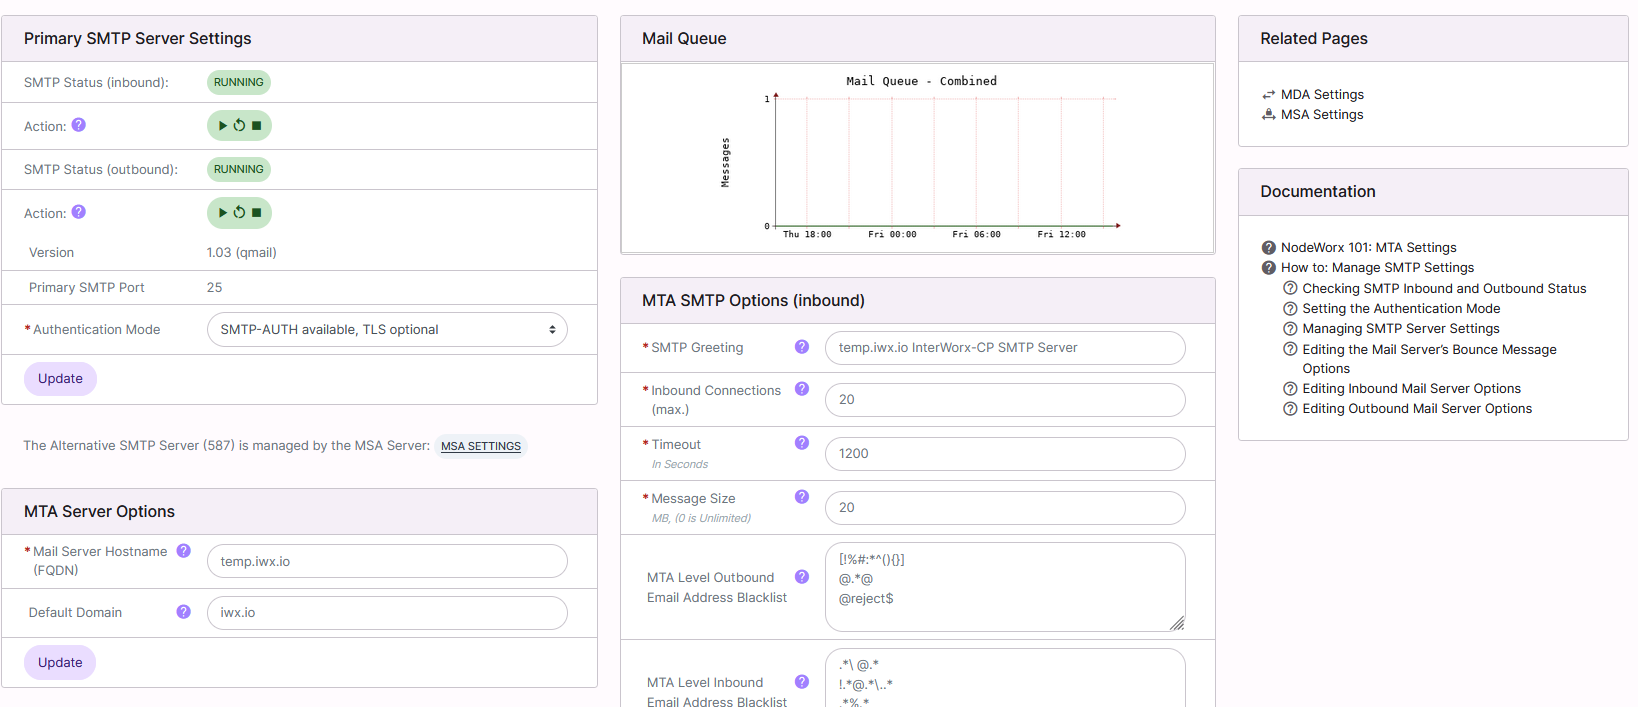
Under Primary SMTP Server Settings, the SMTP Status (inbound) and SMTP Status (outbound) bars indicate the current status of the services

It is also possible to control the status of the service from this interface:
Play starts the services
Arrow restarts/refreshes the services
Stop stops the services
Setting the Authentication Mode
Log into NodeWorx from the browser (https://ip.ad.dr.ess:2443/nodeworx)
In NodeWorx, navigate to System Services > Mail Server > MTA Settings
Under Primary SMTP Server Settings, select the desired authentication mode from the Authentication Mode dropdown

Click Update
To Manage SMTP Server Settings
Log into NodeWorx from the browser (https://ip.ad.dr.ess:2443/nodeworx)
In NodeWorx, navigate to System Services > Mail Server > MTA Settings
Under MTA Server Options, update the desired fields:

- Mail Server Hostname: The mailserver hostname. This must be a Fully Qualified Domain Name (FQDN), as some mail
servers will reject messages from a mail server with a hostname that is unresolvable by DNS
Default Domain: The default domain appending to any email address that does not include a domain portion
Click Update
To Edit the Mail Server’s Bounce Message Options
Log into NodeWorx from the browser (https://ip.ad.dr.ess:2443/nodeworx)
In NodeWorx, navigate to System Services > Mail Server > MTA Settings
Under MTA Bounce Message Options, update the desired fields:

Bounce From: The email address or user that bounces messages are sent from
Bounce Host: The hostname or IP address that a bounce message is sent as.If a message is permanently undeliverable, a single bounce notice is sent to the message’s envelope sender. This notice is sent from bouncefrom@bouncehost
Double Bounce Messages: Setting this option to yes allows Qmail to double bounce email messages. A double-bounce occurs when a bounced message also bounces
Double Bounce To: The email addresses that double-bounce messages are sent to
Double Bounce Host: The hostname or IP address that double bounced messages are sent as. If a single-bounce notice is permanently undeliverable, a double-bounce notice is sent to doublebounceto@doublebouncehost. If that message bounces, no more bounce attempts are made
Click Update
To Edit SMTP Options
Editing Inbound Mail Server Options
Log into NodeWorx from the browser (https://ip.ad.dr.ess:2443/nodeworx)
In NodeWorx, navigate to System Services > Mail Server > MTA Settings
Under MTA SMTP Options (inbound) update the desired fields:

SMTP Greeting: The SMTP greeting shown to mail servers when they connect to the SMTP daemon on this server. This must begin with a FQDN.
Inbound Connections (max):The maximum number of concurrent incoming SMTP connections for the mail server
Timeout: The maximum amount of time, in seconds, that the SMTP mail server will wait for communication for inbound SMTP connections
Message Size: Maximum filesize (in megabytes) allowed for incoming messages. Setting this to 0 will allow an unlimited message size
MTA Level Outbound E-mail Address Blacklist: Email addresses that are blacklisted from sending from the server. Enter one email address, per line. Entire domains may also be blacklisted by entering @domain-to-toblacklist. Existing blacklist entries may be removed by deleting them from this field
MTA Level Inbound E-mail Address Blacklist: Allows the ability to blacklist specific e-mail addresses at a very low level, so they are denied before further processing takes place
Realtime (SBL) Blacklists: The SBLs that are used to determine if incoming or outgoing domains have been globally blacklisted for spam
Click Update
Editing Outbound Mail Server Options
Log into NodeWorx from the browser (https://ip.ad.dr.ess:2443/nodeworx)
In NodeWorx, navigate to System Services > Mail Server > MTA Settings
Under MTA SMTP Options (outbound) update the desired fields:

Outbound Connections (max): The maximum number of concurrent outbound SMTP connections
Response Timeout: The maximum amount of time, in seconds, that the mail server will wait for a response from the sending mail server
Connect Timeout: The maximum amount of time, in seconds, that the server SMTP client will wait for the remote SMTP server to accept a connection
Queue Lifetime: The maximum amount of time, in seconds, that a message will remain in the mail queue for delivery before it is either delivered, or purged. The default is 604800 (one week)
SMTP Routes: Artificial SMTP routes. If the domain matches the host, qmail-remote will connect to the relay, as if the host had the relay as its only MX Record. The syntax for this field is [domain]:[destination server]. If [domain] is blank, blank all mail will be be routed to [destination server]
Click Update