Note
You are viewing the documentation for an older release of Interworx (8.0). To see documentation for the current generally available release of Interworx, click here: 8.2.
How To: Manage Email Aliases
From the Email Groups page in SiteWorx, SiteWorx administrators can add, delete, and edit email aliases (also called forwarders).
Contents
To Add an Email Alias
Log into SiteWorx from the browser (https://ip.ad.dr.ess:2443/siteworx)
In SiteWorx, navigate to Hosting Features > Email > Aliases, either from the side menu or SiteWorx home

Click + or Add an Alias. This opens the Add an Alias form
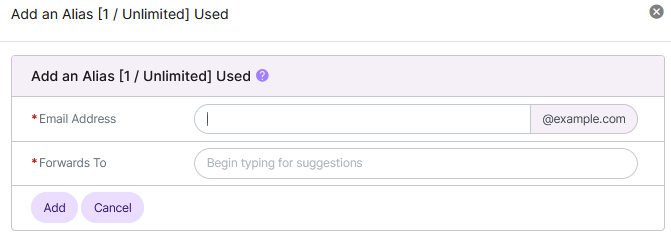
Update the required fields:
Email Address: The email address that, when emailed, will forward the message. The dropdown identifies which domain on the SiteWorx account the email account will be created for, if there is more than one domain
Forwards To: The emil address that will receive the automatically forwarded messages
Click Add
To Edit an Email Alias
Log into SiteWorx from the browser (https://ip.ad.dr.ess:2443/siteworx)
In SiteWorx, navigate to Hosting Features > Email > Aliases, either from the side menu or SiteWorx home
Click the Pencil next to the email Alias. This opens the Email Alias Edit form
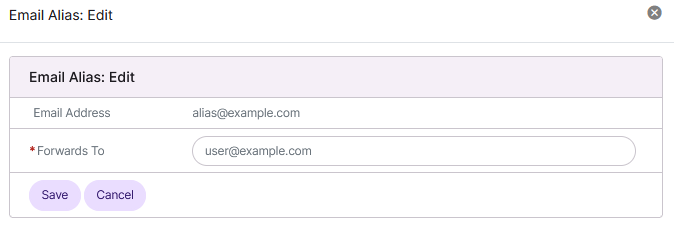
Update the Forwards To field
Click Save
To Delete an Email Alias
From the Accounts Page
Log into SiteWorx from the browser (https://ip.ad.dr.ess:2443/siteworx)
In SiteWorx, navigate to Hosting Features > Email > Aliases, either from the side menu or SiteWorx home
Click the Trashcan next to the email Alias. This opens the Confirmation form
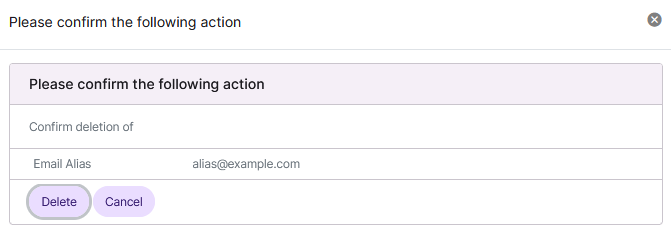
Click Delete
From the With Selected Dropdown
Log into SiteWorx from the browser (https://ip.ad.dr.ess:2443/siteworx)
In SiteWorx, navigate to Hosting Features > Email > Aliases, either from the side menu or SiteWorx home
Select the checkbox next to the alias(es)
Selecting the checkbox next to the With Selected dropdown will automatically select all aliases
Select Delete from the With Selected dropdown
Click Go. This opens the Confirm Deletion form
Click Delete