How To: Manage Local Delivery and Remote MX Records in SiteWorx
From the Remote Setup page in SiteWorx, SiteWorx administrators can enable and disable local delivery, as well as create, edit, and delete custom MX records for the domain.
Contents
To Manage Local Delivery
Disabling local email is most often used when the InterWorx server is not responsible for managing email. This is usually utilized in conjunction with the custom MX records, but can be also be used to simply disable email delivery for a domain.
Note
When local delivery is disabled, it will not be possible to create new email addresses, groups, aliases, etc for the domain. All mail options listed under Hosting Features in the SiteWorx menus, other than Overview, will be removed.
Disabling Local Delivery
Log into SiteWorx from the browser (https://ip.ad.dr.ess:2443/siteworx)
In SiteWorx, navigate to Administration > Mail Options > Remote Setup, either from the side menu or SiteWorx home

Under Local Delivery Status, click the Crossed Out Person next the domain. This opens the Confirmation form

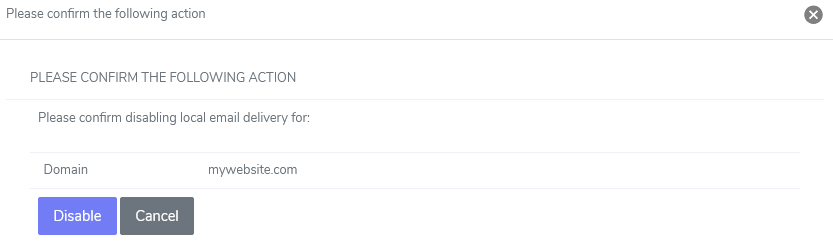
Click Disable
Enabling Local Delivery
Log into SiteWorx from the browser (https://ip.ad.dr.ess:2443/siteworx)
In SiteWorx, navigate to Administration > Mail Options > Remote Setup, either from the side menu or SiteWorx home
Under Local Delivery Status, click the Checkmark Person next the domain. This opens the Confirmation form

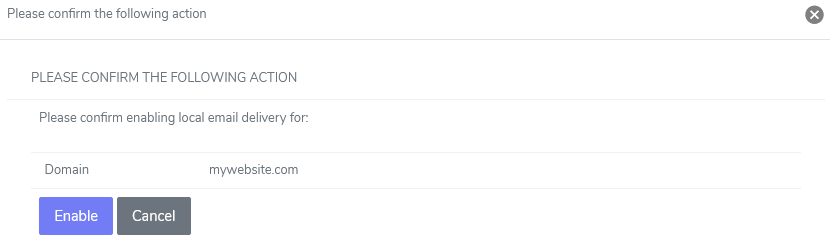
Click Enable
To Manage MX Records
‘MX’ Records are used to tell email servers where to deliver messages. It is possible to set up multiple MX records for a single domain, which will be used to route email based on their corresponding rank.
To use an outside email server, such as GSuite, modifying the MX record for the domain will be required.
Note
If local mail delivery is still enabled, providing custom MX records will not be completely effective. Mail originating from this server will be delivered locally, not to the actual MX record. Disabling local delivery is required to fully implement external MX Records.
To Add an MX Record
Log into SiteWorx from the browser (https://ip.ad.dr.ess:2443/siteworx)
In SiteWorx, navigate to Administration > Mail Options > Remote Setup, either from the side menu or SiteWorx home
Select the domain from the Add MX Record For dropdown
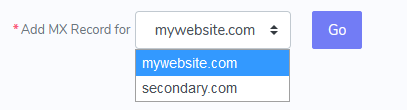
Click Go. This opens the Add DNS MX Record form
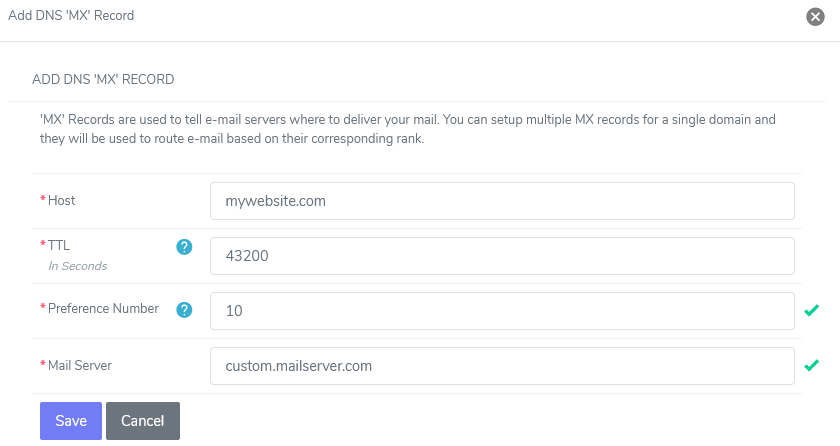
Update the required fields:
Host: The domain
TTL: TTL, or Time To Live, is the number of seconds that a record will be considered valid by a server caching the information
Preference Number: An integer, ranging from 0-65535, indicating the order in which records should be attempted. Lower numbers will be processed before higher ones.
Mail Server: The mail server for the MX record
Click Save
To Edit an MX Record
Log into SiteWorx from the browser (https://ip.ad.dr.ess:2443/siteworx)
In SiteWorx, navigate to Administration > Mail Options > Remote Setup, either from the side menu or SiteWorx home
Under MX Records, click the Pencil next to the domain. This opens the Edit DNS MX Record form
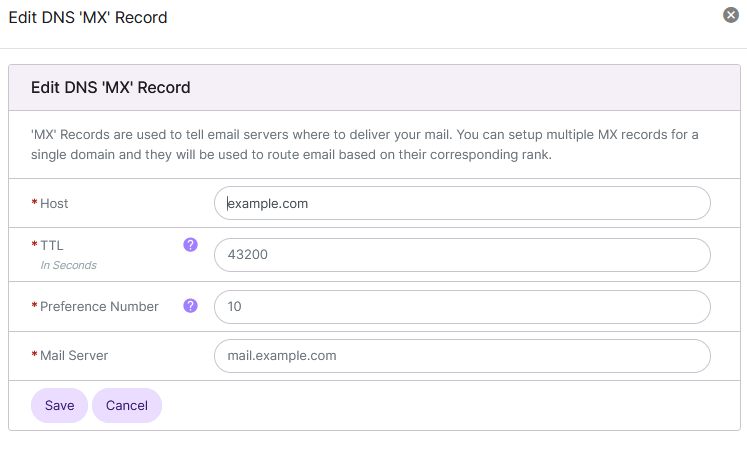
Update the desired fields. The fields are the same as the Add DNS MX Records form
Click Save
To Delete an MX Record
From the MX Records List
Log into SiteWorx from the browser (https://ip.ad.dr.ess:2443/siteworx)
In SiteWorx, navigate to Administration > Mail Options > Remote Setup, either from the side menu or SiteWorx home
Under MX Records, click the Trashcan next to the domain. This opens the Confirmation form
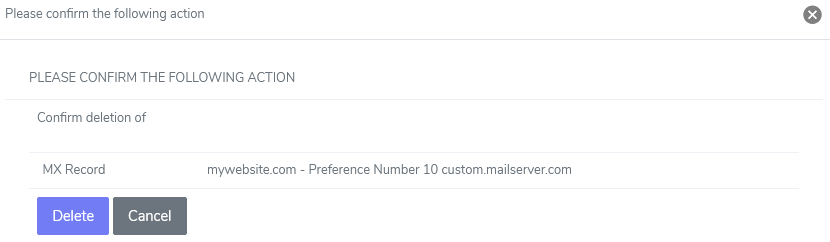
Click Delete
From the With Selected Dropdown
Log into SiteWorx from the browser (https://ip.ad.dr.ess:2443/siteworx)
In SiteWorx, navigate to Administration > Mail Options > Remote Setup, either from the side menu or SiteWorx home
Select the checkbox next to the MX Record(s)
Selecting the checkbox next to the With Selected dropdown will automatically select all records
Select Delete from the With Selected dropdown
Click Go. This opens the Confirmation form
Click Delete