How To: Manage Advanced Settings via .htaccess in SiteWorx
An htaccess file provides the ability for SiteWorx administrators to override some global web server settings for their specific directory in plain text. This file can be used to modify redirects, Apache Handlers, MIME-Types, character sets, and PHP Variables.
To Manage the .htaccess File
Adding a Global .htaccess File
Options set in a Global .htaccess file will affect the entire site, including subdomains. The .htaccess file will be installed into the webroot of the domain.
Log into SiteWorx in the browser (https://ip.ad.dr.ess:2443/siteworx)
In SiteWorx, navigate to Hosting Features > Htaccess, either from the side menu or SiteWorx home
Choose the domain for the .htaccess file for from the Domain dropdown

Click Login. This opens the htaccess page for the domain
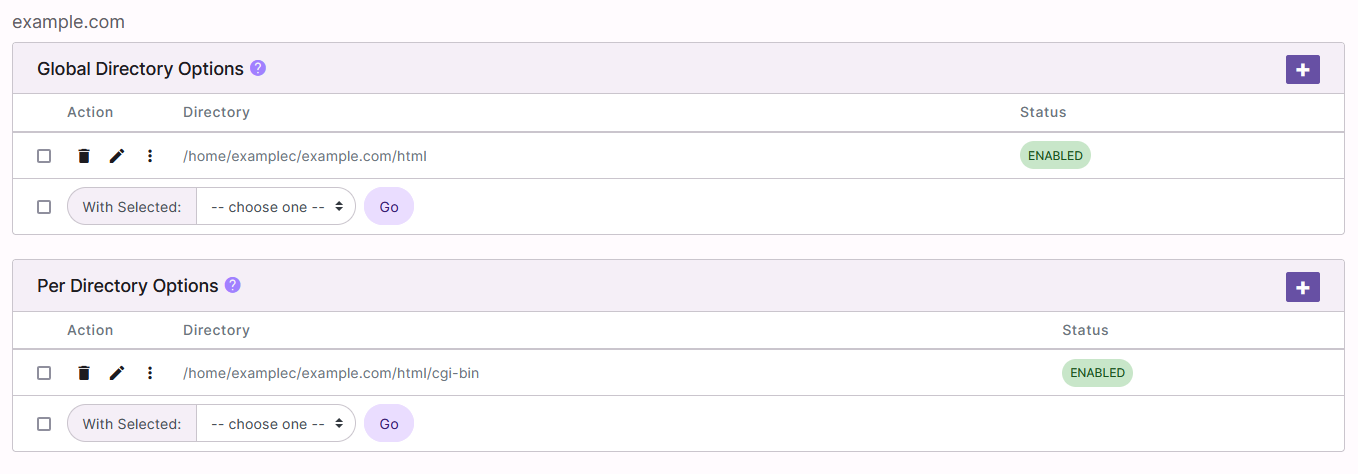
Next to Global Directory Options, click +. This opens the Add .htaccess File form

Click Add
Adding a Directory Specific .htaccess File
Options set in a Directory Specific .htaccess file will only affect files within the corresponding directory, including its subdirectories.
Log into SiteWorx in the browser (https://ip.ad.dr.ess:2443/siteworx)
In SiteWorx, navigate to Hosting Features > Htaccess, either from the side menu or SiteWorx home
Choose the domain for the .htaccess file for from the Domain dropdown
Click Login. This opens the htaccess page for the domain
Next to Per Directory Options, click +. This opens the Add .htaccess File form
Update the required fields:
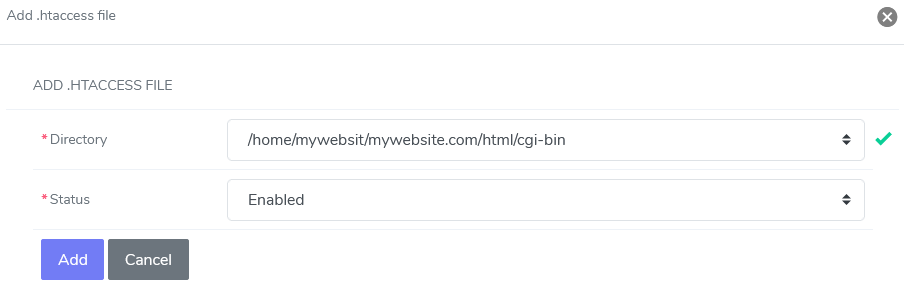
Directory: The full path to the desired directory
Status: If the htaccess file should be enabled or disabled
Click Add
Enabling an .htaccess File
From the htaccess File List
Log into SiteWorx in the browser (https://ip.ad.dr.ess:2443/siteworx)
In SiteWorx, navigate to Hosting Features > Htaccess, either from the side menu or SiteWorx home
Choose the domain for the .htaccess file for from the Domain dropdown
Click Login. This opens the htaccess page for the domain
Click the three vertical dots next to the desired htaccess file. This opens an options list

Click Enable from the options dropdown. This opens the Confirmation form
Click OK
From the Directory Options Management Page
Log into SiteWorx in the browser (https://ip.ad.dr.ess:2443/siteworx)
In SiteWorx, navigate to Hosting Features > Htaccess, either from the side menu or SiteWorx home
Choose the domain for the .htaccess file for from the Domain dropdown
Click Login. This opens the htaccess page for the domain
Click the Pencil next to the desired htaccess file. This opens the Directory Options Management page
Under Action, click the three vertical dots. This opens an options list

Click Enable. This opens the Confirmation form
Click OK
Disabling an .htaccess File
From the htaccess File List
Log into SiteWorx in the browser (https://ip.ad.dr.ess:2443/siteworx)
In SiteWorx, navigate to Hosting Features > Htaccess, either from the side menu or SiteWorx home
Choose the domain for the .htaccess file for from the Domain dropdown
Click Login. This opens the htaccess page for the domain
Click the three vertical dots next to the desired htaccess file. This opens an options list

Click Disable from the options dropdown. This opens the Confirmation form
Click OK
From the Directory Options Management Page
Log into SiteWorx in the browser (https://ip.ad.dr.ess:2443/siteworx)
In SiteWorx, navigate to Hosting Features > Htaccess, either from the side menu or SiteWorx home
Choose the domain for the .htaccess file for from the Domain dropdown
Click Login. This opens the htaccess page for the domain
Click the Pencil next to the desired htaccess file. This opens the Directory Options Management page
Under Action, click the three vertical dots. This opens an options list
Click Disable. This opens the Confirmation form
Click OK
Deleting a Global .htaccess File
From the htaccess File List
Log into SiteWorx in the browser (https://ip.ad.dr.ess:2443/siteworx)
In SiteWorx, navigate to Hosting Features > Htaccess, either from the side menu or SiteWorx home
Choose the domain for the .htaccess file for from the Domain dropdown
Click Login. This opens the htaccess page for the domain
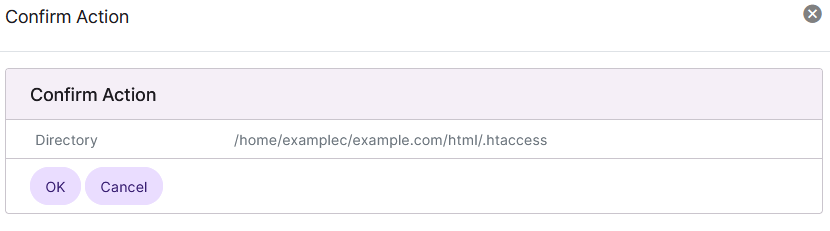
Under Global Directory Options, click the Trashcan next to the desired htaccess file. This opens the Confirmation form
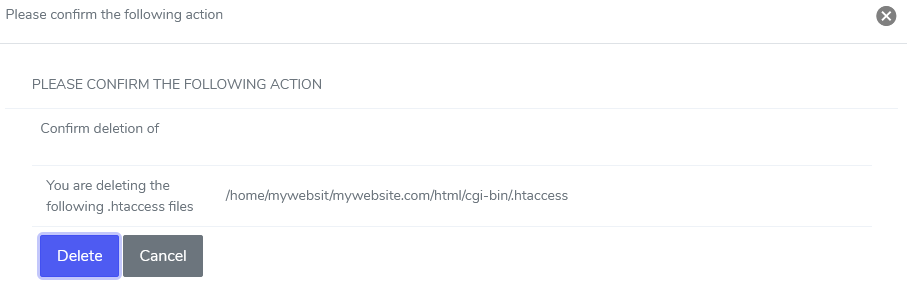
Click Delete
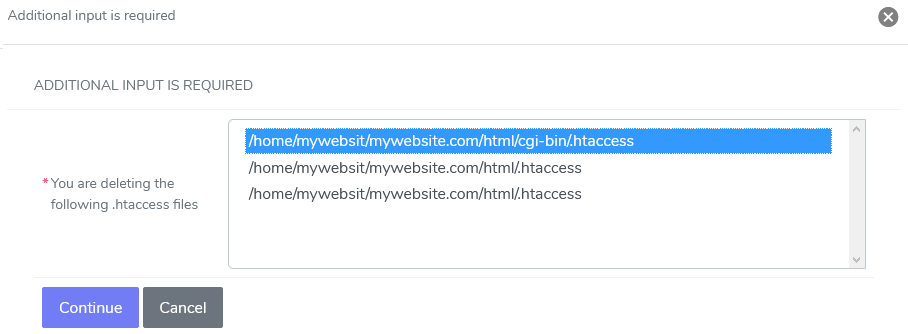
From the With Selected Dropdown
Log into SiteWorx in the browser (https://ip.ad.dr.ess:2443/siteworx)
In SiteWorx, navigate to Hosting Features > Htaccess, either from the side menu or SiteWorx home
Choose the domain for the .htaccess file for from the Domain dropdown
Click Login. This opens the htaccess page for the domain
Select the checkbox next to the htaccess file
Selecting the checkbox next to the With Selected dropdown will automatically select all htaccess files
Select Delete from the With Selected dropdown
Click Go. This opens the Confirm Deletion form
Click Delete
Deleting a Directory Specific .htaccess File
From the htaccess File List
Log into SiteWorx in the browser (https://ip.ad.dr.ess:2443/siteworx)
In SiteWorx, navigate to Hosting Features > Htaccess, either from the side menu or SiteWorx home
Choose the domain for the .htaccess file for from the Domain dropdown
Click Login. This opens the htaccess page for the domain
Under the Per Directory Options heading, click the Trashcan next to the desired htaccess file. This opens the Confirmation form
Click Delete
From the With Selected Dropdown
Log into SiteWorx in the browser (https://ip.ad.dr.ess:2443/siteworx)
In SiteWorx, navigate to Hosting Features > Htaccess, either from the side menu or SiteWorx home
Choose the domain for the .htaccess file for from the Domain dropdown
Click Login. This opens the htaccess page for the domain
Select the checkbox next to the htaccess file
Selecting the checkbox next to the With Selected dropdown will automatically select all htaccess files
Select Delete from the With Selected dropdown
Click Go. This opens the Confirm Deletion form
Click Delete
To Add or Edit .htaccess Access Control
Log into SiteWorx in the browser (https://ip.ad.dr.ess:2443/siteworx)
In SiteWorx, navigate to Hosting Features > Htaccess, either from the side menu or SiteWorx home
Choose the domain for the .htaccess file for from the Domain dropdown
Click Login. This opens the htaccess page for the domain
Click the Pencil next to the desired htaccess file. This opens the Directory Options Management page
Under Action, Click the Globe. This opens the Global Access Control form
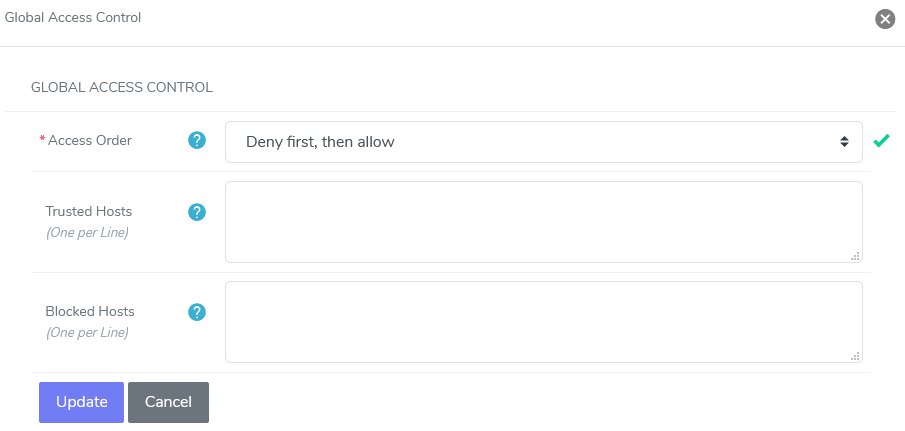
Update the desired fields:
Access Order: Set the order in which the Trusted (Allow) and Blocked
Deny first, then allow - The ‘Blocked Hosts’ list will be evaluated first.
Allow first, then deny - The ‘Trusted Hosts’ list will be evaluated first.
Trusted Hosts: IPs or domain names that will be allowed access to the directory and its subdirectories
Blocked Hosts: IPs or domain names that will be denied access to the directory and its subdirectories
Click Update
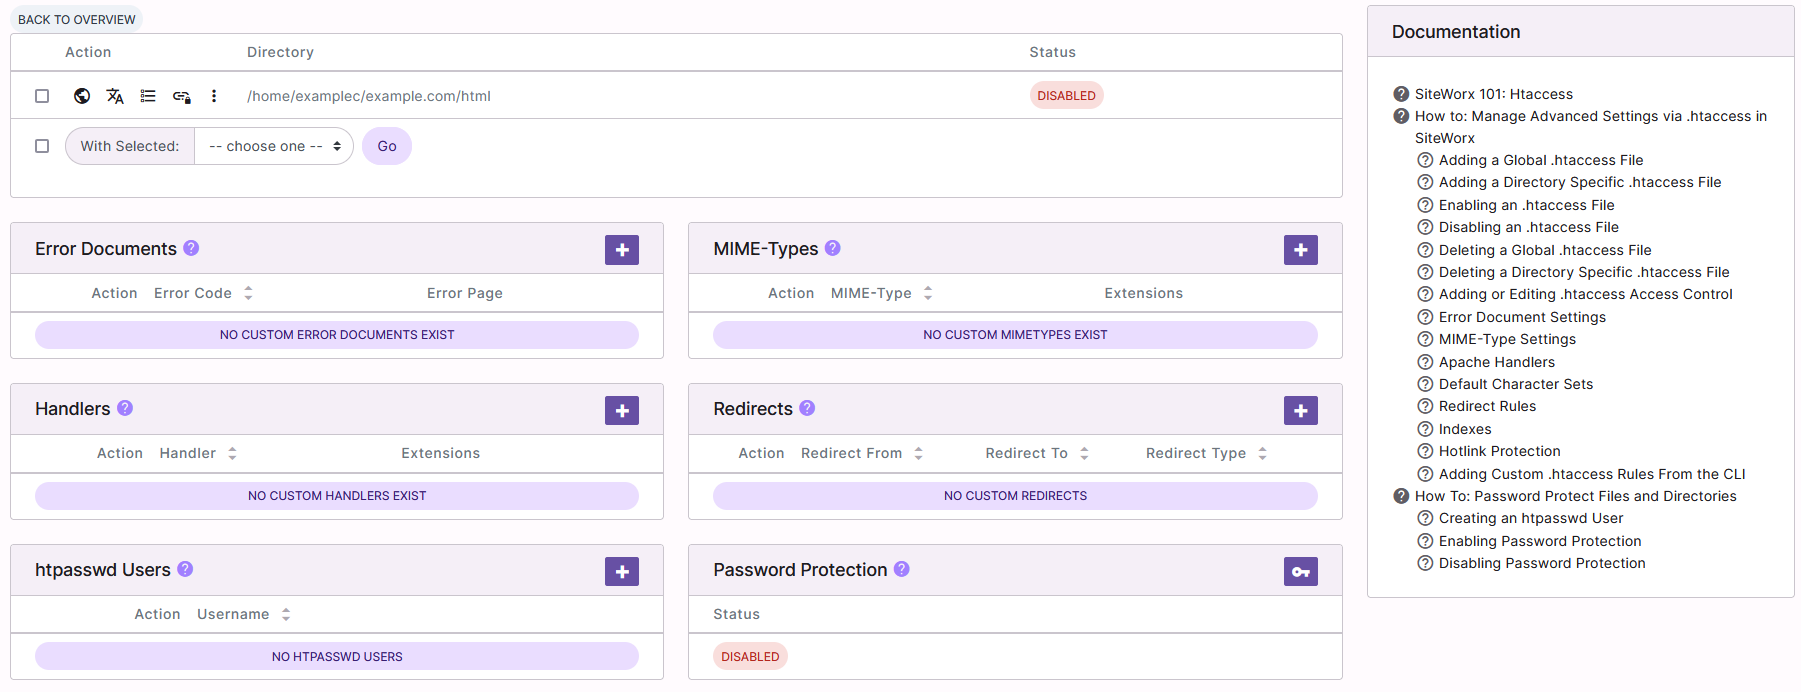
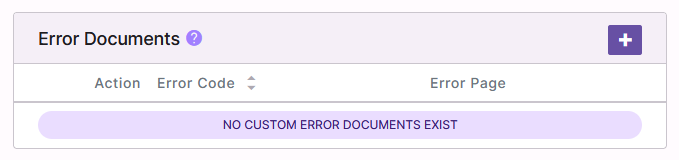
To Manage Error Document Settings
Configure apache to serve up custom error documents. Choose the error code and specify the page (either relative to the current directory, or relative to the webroot).
Adding an Error Document
Log into SiteWorx in the browser (https://ip.ad.dr.ess:2443/siteworx)
In SiteWorx, navigate to Hosting Features > Htaccess, either from the side menu or SiteWorx home
Choose the domain for the .htaccess file for from the Domain dropdown
Click Login. This opens the htaccess page for the domain
Click the Pencil next to the desired htaccess file. This opens the Directory Options Management page
Under Error Documents, click +. This will open the Add ErrorDocument form
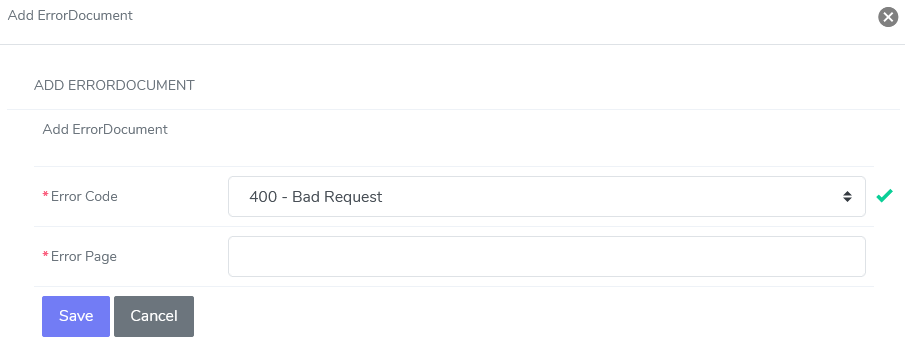
Update the required fields:
Error Code: The error code to direct to a custom page
Error Page: The page to redirect to upon an error code
Click Save
Editing an Error Document
Log into SiteWorx in the browser (https://ip.ad.dr.ess:2443/siteworx)
In SiteWorx, navigate to Hosting Features > Htaccess, either from the side menu or SiteWorx home
Choose the domain for the .htaccess file for from the Domain dropdown
Click Login. This opens the htaccess page for the domain
Click the Pencil next to the desired htaccess file. This opens the Directory Options Management page
Under Error Documents, click Pencil next to the desired Error Document to edit. This will open the Edit ErrorDocument form
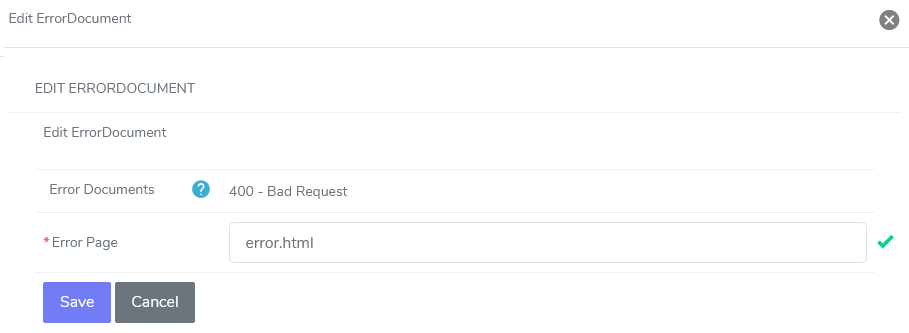
Update the Error Page field
Click Save
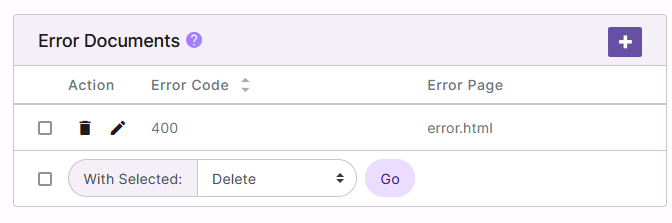
Deleting an Error Document
Log into SiteWorx in the browser (https://ip.ad.dr.ess:2443/siteworx)
In SiteWorx, navigate to Hosting Features > Htaccess, either from the side menu or SiteWorx home
Choose the domain for the .htaccess file for from the Domain dropdown
Click Login. This opens the htaccess page for the domain
Click the Pencil next to the desired htaccess file. This opens the Directory Options Management page
Under Error Documents, click Trashcan next to the desired Error Document to delete. This will open the confirmation form

Click Delete
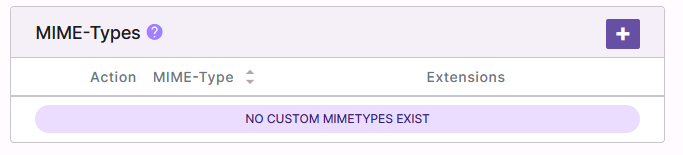
To Manage MIME-Type Settings
Add custom MIME-Types and associated extensions. MIME-Types must be in the form: “<type>/<subtype>”. It is possible to enter more than one extension in the “Extensions” field, separated by either spaces or commas.
Adding a MIME-Type
Log into SiteWorx in the browser (https://ip.ad.dr.ess:2443/siteworx)
In SiteWorx, navigate to Hosting Features > Htaccess, either from the side menu or SiteWorx home
Choose the domain for the .htaccess file for from the Domain dropdown
Click Login. This opens the htaccess page for the domain
Click the Pencil next to the desired htaccess file. This opens the Directory Options Management page
Under Mime-Types, click +. This will open the Add Mimetype form
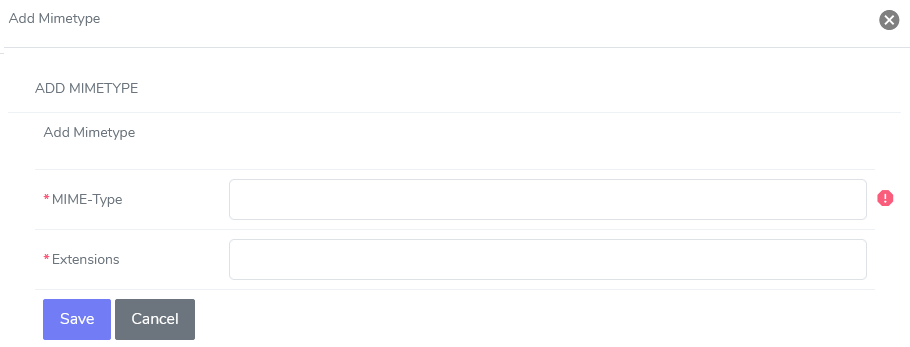
Update the required fields:
MIME-Type: The type of file
Extensions: The extensions of the file type
Click Save
Editing a MIME-Type
Log into SiteWorx in the browser (https://ip.ad.dr.ess:2443/siteworx)
In SiteWorx, navigate to Hosting Features > Htaccess, either from the side menu or SiteWorx home
Choose the domain for the .htaccess file for from the Domain dropdown
Click Login. This opens the htaccess page for the domain
Click the Pencil next to the desired htaccess file. This opens the Directory Options Management page
Under Mime-Types, click Pencil next to the desired Mime-Type definition. This will open the Edit Mimetype form

Update the Extensions field
Click Save
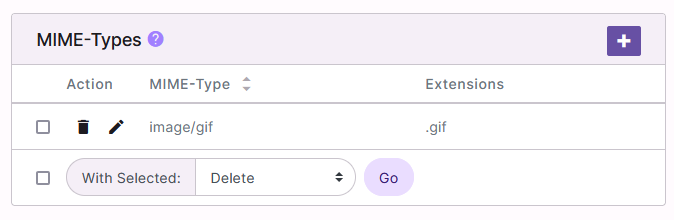
Deleting a MIME-Type
Log into SiteWorx in the browser (https://ip.ad.dr.ess:2443/siteworx)
In SiteWorx, navigate to Hosting Features > Htaccess, either from the side menu or SiteWorx home
Choose the domain for the .htaccess file for from the Domain dropdown
Click Login. This opens the htaccess page for the domain
Click the Pencil next to the desired htaccess file. This opens the Directory Options Management page
Under Mime-Types, click Trashcan next to the desired Mime-Type to delete. This will open the confirmation form
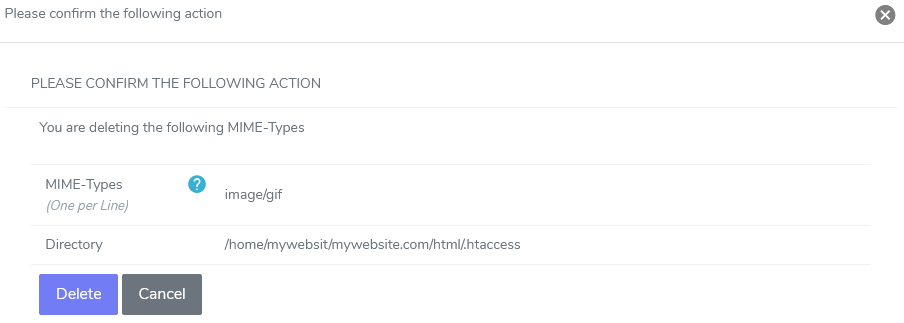
Click Delete
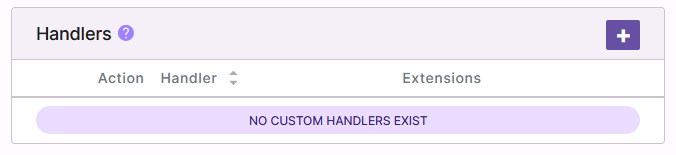
To Manage Apache Handlers
Add custom handlers and associated extensions. Handlers determine how a file with the associated extension is served by Apache. It is possible to enter more than one extension in the “Extensions” field, separated by either spaces or commas.
Adding an Apache Handler
Log into SiteWorx in the browser (https://ip.ad.dr.ess:2443/siteworx)
In SiteWorx, navigate to Hosting Features > Htaccess, either from the side menu or SiteWorx home
Choose the domain for the .htaccess file for from the Domain dropdown
Click Login. This opens the htaccess page for the domain
Click the Pencil next to the desired htaccess file. This opens the Directory Options Management page
Under Handlers, click +. This will open the Add Handler form
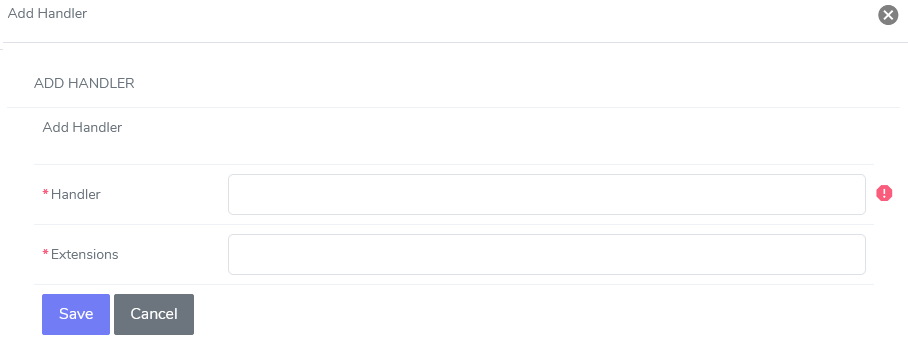
Update the required fields:
Handler: Action to be performed on the file
Extensions: The file extension
Click Save
Editing an Apache Handler
Log into SiteWorx in the browser (https://ip.ad.dr.ess:2443/siteworx)
In SiteWorx, navigate to Hosting Features > Htaccess, either from the side menu or SiteWorx home
Choose the domain for the .htaccess file for from the Domain dropdown
Click Login. This opens the htaccess page for the domain
Click the Pencil next to the desired htaccess file. This opens the Directory Options Management page
Under Handlers, click Pencil next to the desired Handler definition. This will open the Edit Handler form
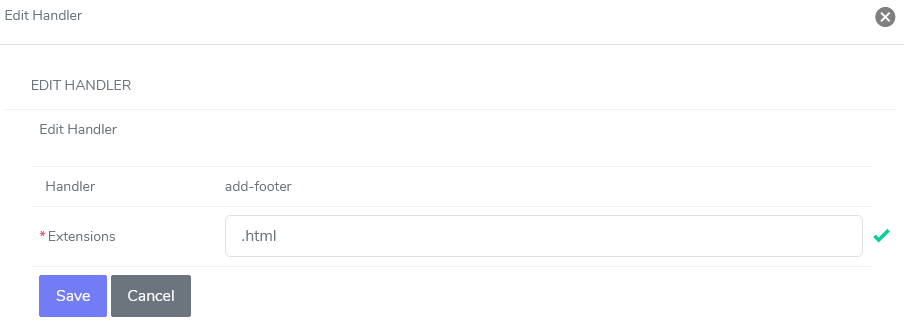
Update the Extensions field
Click Save
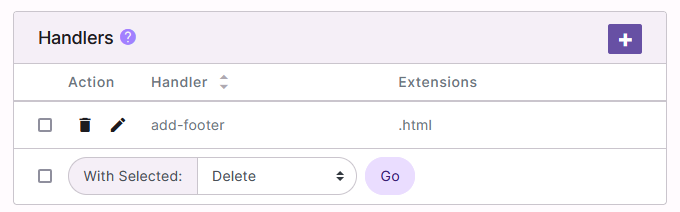
Deleting an Apache Handler
Log into SiteWorx in the browser (https://ip.ad.dr.ess:2443/siteworx)
In SiteWorx, navigate to Hosting Features > Htaccess, either from the side menu or SiteWorx home
Choose the domain for the .htaccess file for from the Domain dropdown
Click Login. This opens the htaccess page for the domain
Click the Pencil next to the desired htaccess file. This opens the Directory Options Management page
Under Handlers, click Trashcan next to the desired Handler to delete. This will open the confirmation form
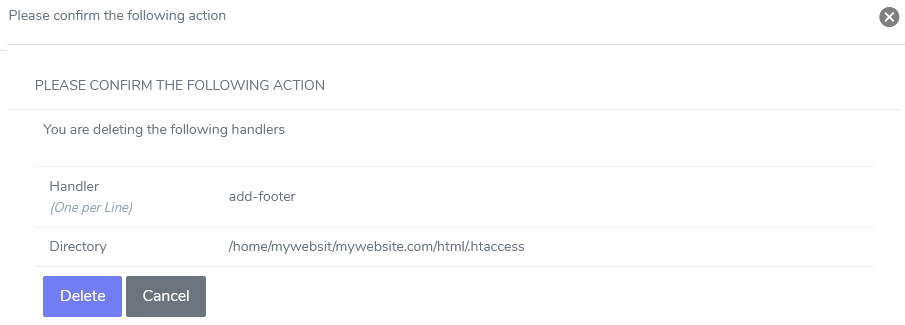
Click Delete
To Manage Default Character Sets
Log into SiteWorx in the browser (https://ip.ad.dr.ess:2443/siteworx)
In SiteWorx, navigate to Hosting Features > Htaccess, either from the side menu or SiteWorx home
Choose the domain for the .htaccess file for from the Domain dropdown
Click Login. This opens the htaccess page for the domain
Click the Pencil next to the desired htaccess file. This opens the Directory Options Management page
Under Action, click the XA. This opens the Default Character set form

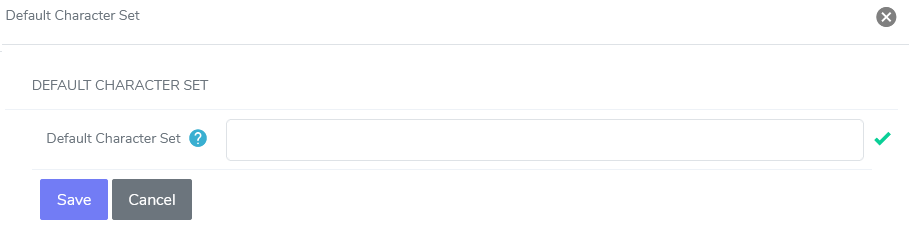
Update the Default Character Set field
Click Save
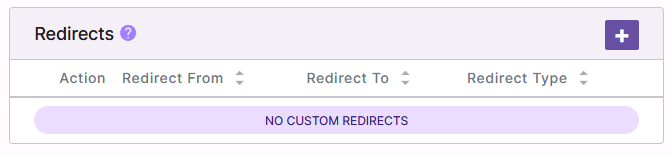
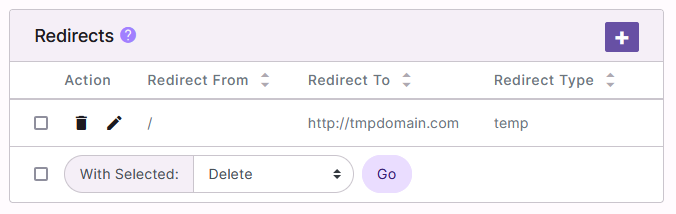
To Manage Redirect Rules
Redirect one URL to a new URL. The “Redirect From” field takes a path relative to the web root, while the “Redirect To” takes an absolute URL to another site.
Adding a Redirect Rule
Log into SiteWorx in the browser (https://ip.ad.dr.ess:2443/siteworx)
In SiteWorx, navigate to Hosting Features > Htaccess, either from the side menu or SiteWorx home
Choose the domain for the .htaccess file for from the Domain dropdown
Click Login. This opens the htaccess page for the domain
Click the Pencil next to the desired htaccess file. This opens the Directory Options Management page
Under Redirects, click +. This opens the Add Redirect form
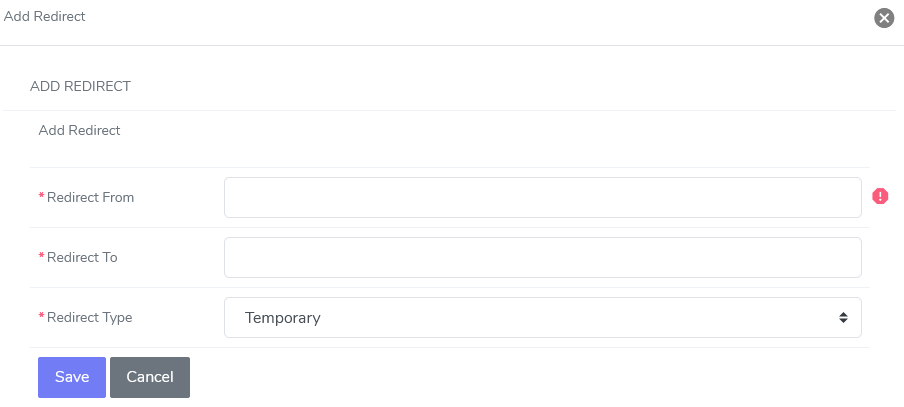
Update the required fields:
Redirect From: the relative directory to redirect. Examples:
/,/old-siteRedirect To: the URL of the site to redirect to. Examples:
https://new-site.com/,http://google.comRedirect Type: The type of redirect that will be set:
Temporary: Returns a temporary redirect status (302). This is the default
Permanent: Returns a permanent redirect status (301) indicating that the resource has moved permanently
See Other: Returns a “See Other” status (303) indicating that the resource has been replaced
Gone: Returns a “Gone” status (410) indicating that the resource has been permanently removed. When this status is used the URL argument should be omitted
Please see the Apache documentation for more detailed information about redirect types
Click Save
Editing a Redirect Rule
Log into SiteWorx in the browser (https://ip.ad.dr.ess:2443/siteworx)
In SiteWorx, navigate to Hosting Features > Htaccess, either from the side menu or SiteWorx home
Choose the domain for the .htaccess file for from the Domain dropdown
Click Login. This opens the htaccess page for the domain
Click the Pencil next to the desired htaccess file. This opens the Directory Options Management page
Under Redirects, click Pencil next to the desired Redirect definition. This will open the Edit Redirect form

Update the Redirect To and Redirect Type fields
Click Save
Deleting a Redirect Rule
Log into SiteWorx in the browser (https://ip.ad.dr.ess:2443/siteworx)
In SiteWorx, navigate to Hosting Features > Htaccess, either from the side menu or SiteWorx home
Choose the domain for the .htaccess file for from the Domain dropdown
Click Login. This opens the htaccess page for the domain
Click the Pencil next to the desired htaccess file. This opens the Directory Options Management page
Under Redirects, click Trashcan next to the desired Redirect to delete. This will open the confirmation form
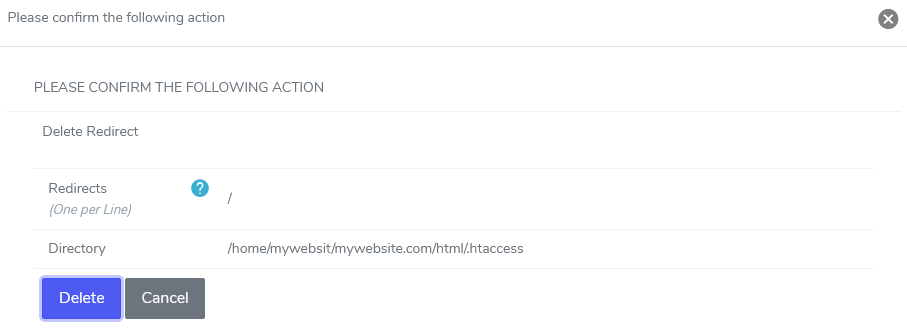
Click Delete
To Manage Indexes
Log into SiteWorx in the browser (https://ip.ad.dr.ess:2443/siteworx)
In SiteWorx, navigate to Hosting Features > Htaccess, either from the side menu or SiteWorx home
Choose the domain for the .htaccess file for from the Domain dropdown
Click Login. This opens the htaccess page for the domain
Click the Pencil next to the desired htaccess file. This opens the Directory Options Management page
Under Action, click the List. This opens the Index Management form

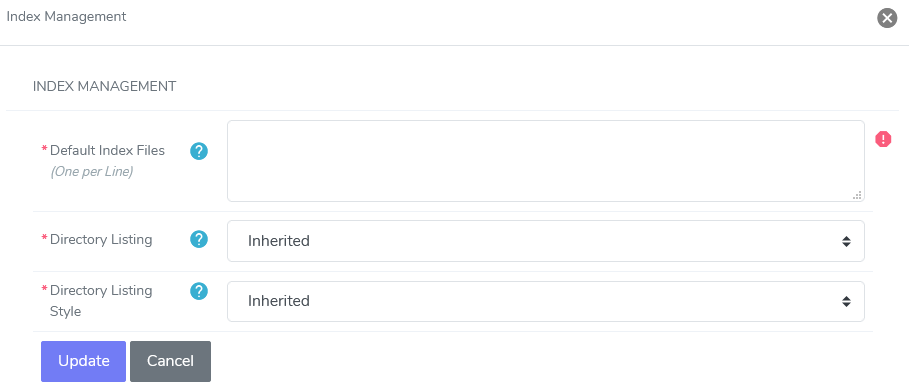
Update the required fields:
Default Index Files: This setting affects when a browser requests a URL that ends in
/(a directory). Apache will use this list of files to determine which file to server. Apache will server the first file found in the list from top to bottomDirectory Listing: This setting affects when a browser requests a URL that ends in a ‘/’ (a directory), and no Default Index files are found:
No: The browser will receive a ‘403 Forbidden’ response
Yes: The browser will list the contents of the directory
Inherited: The setting will be inherited from a parent directory
Directory Listing Style: This setting affects how the directorylisting will be displayed:
Simple Listing: A simple directory list of files will be displayed
Fancy Listing: A directory list of files along with timestamps and file sizes will be displayed
Inherited: The setting will be inherited from a parent directory
Click Update
To Manage Hotlink Protection
Log into SiteWorx in the browser (https://ip.ad.dr.ess:2443/siteworx)
In SiteWorx, navigate to Hosting Features > Htaccess, either from the side menu or SiteWorx home
Choose the domain for the .htaccess file for from the Domain dropdown
Click Login. This opens the htaccess page for the domain
Click the Pencil next to the desired htaccess file. This opens the Directory Options Management page
Under Action, click the Chain Link and Lock. This opens the Hotlink protection form

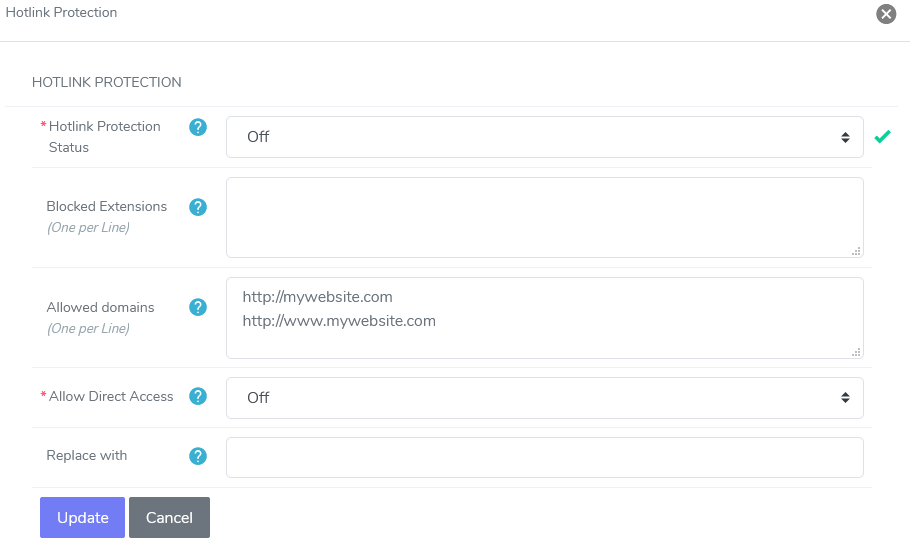
Update the desired fields:
Hotlink Protection Status: Turns hotlink protection on or off
Blocked Extensions: Sets the list of extensions that will be protected from hotlinking
Allowed domains: Sets the list of allowed domains that are allowed to hotlink to files with the listed extensions. The current SiteWorx domain will always be allowed to hotlink to the listed extensions
Allow Direct Access: This option allows “direct access” to the list of protected extensions. “Direct access” typically means the URL of the file is typed directly into the browser, and not linked from another page. More specifically, “Direct access” allows access to the protected extensions when the
HTTP_REFERERfield is emptyReplace with: When this option is set with a valid absolute URL to an image file (e.g., http://www.somedomain.com/replaceimg.jpg), a hotlinked image will be replaced with this URL. If this option is not set, a hotlinked image will return a ‘403 Forbidden’ response
Click Update
To Add Custom .htaccess Rules From the CLI
Customers may add their own .htaccess rules to the top of any .htaccess file generated by InterWorx.
Note
SiteWorx users must have shell access provided to them by the server administrator in order to access the CLI.
Log in to the server at the CLI, either as root (if the server administrator), or the SiteWorx user (if shell access has been granted), either via SSH or from the terminal
Using a text editor, open the .htaccess file for the account. It is most likely located in
/home/{unixuser}/{domain.com}/html/.htaccess, replacing {unixuser} and {domain.com} with the corresponding information. The following example uses the vim text editorvim /home/domainco/domain.com/html/.htaccess
Add the desired custom rules to the top of the file. There is a message built into the file that states where to add any manual edits
# ALL CUSTOM ENTRIES SHOULD GO ABOVE THIS LINE
# BEGIN IWORX header
Save the file and exit the text editor