SSH Server Guide
The InterWorx Control Panel provides an easy-to-use interface for managing SSH Server settings.
From the SSH Server page in NodeWorx, server administrators can manage auto-restart and start-on-boot settings for the SSH server, set configuration options such as SSH port and root login permissions, and terminate shell user sessions.
Contents
Managing SSH Server Options
Log into NodeWorx from the browser (https://ip.ad.dr.ess:2443/nodeworx)
From NodeWorx, navigate to System Services > SSH Server

Update the desired fields

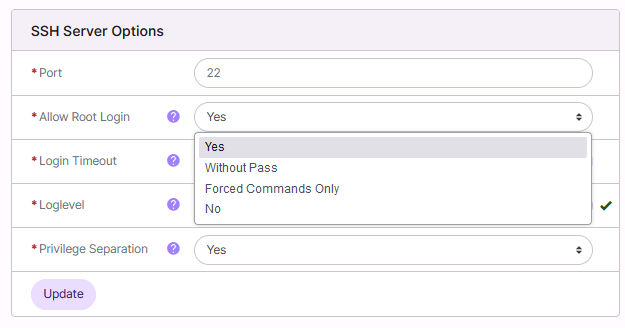
Port: The port that shell users connect to. By default this is set to port 22
If SiteWorx users will be given shell access, for simplicity and ease-of-use, it is recommended to keep the SSH port to its default port, as that is the standard most end users will expect and be used to.
If SSH is set to listen on port 22, it may be prudent to set Allow Root Login to either No or Without Pass, as Passwordless SSH for the root user tends to be more secure, and ties the root login to a single computer, with the correct keys. More information on Passwordless SSH can be found here
If SiteWorx users will not be given shell access, it may be useful to set Allow Root Login to yes and change the port to something other than 22, making sure the new port is not in use by another service on the system. A list of ports that are commonly used by other services can be found here
Allow Root Login: Sets whether the root user can log in via SSH
Yes: The root user is permitted to log in
Without Password: Disables password authentication for the root user
Forced Command Only: The root user is permitted to log in, but only if a command option is specified
No: The root user is not permitted to log in
Login Timeout: Amount of time before the server will disconnect a user who has not yet successfully logged in
Loglevel: Sets the verbosity used when logging sshd messages
Privilege Separation: Toggles privilege separation. Used to prevent privilege escalation during the authentication process
Click Update
To Manage Start-On-Boot Options for the SSH Server
Log into NodeWorx from the browser (https://ip.ad.dr.ess:2443/nodeworx)
From NodeWorx, navigate to System Services > SSH Server
Under SSH Server Control, select either Yes or No from the Start On Boot-up dropdown

Click Update
To Manage Auto-Restart Options for the SSH Server
Log into NodeWorx from the browser (https://ip.ad.dr.ess:2443/nodeworx)
From NodeWorx, navigate to System Services > SSH Server
Under SSH Server Control, select either Yes or No from the Auto-Restart SSH dropdown
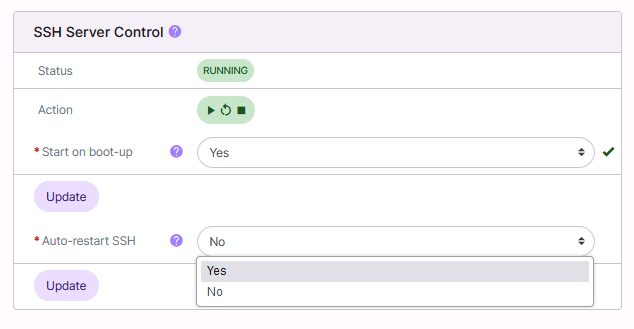
Click Update
To Change the SSH Port
Log into NodeWorx from the browser (https://ip.ad.dr.ess:2443/nodeworx)
From NodeWorx, navigate to System Services > SSH Server
Under SSH Server Options, update the Port field to the new port
Click Update
To Manage Root Login Permission
Log into NodeWorx from the browser (https://ip.ad.dr.ess:2443/nodeworx)
From NodeWorx, navigate to System Services > SSH Server
Under SSH Server Options, select the desired setting from the Allow Root Login dropdown:
Yes: The root user is permitted to log in
No: The root user is not permitted to log in
Without Password : Disables password authentication for the root user
Forced Command Only: The root user is permitted to log in, but only if a command option is specified
Example:
ssh root@test.com uptime
Click Update
To Terminate an SSH Session
From the Sessions List
Log into NodeWorx from the browser (https://ip.ad.dr.ess:2443/nodeworx)
From NodeWorx, navigate to System Services > SSH Server

Click the Trashcan next to the shell session. This opens the Confirmation from
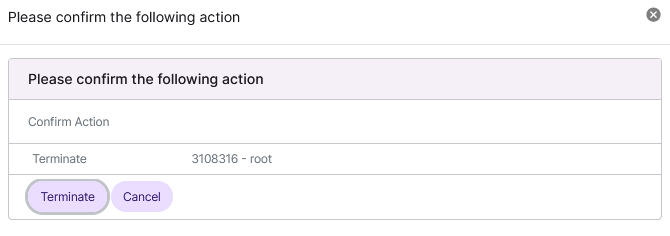
Click Terminate to confirm
From the With Selected Dropdown
Log into NodeWorx from the browser (https://ip.ad.dr.ess:2443/nodeworx)
From NodeWorx, navigate to System Services > SSH Server
Select the checkbox next to the user(s)
Selecting the checkbox next to the With Selected dropdown will automatically select all

Select Terminate from the With Selected dropdown
Click Go. This opens the Confirmation form
Click Terminate to confirm