How to: Manage Email Accounts
The InterWorx Control Panel provides and easy-to-use interface for SiteWorx administrators to manage email accounts associated with their domains. From the Mailboxes page in SiteWorx, SiteWorx administrators can add, edit, and delete email accounts, as well as manage user vacation messages and mail quotas.
Contents
To Add an Email Account
From the Accounts Page
Log into SiteWorx from the browser (https://ip.ad.dr.ess:2443/siteworx)
In SiteWorx, navigate to Hosting Features > Email > Mailboxes, either from the side menu or SiteWorx home
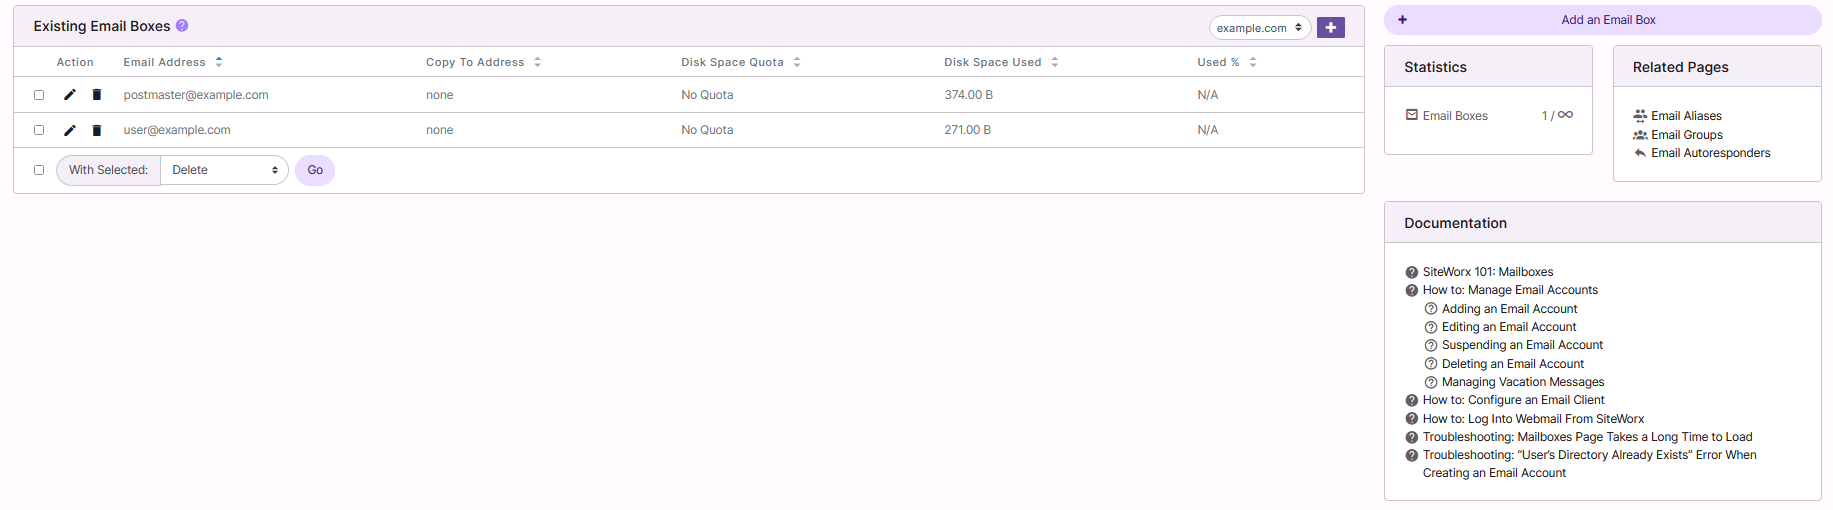
Click + or Add an Email Box. This opens the Add an Email Box form
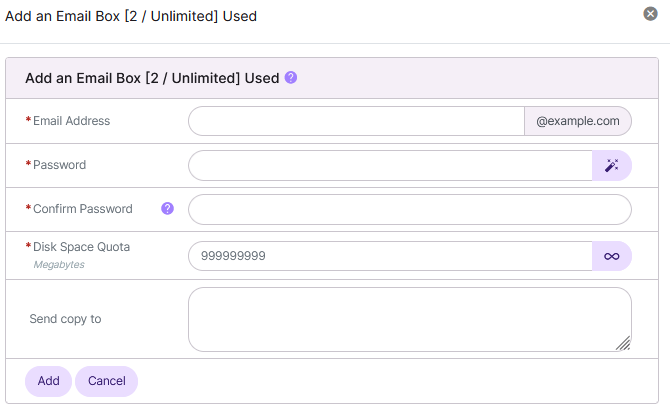
Update the desired fields:
Email Address: The new email user. The dropdown identifies which domain on the SiteWorx account the email account will be created for, if there is more than one domain
Password/Confirm Password: The password for the email user. Clicking the Magic Wand will automatically generate a secure password
Disk Space Quota: The mailbox quota, in megabytes.
Send Copy To: Email addresses listed will receive copies of messages that are sent to the new email account
Click Add
From the Add an Email Account Icon
Log into SiteWorx from the browser (https://ip.ad.dr.ess:2443/siteworx)
In SiteWorx, click Add an Email Account. This opens the Add an Email Box form
Update the desired fields:
Email Address: The new email user. The dropdown identifies which domain on the SiteWorx account the email account will be created for, if there is more than one domain
Password/Confirm Password: The password for the email user. Clicking the Magic Wand will automatically generate a secure password
Disk Space Quota: The mailbox quota, in megabytes.
Send Copy To: Email addresses listed will receive copies of messages that are sent to the new email account
Click Add
To Edit an Email Account
Log into SiteWorx from the browser (https://ip.ad.dr.ess:2443/siteworx)
In SiteWorx, navigate to Hosting Features > Email > Mailboxes, either from the side menu or SiteWorx home
Click the Pencil next to the E-mail account. This opens the Email Box Edit form
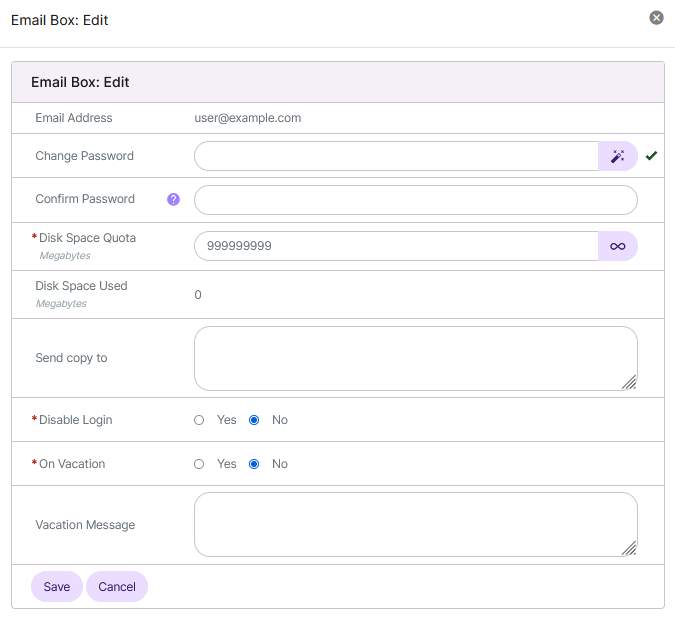
Update the desired fields
Click Save
To Manage Vacation Messages
Note
Vacation messages may also be set from the Roundcube webmail interface.
Log into SiteWorx from the browser (https://ip.ad.dr.ess:2443/siteworx)
In SiteWorx, navigate to Hosting Features > Email > Mailboxes, either from the side menu or SiteWorx home
Click the Pencil next to the E-mail account. This opens the Email Box Edit form
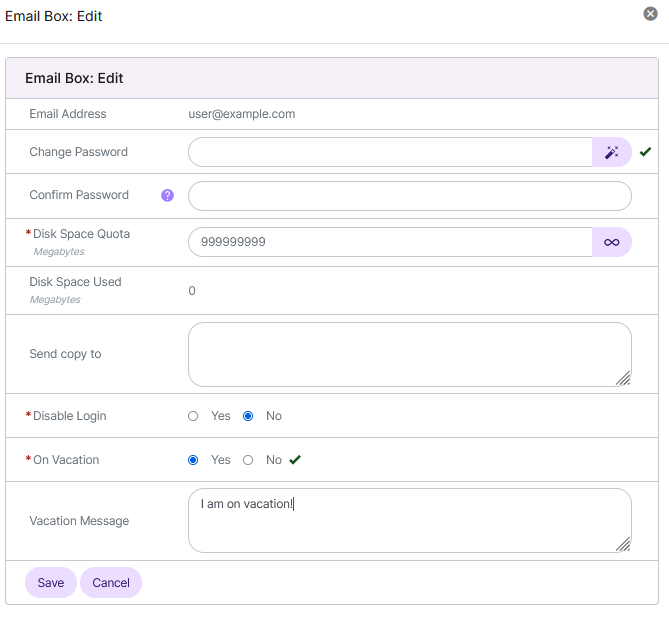
Next to On Vacation, select Yes or No. This enables or disabled the vacation message
Update the Vacation Message field with the desired message. This message will be sent automatically to anyone sending a message to this account when On Vacation is enabled
Click Save
To Suspend an Email Account
Log into SiteWorx from the browser (https://ip.ad.dr.ess:2443/siteworx)
In SiteWorx, navigate to Hosting Features > Email > Mailboxes, either from the side menu or SiteWorx home
Click the Pencil next to the E-mail account. This opens the Email Box Edit form
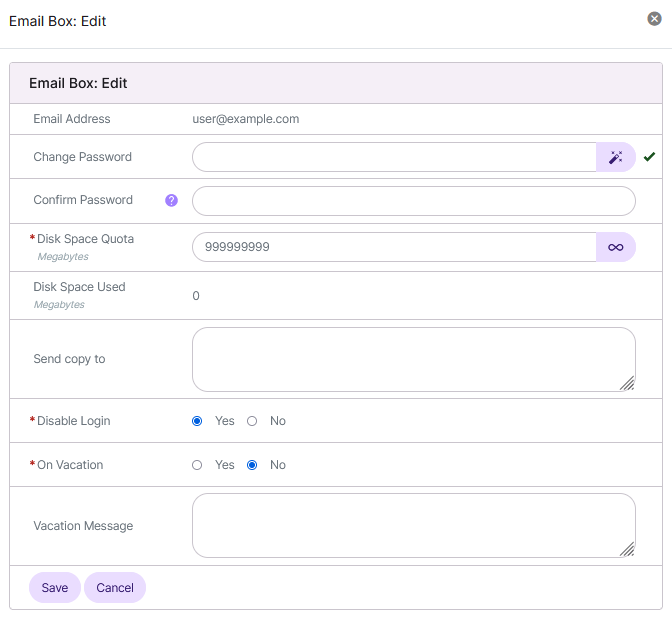
Next to Disable Login, select Yes or No. This enables or disables the login function for the email account
Click Save
To Delete an Email Account
From the Accounts List
Log into SiteWorx from the browser (https://ip.ad.dr.ess:2443/siteworx)
In SiteWorx, navigate to Hosting Features > Email > Mailboxes, either from the side menu or SiteWorx home
Click the Trashcan next to the E-mail account. This opens the Confirmation form
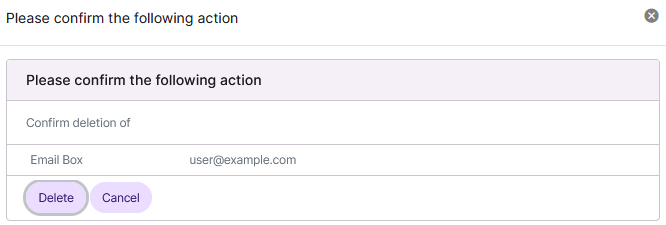
Click Delete
From the With Selected Dropdown
Log into SiteWorx from the browser (https://ip.ad.dr.ess:2443/siteworx)
In SiteWorx, navigate to Hosting Features > Email > Mailboxes, either from the side menu or SiteWorx home
Select the checkbox next to the account(s)
Selecting the checkbox next to the With Selected dropdown will automatically select all accounts
Select Delete from the With Selected dropdown
Click Go. This opens the Confirm Deletion form
Click Delete