How To: Manage SSH Shell Users
The InterWorx Control Panel allows server administrators the ability to easily manage SSH shell users from within NodeWorx. From the Shell Users page, it is possible to enable and disable shell users, change both the default and a user’s shell, change shell users’ passwords, and set jailed users.
It is recommended to exercise discretion when giving out shell access, even jailed shell access, to end users in shared hosting environments.
Contents
To Change the Default Shell
Note
This will change the default shell for all newly enabled accounts. It will not affect existing enabled shell users.
Log into NodeWorx from the browser (https://ip.ad.dr.ess:2443/nodeworx)
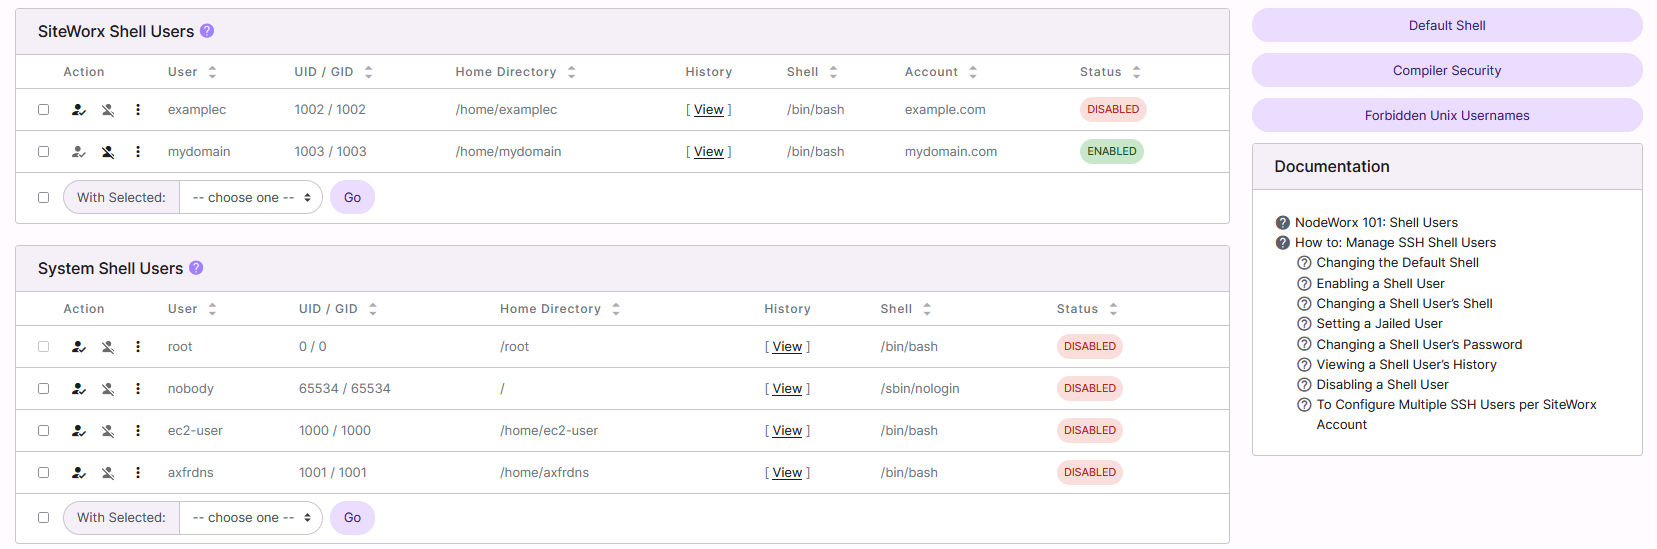
From NodeWorx, navigate to SiteWorx > Shell Users
At the bottom of the page, under More Options, click Default Shell. This opens the Shell Account Options form
Select the desired shell from the Default Shell dropdown
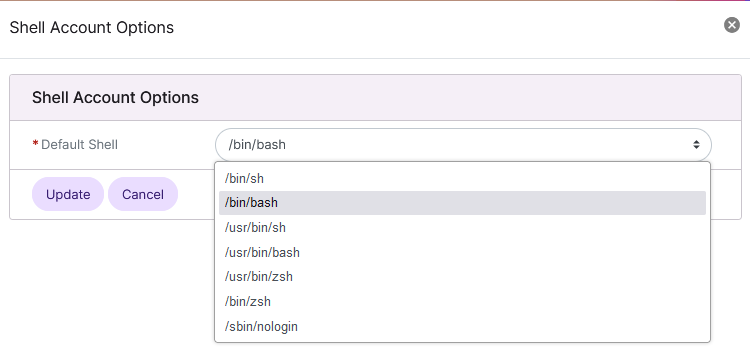
Click Update
To Enable a Shell User
From the User List
When enabling a user’s shell, three distinct operations are performed:
The shell user’s password is set to the SiteWorx account password
The user’s shell is updated to the default shell setting
The account is enabled
Log into NodeWorx from the browser (https://ip.ad.dr.ess:2443/nodeworx)
From NodeWorx, navigate to SiteWorx > Shell Users
Click the checkmarked person next to the shell user. This opens the Confirmation form

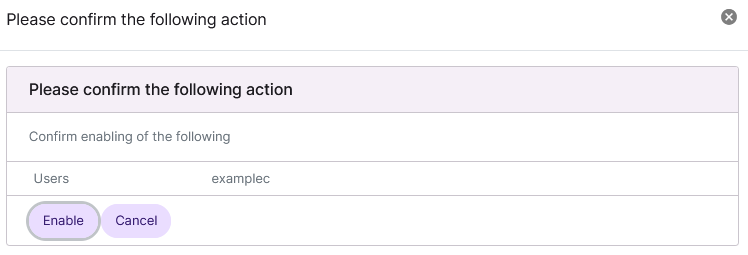
Click Enable to confirm
From the With Selected Dropdown
Log into NodeWorx from the browser (https://ip.ad.dr.ess:2443/nodeworx)
From NodeWorx, navigate to SiteWorx > Shell Users
Select the checkbox next to the user(s)
Selecting the checkbox next to the With Selected dropdown will automatically select all accounts
Select Enable from the With Selected dropdown
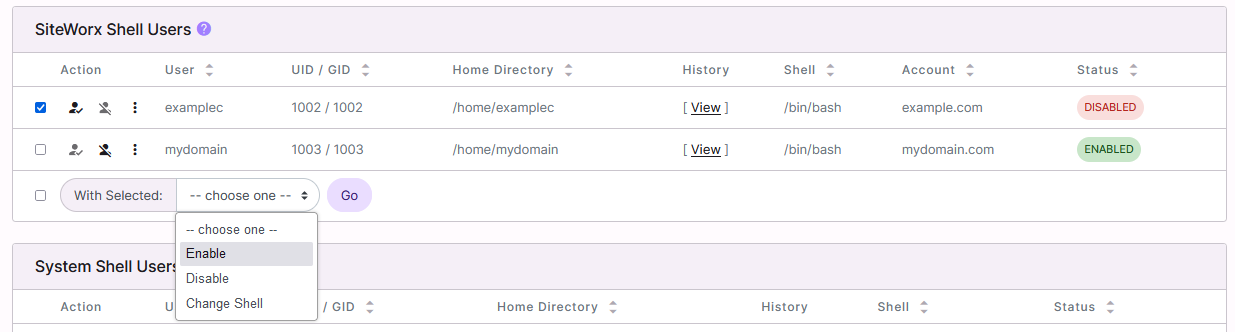
Click Go. This opens the Confirmation form
Click Enable to confirm
To Change a Shell User’s Shell
From the User List
Log into NodeWorx from the browser (https://ip.ad.dr.ess:2443/nodeworx)
From NodeWorx, navigate to SiteWorx > Shell Users
If the shell user is not already enabled, see To Enable a Shell User
Click the three vertical dots next to the account. This opens an options form

Select Change Shell. This opens the Change Shell form
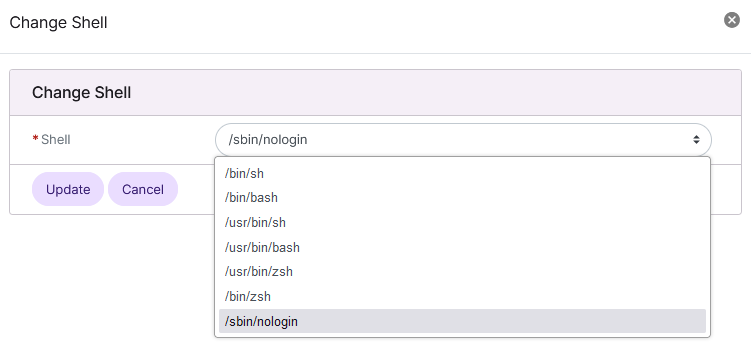
Select the desired shell from the Shell dropdown
Click Update
From the With Selected Dropdown
Log into NodeWorx from the browser (https://ip.ad.dr.ess:2443/nodeworx)
From NodeWorx, navigate to SiteWorx > Shell Users
If the shell user is not already enabled, see To Enable a Shell User
Select the checkbox next to the user(s)
Selecting the checkbox next to the With Selected dropdown will automatically select all users
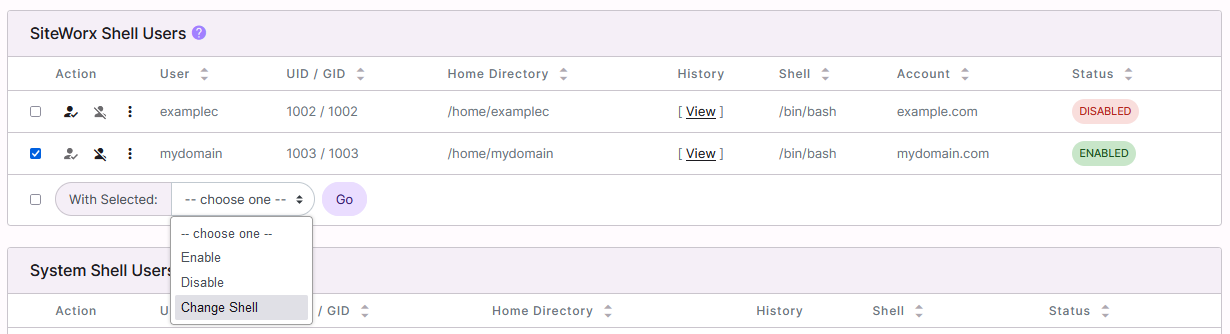
Select Change Shell from the With Selected dropdown
Click Go. This opens the Change Shell form
Select the desired shell from the Shell dropdown
Click Update
To Set a Jailed User
A jailed user has a very limited view of the file system and available Linux commands when logged in.
From the User List
Log into NodeWorx from the browser (https://ip.ad.dr.ess:2443/nodeworx)
From NodeWorx, navigate to SiteWorx > Shell Users
If the shell user is not already enabled, see To Enable a Shell User
Click the three vertical dots next to the account. This opens an options form
Select Change Shell. This opens the Change Shell form
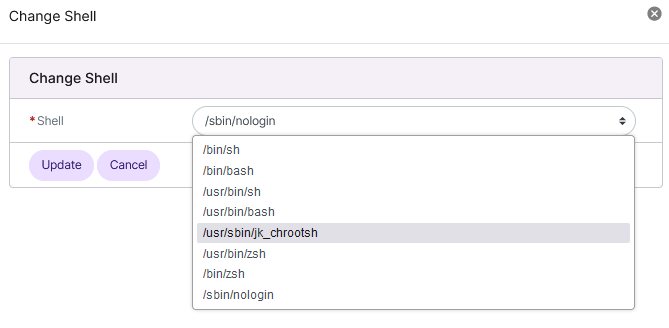
Select /usr/sbin/jk_chrootsh from the Shell dropdown
Click Update
From the With Selected Dropdown
Log into NodeWorx from the browser (https://ip.ad.dr.ess:2443/nodeworx)
From NodeWorx, navigate to SiteWorx > Shell Users
If the shell user is not already enabled, see To Enable a Shell User
Select the checkbox next to the user(s)
Selecting the checkbox next to the With Selected dropdown will automatically select all users
Select Change Shell from the With Selected dropdown
Click Go. This opens the Change Shell form
Select /usr/sbin/jk_chrootsh from the Shell dropdown
Click Update
To Change a Shell User’s Password
Log into NodeWorx from the browser (https://ip.ad.dr.ess:2443/nodeworx)
From NodeWorx, navigate to SiteWorx > Shell Users
If the shell user is not already enabled, see To Enable a Shell User
Click the three vertical dots next to the account. This opens an options form
Select Change Password. This opens the Change Shell Password form
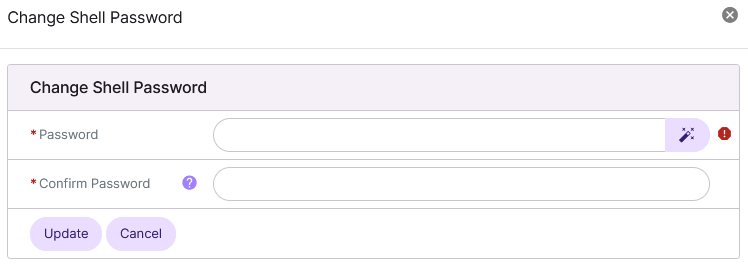
Update the Password and Confirm Password fields with the new password
Alternately, click the Magic Wand to automatically generate a new password
Click Update
To View a Shell User’s History
Log into NodeWorx from the browser (https://ip.ad.dr.ess:2443/nodeworx)
From NodeWorx, navigate to SiteWorx > Shell Users
Click View next to the shell user. This opens a new window with the complete shell history of the shell user
To Disable a Shell User
From the User List
Log into NodeWorx from the browser (https://ip.ad.dr.ess:2443/nodeworx)
From NodeWorx, navigate to SiteWorx > Shell Users
Click the crossed out person next to the shell user. This opens the confirmation form

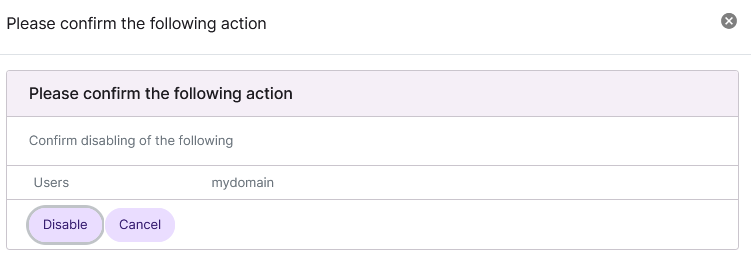
Click Disable to confirm
From the With Selected Dropdown
Log into NodeWorx from the browser (https://ip.ad.dr.ess:2443/nodeworx)
From NodeWorx, navigate to SiteWorx > Shell Users
Select the checkbox next to the user(s)
Selecting the checkbox next to the With Selected dropdown will automatically select all
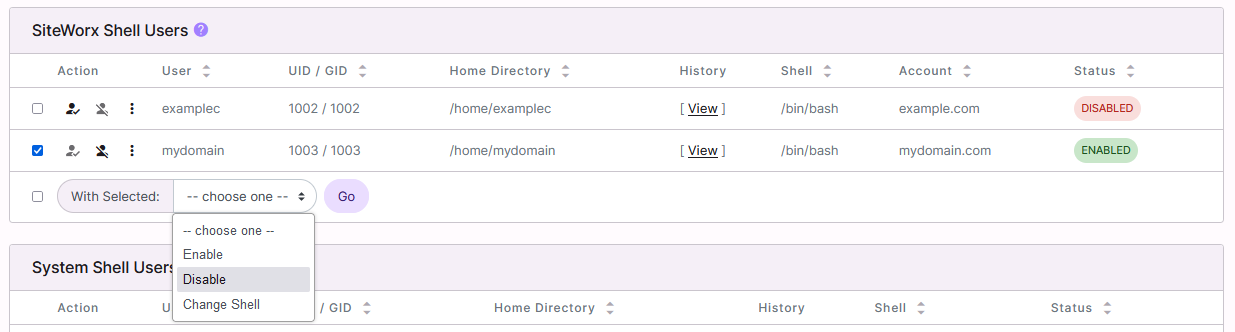
Select Disable from the With Selected dropdown
Click Go. This opens the Confirmation form
Click Disable to confirm
To Configure Multiple SSH Users per SiteWorx Account
InterWorx allows for the ability to have more than one SSH user per SiteWorx account. The SiteWorx account must have shell access in order to use this feature.
Enabling Multiple SSH Users
On AlmaLinux 8
Log in to the server at the CLI as root, either via SSH or from the terminal
Run the following commands to install libnss-mysql and set the config options to allow multiple SSH users per SiteWorx account:
yum install libnss-mysql
~iworx/bin/config.pex --global --set --name SITEWORX_SSH_FEATURE --value 1
~iworx/bin/sshd.pex --init-libnss-mysql
Using a text editor, open
/etc/nsswitch.conf. The following example uses the vim text editor:vim /etc/nsswitch.conf
Append
mysqlto thepasswd,shadow, andgrouplines. The edited section should be similar to the following:# In order of likelihood of use to accelerate lookup. passwd: files sss systemd mysql shadow: files sss mysql group: files sss systemd mysql hosts: files dns myhostname services: files sss netgroup: sss automount: files sss aliases: files ethers: files gshadow: files
Save and exit the text editor
On Rocky Linux 8
Log in to the server at the CLI as root, either via SSH or from the terminal
Run the following commands to install libnss-mysql, set the config options to allow multiple SSH users per SiteWorx account, and create a custom autoselect profile:
yum install libnss-mysql
~iworx/bin/config.pex --global --set --name SITEWORX_SSH_FEATURE --value 1
~iworx/bin/sshd.pex --init-libnss-mysql
authselect create-profile libnss-mysql -b minimal
Using a text editor, open
/etc/authselect/custom/libnss-mysql/nsswitch.conf. The following example uses the vim text editor:vim /etc/authselect/custom/libnss-mysql/nsswitch.conf
Append
mysqlafter the wordfileson thepasswd,shadow, andgrouplines. The edited section should be similar to the following example:aliases: files {exclude if "with-custom-aliases"} automount: files {exclude if "with-custom-automount"} ethers: files {exclude if "with-custom-ethers"} group: files mysql {if "with-altfiles":altfiles }systemd {exclude if "with-custom-group"} hosts: files dns myhostname {exclude if "with-custom-hosts"} initgroups: files {exclude if "with-custom-initgroups"} netgroup: files {exclude if "with-custom-netgroup"} networks: files {exclude if "with-custom-networks"} passwd: files mysql {if "with-altfiles":altfiles }systemd {exclude if "with-custom-passwd"} protocols: files {exclude if "with-custom-protocols"} publickey: files {exclude if "with-custom-publickey"} rpc: files {exclude if "with-custom-rpc"} services: files {exclude if "with-custom-services"} shadow: files mysql {exclude if "with-custom-shadow"}
Save and exit the text editor
Run the following to enable the profile:
authselect select custom/libnss-mysql
On EL9 Servers
Note
The following commands will update all files in /etc/pam.d/, as well as /etc/nsswitch.conf. It
is recommended to back up any customizations that may have been made to those files before running the commands,
below.
Log in to the server at the CLI as root, either via SSH or from the terminal
Run the following commands to install libnss-mysql and set the config options to allow multiple SSH users per SiteWorx account:
yum install libnss-mysql
~iworx/bin/config.pex --global --set --name SITEWORX_SSH_FEATURE --value 1
~iworx/bin/sshd.pex --init-libnss-mysql
authselect select libnss-mysql --force
Configuring the SSH Users
Once enabled, the secondary SiteWorx user will be able to use their SiteWorx password to access the server over SSH.
Note
Information on how to create secondary SiteWorx users can be found here.
Log into SiteWorx from the browser (https://ip.ad.dr.ess:2443/siteworx)
In SiteWorx, navigate to Adminstration > User Accounts

Click the Pencil next to the SiteWorx user that should have secondary SSH access. This opens the Edit SiteWorx User form
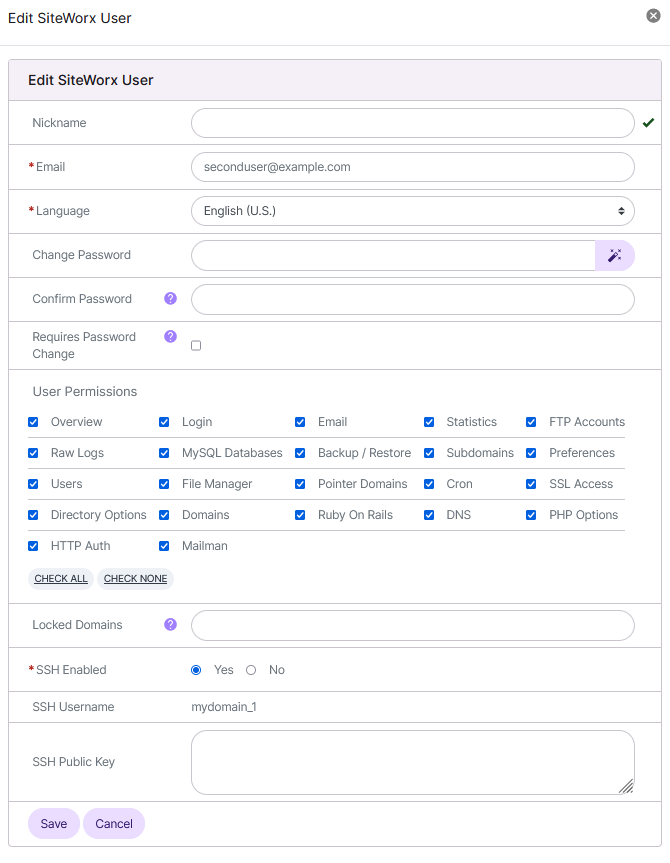
Select Yes next to SSH Enabled
If desired, update the SSH Public Key field with the User’s Public Key (Optional)
Click Save