How To: Add Custom Branding to the InterWorx User Interface
Custom logo images and color styles can be added to both NodeWorx and SiteWorx, either via the GUI or the CLI.
Using the GUI
Creating a New Branding Package
Note
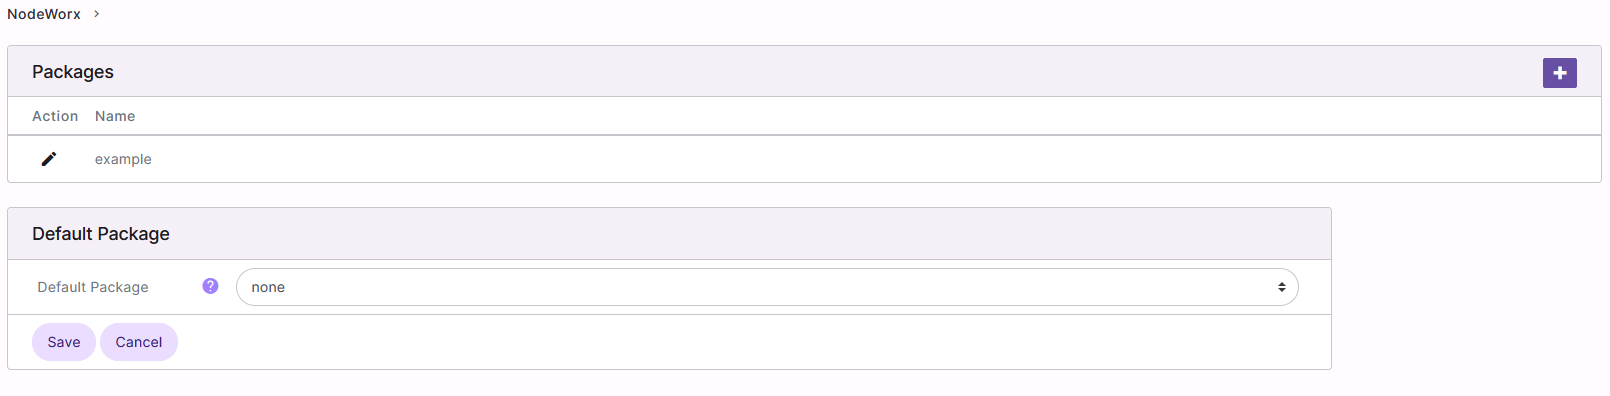
There is a branding example named “example”, listed under Packages on the Branding page in NodeWorx. This can be used as a template for creating custom branding packages
Supported image files are:
.svg,.png,.jpg, and.gif. It is strongly recommended to use.svgfiles for highest quality and flexibility, as scaled.jpgor.pngimages may not render as cleanly, particularly on HiDPI displays
Log into NodeWorx from the browser (https://ip.ad.dr.ess:2443/nodeworx)
In NodeWorx, navigate to Branding
Click +. This opens the Add Branding Package form
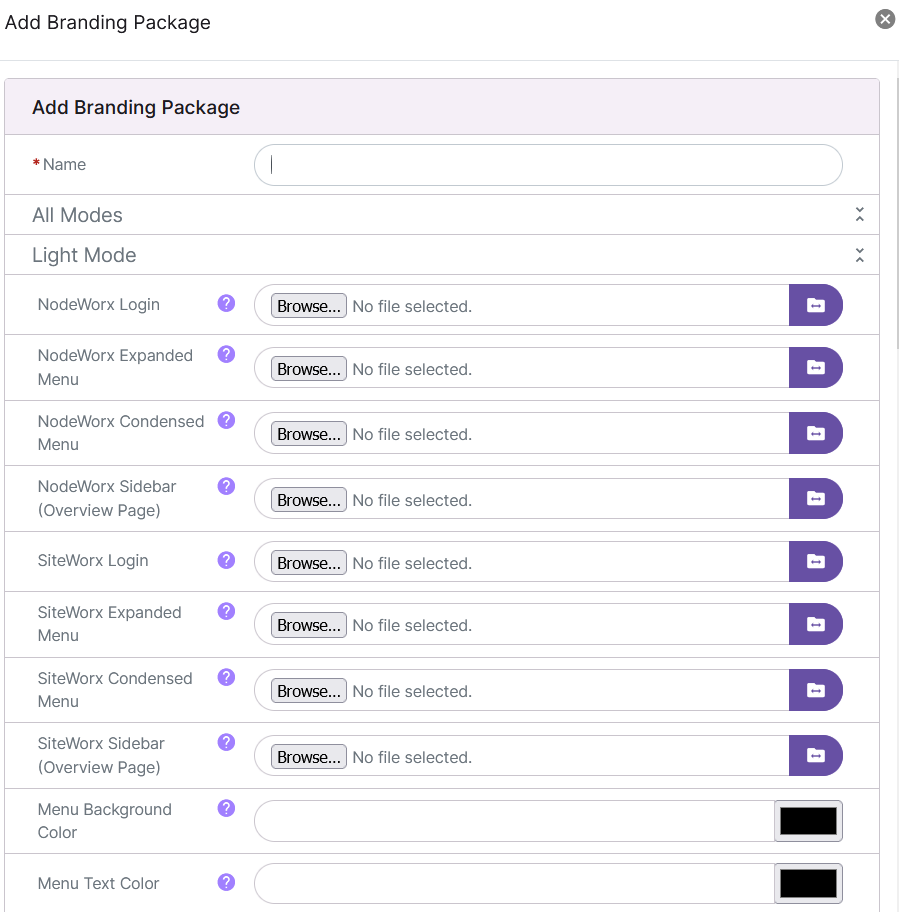
Update the required fields and desired fields. There are separate sections for the theming used in Light Mode and Dark Mode. The menu items are the same for each section:
Name: The name of the theme package. This field cannot include any spaces
NodeWorx Login: The logo shown on the NodeWorx login page. There are two options:
Click Browse to choose a backup file on the local machine hard drive
Click the Folder Icon to specify the path to a backup file located on the destination/local server
NodeWorx Expanded Menu: The logo located at the top of the NodeWorx menu when expanded (large screens). There are two options:
Click Browse to choose a backup file on the local machine hard drive
Click the Folder Icon to specify the path to a backup file located on the destination/local server
NodeWorx Condensed Menu: The logo located at the top of the NodeWorx menu when condensed (small screens) There are two options:
Click Browse to choose a backup file on the local machine hard drive
Click the Folder Icon to specify the path to a backup file located on the destination/local server
NodeWorx Sidebar (Overview Page): The right-hand sidebar logo on the NodeWorx overview page. There are two options:
Click Browse to choose a backup file on the local machine hard drive
Click the Folder Icon to specify the path to a backup file located on the destination/local server
SiteWorx Login: The logo shown on the SiteWorx Login page. There are two options:
Click Browse to choose a backup file on the local machine hard drive
Click the Folder Icon to specify the path to a backup file located on the destination/local server
SiteWorx Expanded Menu: The logo located at the top of the SiteWorx menu when expanded (large screens) There are two options:
Click Browse to choose a backup file on the local machine hard drive
Click the Folder Icon to specify the path to a backup file located on the destination/local server
SiteWorx Condensed Menu: The logo located at the top of the SiteWorx menu when condensed (small screens) There are two options:
Click Browse to choose a backup file on the local machine hard drive
Click the Folder Icon to specify the path to a backup file located on the destination/local server
SiteWorx Sidebar (Overview Page):The right-hand sidebar logo on the SiteWorx overview page. There are two options:
Click Browse to choose a backup file on the local machine hard drive
Click the Folder Icon to specify the path to a backup file located on the destination/local server
Menu Background Color: The background color of the menu (left sidebar). There are two options:
Update the field with the hexadecimal code for the color (example #004080)
Click the box next to the field. This opens a color option form
Click the desired color
Click Ok to populate the field with the corresponding hexadecimal code for the color
Menu Text Color: Main text color in menu/sidebar. There are two options:
Update the field with the hexadecimal code for the color (example #004080)
Click the box next to the field. This opens a color option form
Click the desired color
Click Ok to populate the field with the corresponding hexadecimal code for the color
Menu Text Color Active: Text color in menu/sidebar when active. There are two options:
Update the field with the hexadecimal code for the color (example #004080)
Click the box next to the field. This opens a color option form
Click the desired color
Click Ok to populate the field with the corresponding hexadecimal code for the color
Menu Text Color Hover: Text color in menu/sidebar when hovering over it. There are two options:
Update the field with the hexadecimal code for the color (example #004080)
Click the box next to the field. This opens a color option form
Click the desired color
Click Ok to populate the field with the corresponding hexadecimal code for the color
Primary Color (used in breadcrumbs and menu item in condensed view): The primary color dictates the color of the breadcrumbs and expanded menu items on small screens. There are two options:
Update the field with the hexadecimal code for the color (example #004080)
Click the box next to the field. This opens a color option form
Click the desired color
Click Ok to populate the field with the corresponding hexadecimal code for the color
Button Text Color:Main button text color. Examples of buttons that will be impacted: search, save, and actions such as “add”. There are two options:
Update the field with the hexadecimal code for the color (example #004080)
Click the box next to the field. This opens a color option form
Click the desired color
Click Ok to populate the field with the corresponding hexadecimal code for the color
Button Background Color: Main button background color. Examples of buttons that will be impacted: search, save, and actions such as “add”. There are two options:
Update the field with the hexadecimal code for the color (example #004080)
Click the box next to the field. This opens a color option form
Click the desired color
Click Ok to populate the field with the corresponding hexadecimal code for the color
Button Border Color: Main button border color. Examples of buttons that will be impacted: search, save, and actions such as “add”. There are two options:
Update the field with the hexadecimal code for the color (example #004080)
Click the box next to the field. This opens a color option form
Click the desired color
Click Ok to populate the field with the corresponding hexadecimal code for the color
Click Save
Refresh the page. The new branding package will appear in the Packages list and Default Package dropdown
Setting the Default Branding Package
These package will be applied globally, in both the NodeWorx and SiteWorx interfaces. It is possible to override the themeing package for SiteWorx on a per-account basis. See Setting a SiteWorx Account’s Branding Package.
Log into NodeWorx from the browser (https://ip.ad.dr.ess:2443/nodeworx)
In NodeWorx, navigate to Branding
Under Default Package, select the desired package from the Default Package dropdown
Click Save
Refresh or navigate away from the page to see the new branding package in place
Setting a SiteWorx Account’s Branding Package
Setting a branding package for a SiteWorx account will override the global default package for that account
Log into NodeWorx from the browser (https://ip.ad.dr.ess:2443/nodeworx)
In NodeWorx, navigate to SiteWorx > Accounts
Click the Pencil next to the SiteWorx account. This opens the SiteWorx Accounts Management form

Select the desired package from the Branding dropdown
Click Save
Log in to the SiteWorx account to see the new branding package in place
Using the CLI
Creating a New Branding Package
Note
There is a branding package example located under
~iworx/html/branding/1/example/. This example can be used as a template for creating a custom branding package
Log in to the server at the CLI as root, either via SSH or from the terminal
Navigate to the branding directory for the desired reseller, replacing
{reseller_id}with the corresponding informationcd ~iworx/html/branding/{reseller_id}
The Reseller ID for the Server Administrator is always 1
The Reseller ID for a specific reseller can be found on the Resellers > Accounts page in NodeWorx. For example, the reseller account named “reseller” on this server has a Reseller ID of 2:

The specific reseller directory under
~iworx/html/brandingis automatically created once the reseller adds its first SiteWorx account. If the reseller does not yet have any SiteWorx accounts, the directory will have to manually be created, replacing{reseller_id}with the corresponding informationmkdir ~iworx/html/branding/{reseller_id}
Create a new directory for the branding package, replacing
{package_name}with the corresponding informationmkdir {package_name}
Navigate to the new directory, replacing
{package_name}with the corresponding informationcd {package_name}
Create a new directory named
imgmkdir img
Upload all custom image files for the branding package to the
imgdirectory. This step can be completed using any desired transfer method, including FTP, rsync, or scpSupported image files are:
.svg,.png,.jpg, and.gif. It is strongly recommended to use.svgfiles for highest quality and flexibility, as scaled.jpgor.pngimages may not render as cleanly, particularly on HiDPI displays
Copy
~iworx/html/branding/1/example/rules.jsonto the~iworx/html/branding/{reseller_id}/{package_name}directory, replacing{reseller_id}and{package_name}with the corresponding information. This will provide a template for css changescp ~iworx/html/branding/1/example/rules.json ~iworx/html/branding/{reseller_id}/{package_name}
Using a text editor, open
rules.json. The following example uses the Vim text editorvim rules.json
Update the desired fields
Update the path for any custom image files to the path located under
~iworx/html/branding/{reseller_id}/{package_name}/img. Example:Before:
{
  "name": "--iw-branding-logo-nw-login-light-mode",
  "value": "url(/branding/example/img/my-logo.png)"
},
After:
{
  "name": "--iw-branding-logo-nw-login-light-mode",
  "value": "url(/branding/1/new_package/img/customlogo.svg)"
},
Update css settings with the desired changes. Example:
Before:
{
  "name": "--iw-branding-menu-text-color-active-light-mode",
  "value": "#ffffff"
},
After:
{
  "name": "--iw-branding-menu-text-color-active-light-mode",
  "value": "#7f2084"
},
Save and exit the text editor
Update the permission for all new files and directories so that the permissions are
iworx:iworx 0644, replacing{path}with the corresponding information. This includes any newly created directories, custom image files, and rules.jsonchmod 0644 {path} chown iworx:iworx {path}
Example:
chmod 0644 ~iworx/html/branding/1/new_package/
chown iworx:iworx ~iworx/html/branding/1/new_package/

chmod 0644 ~iworx/html/branding/1/new_package/*
chown iworx:iworx ~iworx/html/branding/1/new_package/*
To Apply a Branding Package Globally
Note
The following will apply the branding package to NodeWorx, as well as all SiteWorx accounts associated with the System Administrator account. It will not effect resellers, or the SiteWorx accounts associated with any resellers.
Log in to the server at the CLI as root, either via SSH or from the terminal
Run the following, replacing
{package_name}with the corresponding information~iworx/bin/config.pex --set --name UI_BRANDING_PACKAGE_NAME --value {package_name} --global
Example:
~iworx/bin/config.pex --set --name UI_BRANDING_PACKAGE_NAME --value new_package --global
To Apply a Branding Package to a Specific SiteWorx Account
Note
The following will apply the branding package to a specific SiteWorx account, overriding any custom branding at the global or reseller level.
Log in to the server at the CLI as root, either via SSH or from the terminal
Run the following, replacing
{package_name}and{master_domain}with the corresponding information~iworx/bin/config.pex --set --name UI_BRANDING_PACKAGE_NAME --value {package_name} --siteworx {master_domain}
Example:
~iworx/bin/config.pex --set --name UI_BRANDING_PACKAGE_NAME --value new_package --siteworx domain.com
To Apply a Branding Package for a Specific Reseller
Note
The following will apply the branding package a specific reseller, as well as all SiteWorx accounts associated with that reseller. The branding package specified must exist under the specific reseller’s branding directory.
Log in to the server at the CLI as root, either via SSH or from the terminal
Run the following, replacing
{package_name}and{reseller_id}with the corresponding information~iworx/bin/config.pex --set --name UI_BRANDING_PACKAGE_NAME --value {package_name} --reseller {reseller_id}
Example:
~iworx/bin/config.pex --set --name UI_BRANDING_PACKAGE_NAME --value new_reseller_package --reseller {reseller_id}
To Remove Custom Branding
Log in to the server at the CLI as root, either via SSH or from the terminal
Run the following:
To remove the branding, globally:
~iworx/bin/config.pex --unset --name UI_BRANDING_PACKAGE_NAME --global
To remove the branding for a specific SiteWorx account, replacing
{master_domain}with the corresponding information:
~iworx/bin/config.pex --unset --name UI_BRANDING_PACKAGE_NAME --siteworx --domain {master_domain}
To remove the branding for a specific reseller, replacing
{reseller_id}with the corresponding information:~iworx/bin/config.pex --unset --name UI_BRANDING_PACKAGE_NAME --reseller {reseller_id}