Note
You are viewing the documentation for an older release of Interworx (8.1). To see documentation for the current generally available release of Interworx, click here: 8.2.
How To: Manage and Use the Session History Plugin
The Session History plugin allows the Server Administrator to view what changes users have made while logged into NodeWorx or SiteWorx.
Session Histories can be configured to be deleted after a specified number of days.
If the Session History plugin is enabled, a new menu item will appear in NodeWorx, under the NodeWorx menu heading called Session History. This menu item does not appear when the plugin is disabled. This menu item is only available to the master NodeWorx user/Server Administrator. It will not appear in the menu for secondary NodeWorx users or Resellers.
Contents
To Manage the Session History Plugin
Log into NodeWorx from the browser (https://ip.ad.dr.ess:2443/nodeworx)
In NodeWorx, navigate to NodeWorx > Plugins
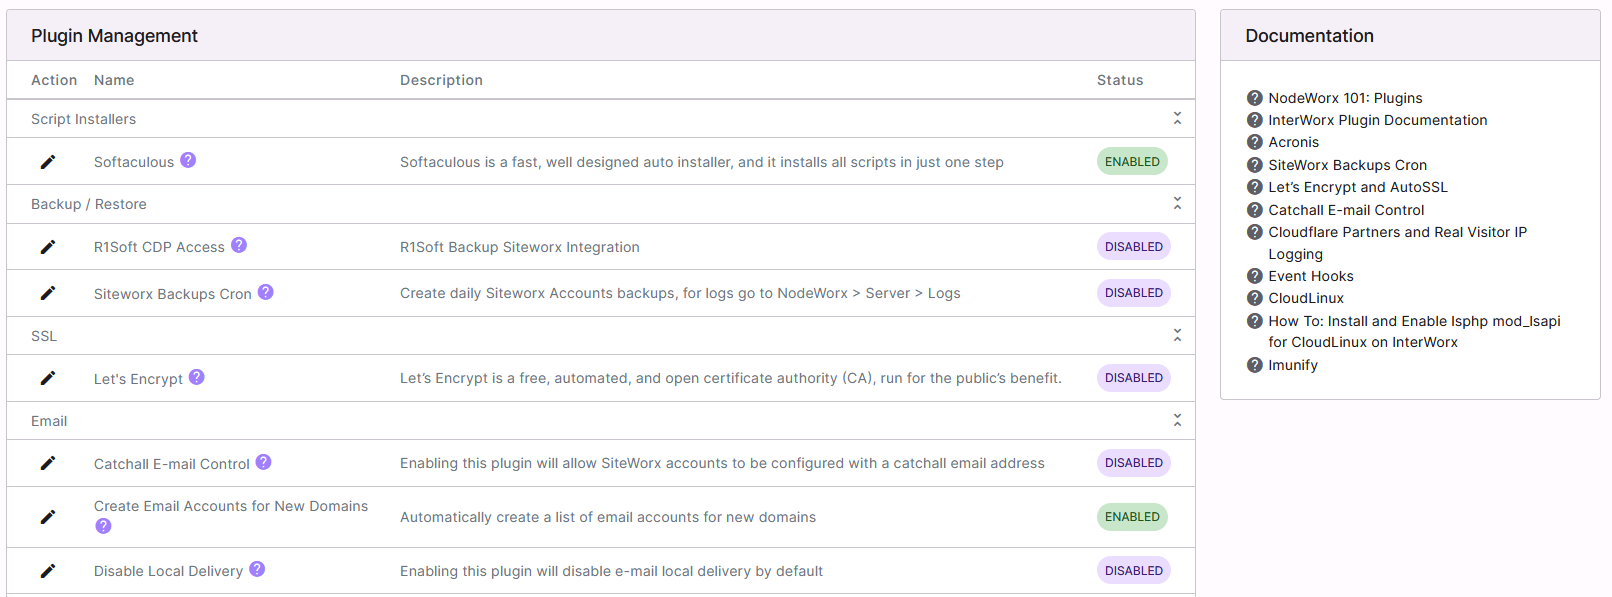
Under Miscellaneous, click the Pencil next to Sesson History. This opens the Edit Plugin form

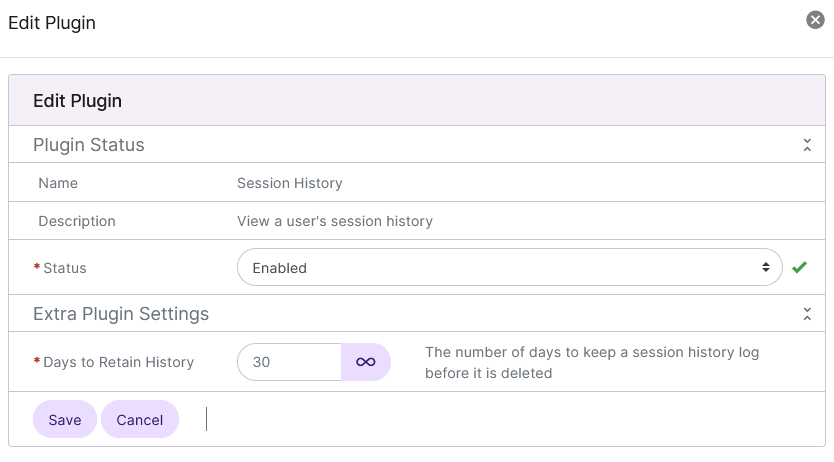
Select either Enabled or Disabled from the Status dropdown
Update the Days to Retain History field to reflect the number of days session history information should be saved. This is set to 30 by default
Click Save
To View Session History Data
Log into NodeWorx from the browser (https://ip.ad.dr.ess:2443/nodeworx)
From NodeWorx, navigate to NodeWorx > Session History
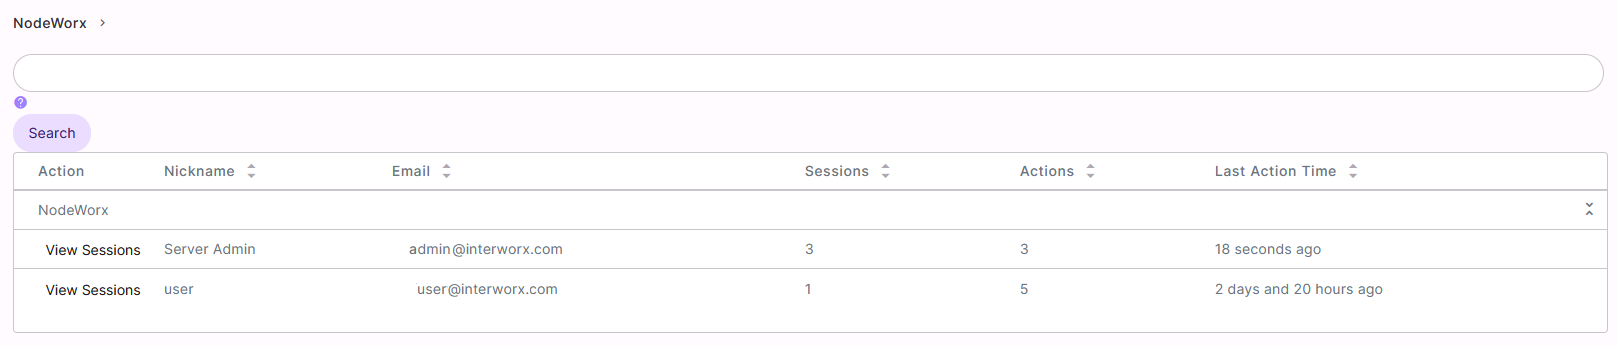
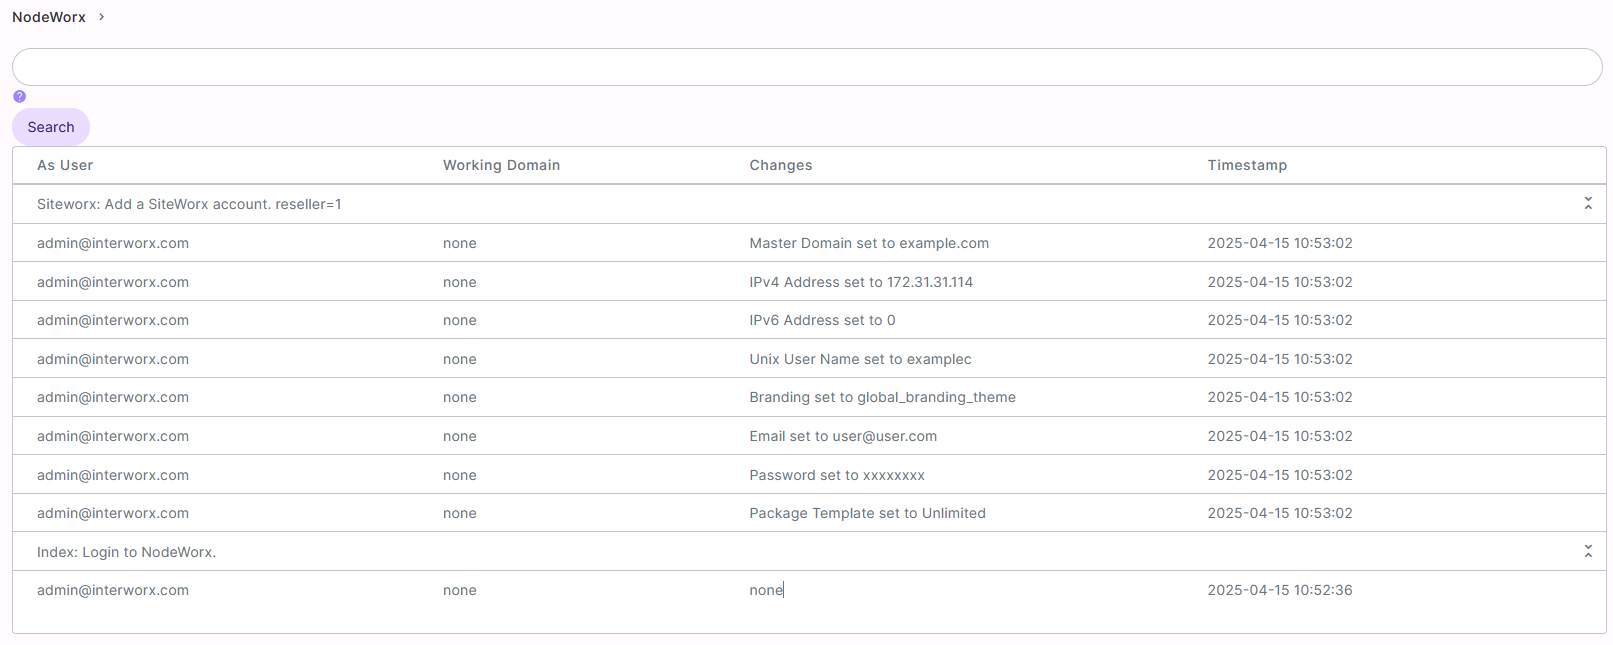
Click View Sessions next to the user. This opens the sessions list page

Click View Details next to the session. This opens the history changes pages