Note
You are viewing the documentation for an older release of Interworx (8.1). To see documentation for the current generally available release of Interworx, click here: 8.2.
How To: Create and Manage Reseller Accounts
NodeWorx Reseller accounts can be used to allow customers the ability to create their own SiteWorx accounts.
While Resellers have access to NodeWorx, they do not see any features that are reserved for the Server Administrator. For example, they cannot alter Apache service configurations or give themselves shell access.
Contents
To Add a Reseller Account
Log into NodeWorx from the browser (https://ip.ad.dr.ess:2443/nodeworx)
In NodeWorx, navigate to Resellers > Accounts
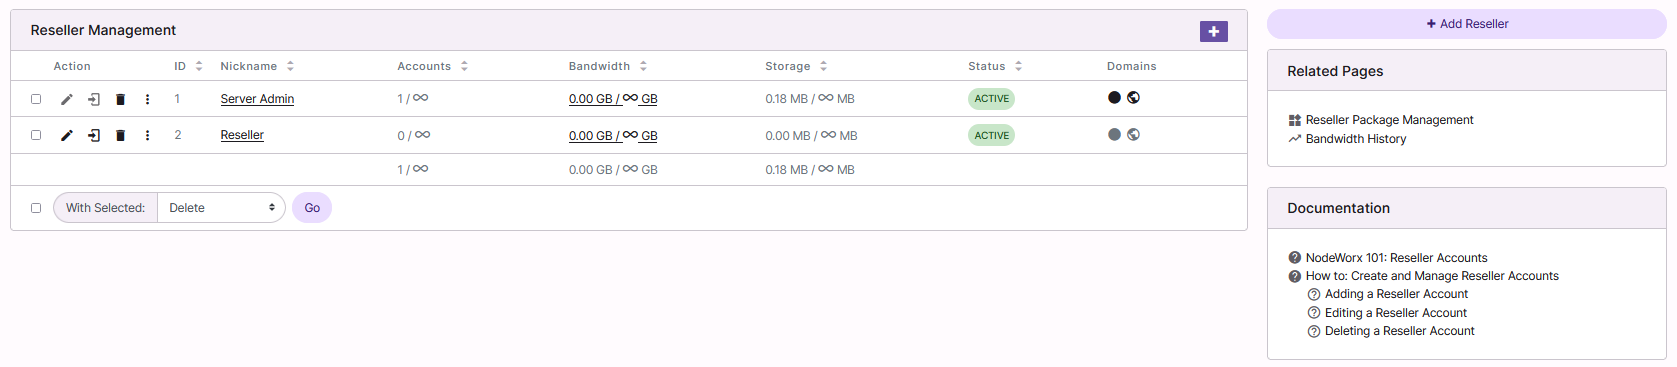
Click + or Add Reseller. This opens the Reseller Account Management form
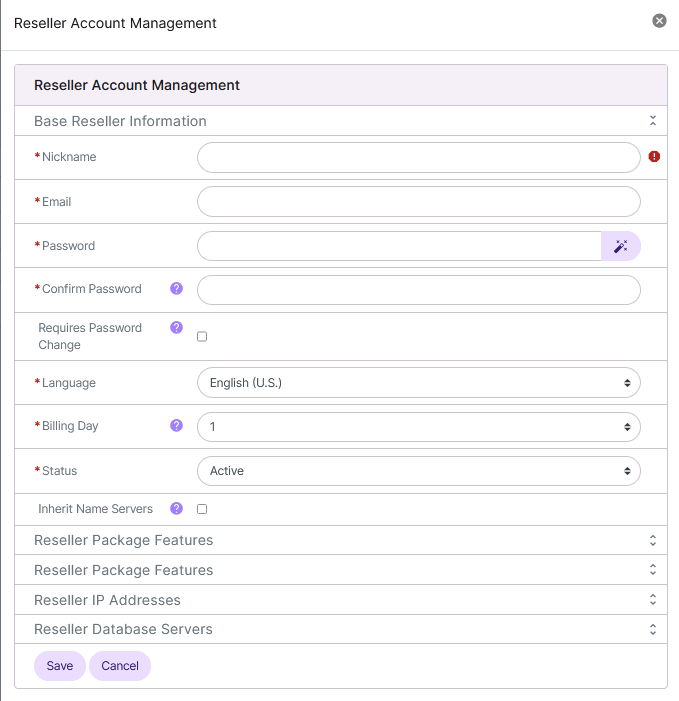
Update the required fields. These include:
Nickname: The nickname of the reseller. This is used to identify the reseller
E-mail Address: The e-mail address of the reseller. This is the NodeWorx login and point of contact for the reseller
Password/Confirm Password: The password of the reseller
Language: The default language of the reseller. The selected language is the language that will appear in the interface
Billing Day: This is the day of each month that the billing cycle starts. This is also the day the bandwidth counter resets each month for the reseller account
Status: The status of the reseller account
Reseller accounts marked Inactive will no longer be able to log into NodeWorx
Reseller Package Features: For details about each Reseller Package Features, see Reseller Package Overview
Reseller IP Addresses: Server IP addresses the reseller is allowed to use
If there are no IPs listed, see: IP Management Documentation
Database Server: The database server associated with the reseller
Click Save
To Edit a Reseller Account
Log into NodeWorx from the browser (https://ip.ad.dr.ess:2443/nodeworx)
In NodeWorx, navigate to Resellers > Accounts
Click the Pencil next to the reseller account. This opens the Reseller Account Management form
Modify the desired values
Click Save
To Delete a Reseller Account
Warning
When a reseller account is deleted, all of the SiteWorx accounts created under that reseller are transferred to the Server Admin reseller (the master NodeWorx user).
From the Accounts List
Log into NodeWorx from the browser (https://ip.ad.dr.ess:2443/nodeworx)
In NodeWorx, navigate to Resellers > Accounts
Select the Trashcan next to the reseller account. This opens the Confirm Deletion form
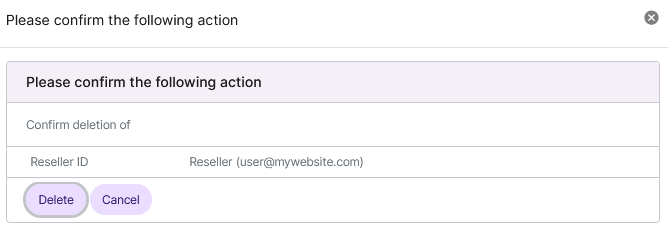
Click Delete
From the With Selected Dropdown
Log into NodeWorx from the browser (https://ip.ad.dr.ess:2443/nodeworx)
In NodeWorx, navigate to Resellers > Accounts
Select the checkbox next to the account(s)
Selecting the checkbox next to the With Selected dropdown will automatically select all accounts
Select Delete from the With Selected dropdown
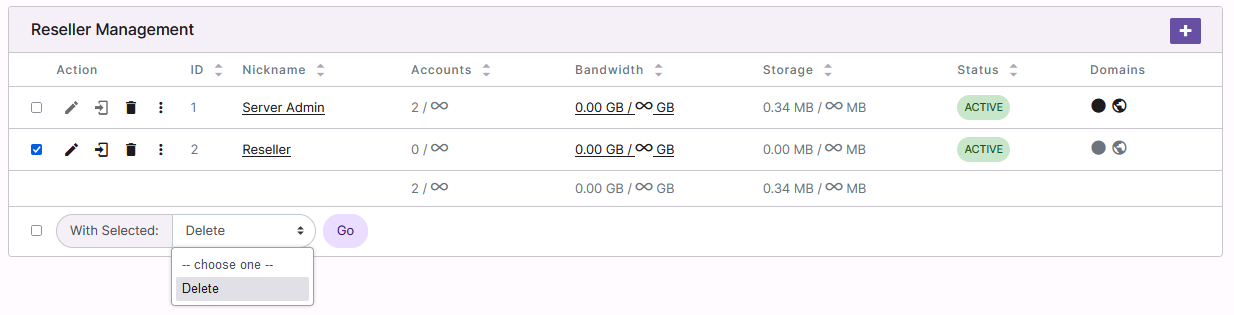
Click Go. This opens the Confirm Deletion form
Click Delete
To Manage Reseller Account IP Addresses
To Add a New IP Addresss to a Reseller Account
Log into NodeWorx from the browser (https://ip.ad.dr.ess:2443/nodeworx)
In NodeWorx, navigate to Resellers > Accounts
Click the vertical dots icon next to the reseller account. This opens an options menu

Click Manage IPs. This opens the Manage IPs page for the reseller account

Click Assign More IPs. This opens the Add an IP Address form

Select the checkbox next to the desired IP addresses
Click Save
To Remove an IP Address from a Reseller Account
Log into NodeWorx from the browser (https://ip.ad.dr.ess:2443/nodeworx)
In NodeWorx, navigate to Resellers > Accounts
Click the vertical dots icon next to the reseller account. This opens an options menu
Click Manage IPs. This opens the Manage IPs page for the reseller account
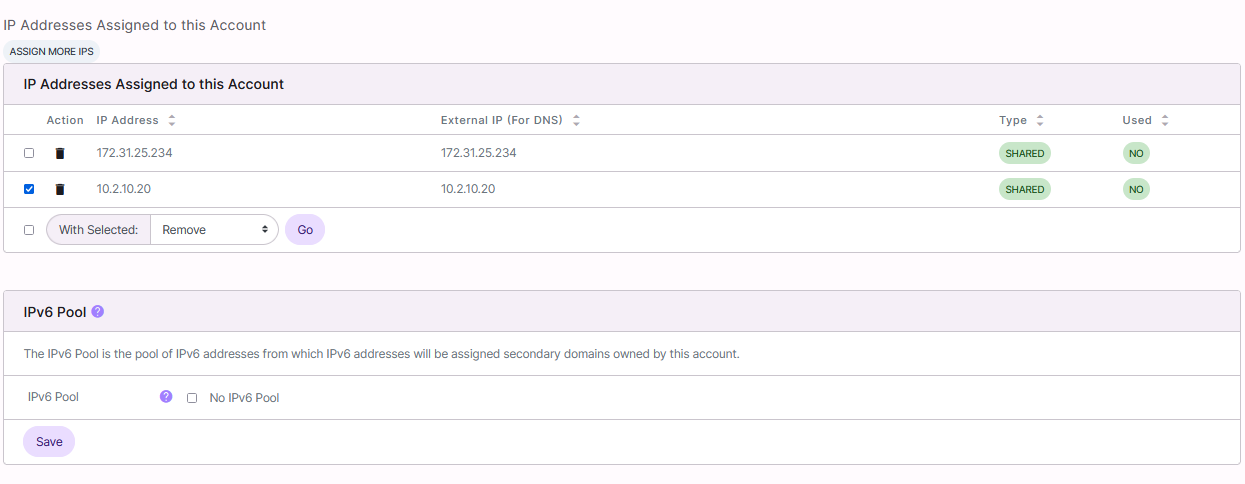
Select the checkbox next to the desired IP address
Select Remove from the With Selected dropdown
Click Go. This opens the Confirmation form
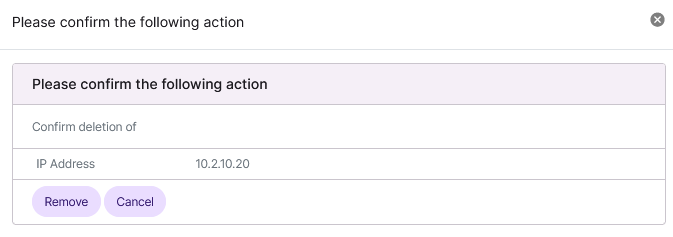
Click Remove