Note
You are viewing the documentation for a development version of Interworx (7.12). To see documentation for the current generally available release of Interworx, click here: 7.13.
How to: Manage MySQL Databases in SiteWorx
From the SiteWorx interface, SiteWorx users can create and manage MySQL databases.
By default, all databases created in SiteWorx will be prefixed by the SiteWorx account unix username. While it is not possible to create non-prefixed databases from within SiteWorx, users with shell access may do so from the CLI.
Contents
To Manage MySQL Databases
Adding a Database
Log into SiteWorx from the browser (https://ip.ad.dr.ess:2443/siteworx)
In SiteWorx, navigate to Hosting Features > MySQL > Databases, either from the side menu or SiteWorx home
Click +. This opens the Add a MySQL Database from
Update the desired fields:
Database Name: The name of the database. SiteWorx will automatically append the unix username of the SiteWorx to the database name provided
Create User: Checking this box will expand the form to include database user options. Creating a database user for the new wordpress database is recommended
Password/Confirm Password: The password for the database user. Clicking the Magic Wand will automatically generate a secure password
MySQL User Permissions: The permissions the database user should have
When Connecting From: The host the database user will connect from. % is the default, which is a wildcard
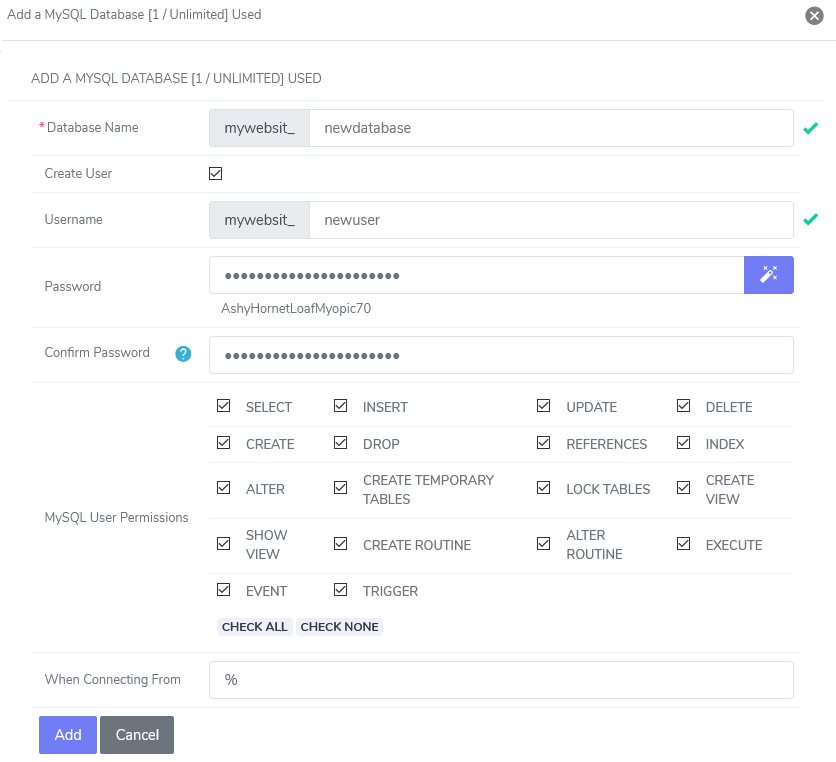
Click Add
Deleting a Database
Log into SiteWorx from the browser (https://ip.ad.dr.ess:2443/siteworx)
In SiteWorx, navigate to Hosting Features > MySQL > Databases, either from the side menu or SiteWorx home.
Click the Trashcan icon next to the database to delete. This opens the Confirmation form
Select the Confirm Action checkbox
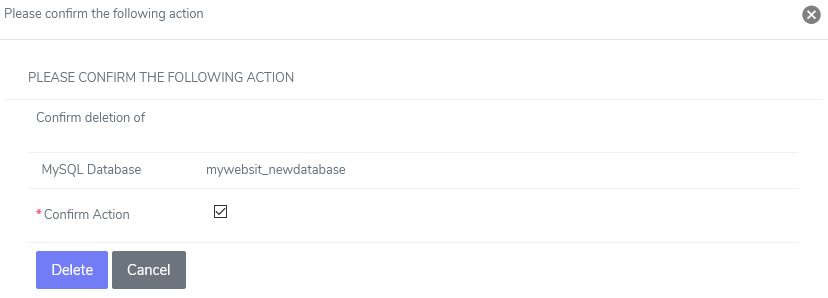
Click Delete
To Manage MySQL Database Permissions
Adding Database User Permissions
Log into SiteWorx from the browser (https://ip.ad.dr.ess:2443/siteworx)
In SiteWorx, navigate to Hosting Features > MySQL > Databases, either from the side menu or SiteWorx home.
Click the Person icon button next to the Database. The opens the User Permissions page
Update the required fields:
User: The user that will be added to the database
MySQL User Permissions: The permissions the database user should have
When Connecting From: The host the database user will connect from. % is the default, which is a wildcard
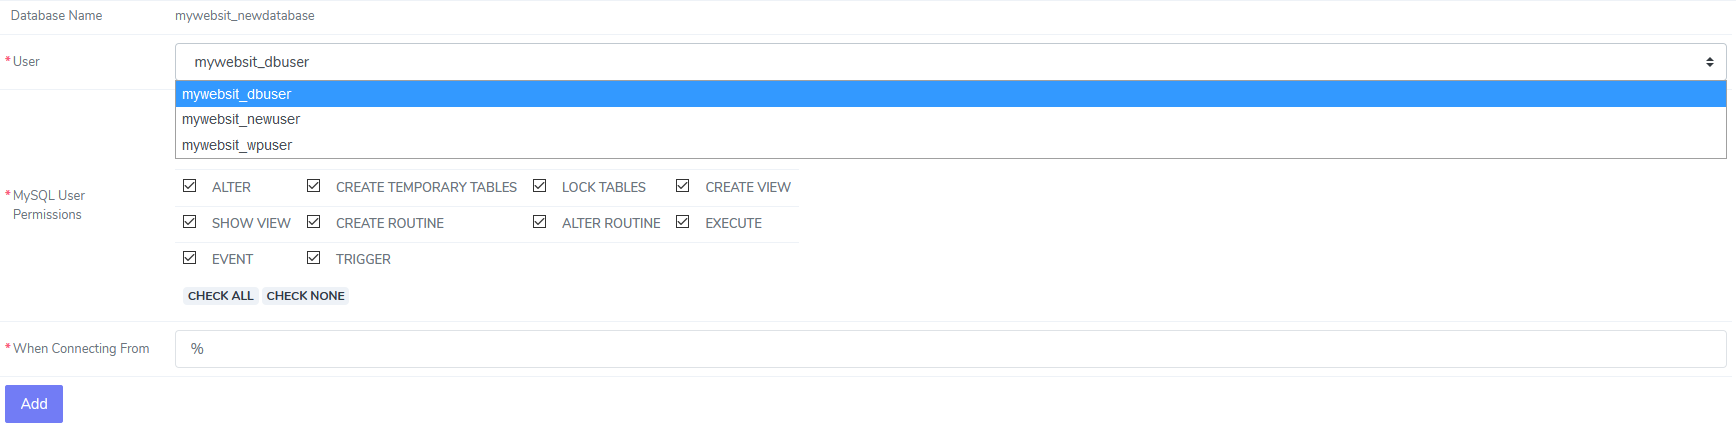
Click Add
Editing Database User Permissions
Log into SiteWorx from the browser (https://ip.ad.dr.ess:2443/siteworx)
In SiteWorx, navigate to Hosting Features > MySQL > Databases, either from the side menu or SiteWorx home.
Click the Person icon button next to the Database. The opens the User Permissions page
Under Existing Permissions, click the Pencil button next to the MySQL user to edit permissions for
Update the desired permissions
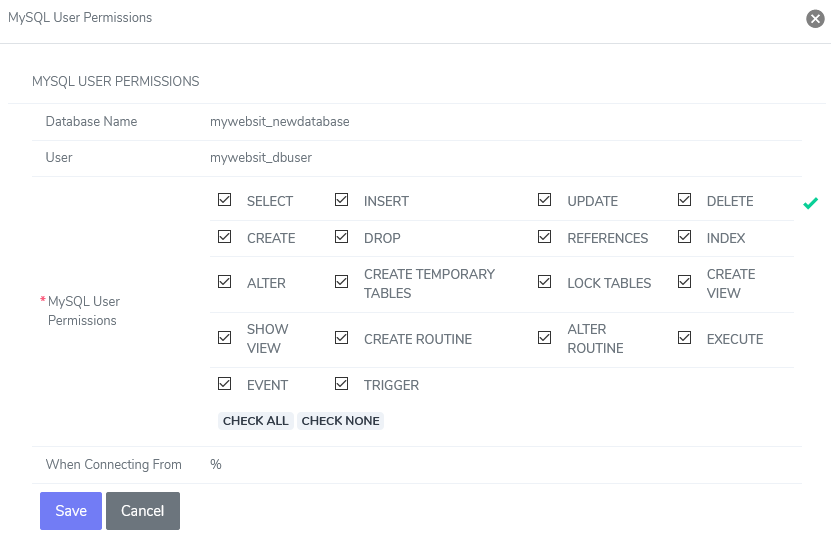
Click Save
Deleting Database User Permissions
Log into SiteWorx from the browser (https://ip.ad.dr.ess:2443/siteworx)
In SiteWorx, navigate to Hosting Features > MySQL > Databases, either from the side menu or SiteWorx home.
Click the Person icon button next to the Database. The opens the User Permissions page
Click the Trashcan button next to the mysql user to delete permissions for. This opens the confirmation form
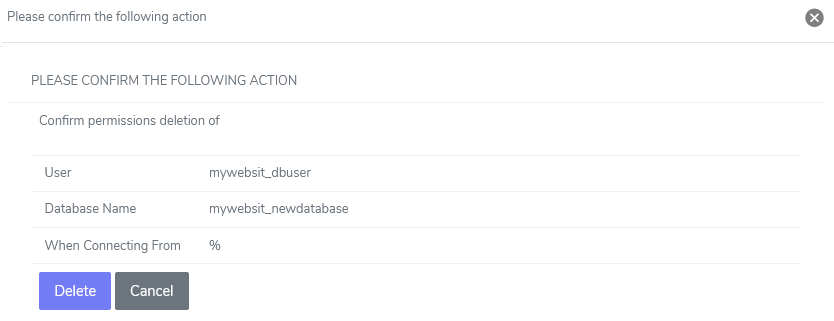
Click Delete