Note
You are viewing the documentation for an older release of Interworx (7.0). To see documentation for the current generally available release of Interworx, click here: 7.13.
How to: Manage DNS Zones and Records
From the DNS Zones page in NodeWorx, server administrators can add and edit DNS zones and records for the domains on the server.
Descriptions of the different types of DNS zones and their add and edit requirements can be found here.
Note
This page is the only location where domain A records can be managed. While it is possible to provide SiteWorx users access to manage the DNS records for their domains, editing, adding, and deleting A records may only be accomplished via NodeWorx. This reduces the potential risk of end users accidentally deleting records that are required for their domains to be accessible from the browser.
Contents
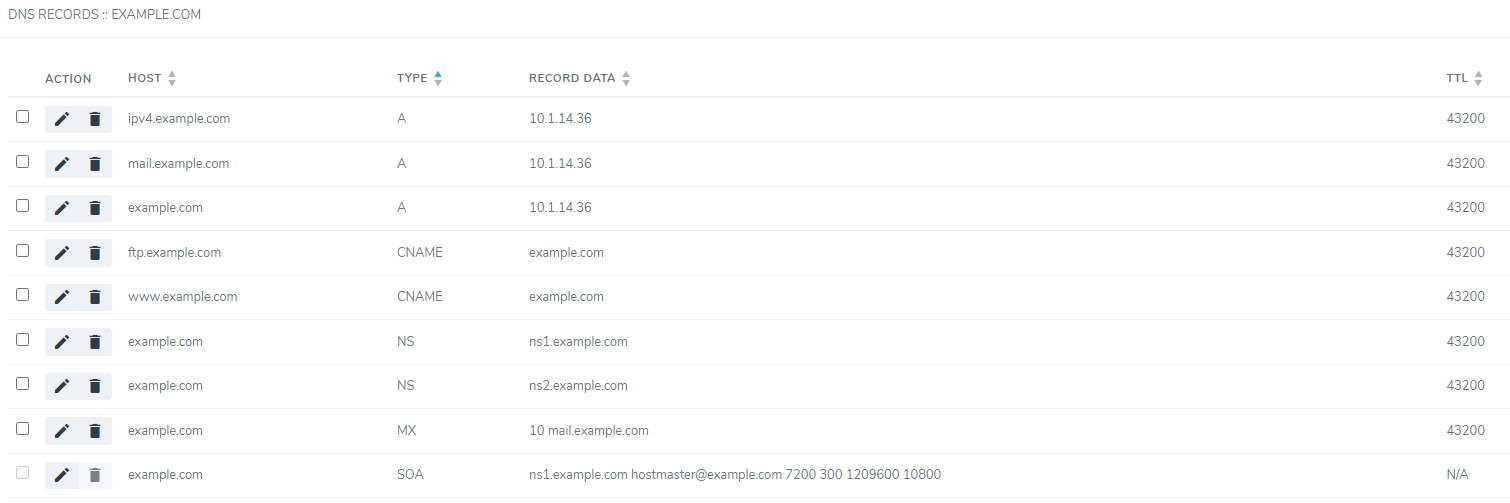
To View the DNS Records for a Domain
Log into NodeWorx from the browser (https://ip.ad.dr.ess:2443/nodeworx)
In NodeWorx, navigate to System Services > DNS Server > Zones
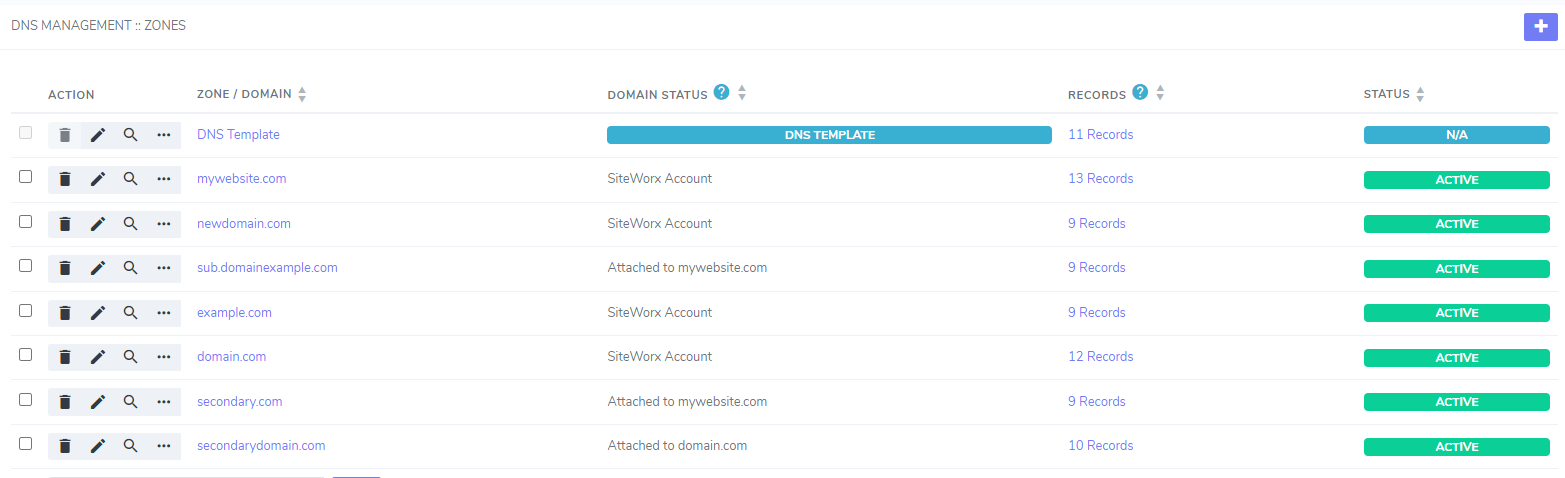
Click the Magnifying Glass next to the domain. This opens the specific DNS records page for that domain
To Edit a DNS Records for a Domain
Log into NodeWorx from the browser (https://ip.ad.dr.ess:2443/nodeworx)
In NodeWorx, navigate to System Services > DNS Server > Zones
Click the Magnifying Glass next to the domain. This opens the DNS Records page
Click the Pencil next to the record to edit. This opens the Edit DNS Record Form
Update the desired information
Click Save
To Add a DNS Record for a Domain
Log into NodeWorx from the browser (https://ip.ad.dr.ess:2443/nodeworx)
In NodeWorx, navigate to System Services > DNS Server > Zones
Click the Magnifying Glass next to the domain. This opens the DNS Records page
From the Add a New dropdown, select the type of record
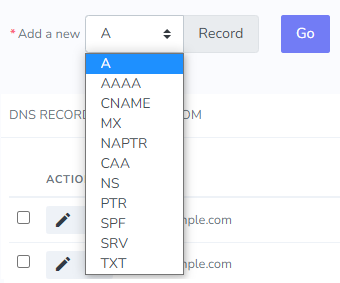
Click Go. This opens the Add DNS Record form. This form is a different for each type of record, as they all require different configuration information. Details can be found here
Update the required information
Click Save