Note
You are viewing the documentation for a development version of Interworx (7.12). To see documentation for the current generally available release of Interworx, click here: 7.13.
How To: Add Custom Branding to the InterWorx User Interface
Custom logo images can be added to both NodeWorx and SiteWorx using the InterWorx Config System.
At this time, custom logos is the only branding customization option available for InterWorx 7. Color customization may be added in a future release.
Contents
Image Locations and Permissions
Note
It is strongly recommended to use .svg files for highest quality and flexibility, as scaled jpg or png may not render as cleanly, particularly on HiDPI displays.
However, jpg, png, and gif are also supported.
Custom image files should be placed in the
~iworx/html/img/logos/directoryImage files must be readable by the iworx-web user. As such, recommended ownership and permissions are
iworx:iworx 0644chmod 0644 {CUSTOM_IMAGE} chown iworx:iworx {CUSTOM_IMAGE}
To Customize NodeWorx
Log in to the server at the CLI as root, either via SSH or from the terminal
Run the following command, specifying the CONFIG_NAME, and LEVEL from the options in the table, below, as well as the CUSTOM_IMAGE:
~iworx/bin/config.pex --set --name {CONFIG_NAME} --value /img/logos/{CUSTOM_IMAGE} --{LEVEL}
Image
Config Name
Level(s)
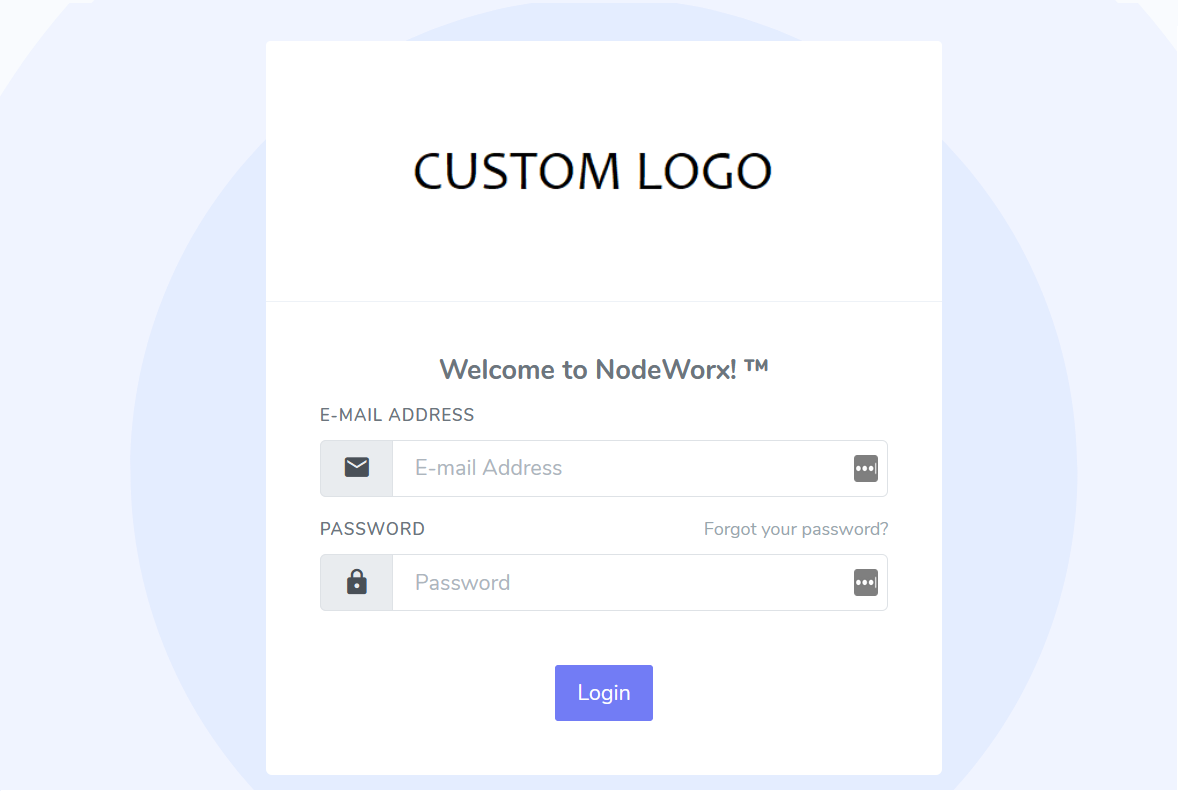
NodeWorx Login Page
BRANDING_NW_LOGO_LOGINServer (
--server)NodeWorx Menu Header
BRANDING_NW_LOGO_MENUServer (
--server), Per-reseller (--reseller)NodeWorx Condensed Menu
BRANDING_NW_LOGO_CONDENSEDServer (
--server), Per-reseller (--reseller)NodeWorx Overview
BRANDING_NW_LOGO_WELCOMEServer (
--server), Per-reseller (--reseller)For example, to add a custom image to the NodeWorx login page (https://server.hostname:2443/nodeworx), with a custom image file named custom_logo.png, use the following command:
~iworx/bin/config.pex --set --name BRANDING_NW_LOGO_LOGIN --value /img/logos/custom_logo.png --server
Note
The NodeWorx login page can be customized per-server only (--server). All other
NodeWorx images can be customized per-server or per-reseller.
To Customize SiteWorx
Log in to the server at the CLI as root, either via SSH or from the terminal
Run the following command, specifying the CONFIG_NAME, and LEVEL from the options in the table, below, as well as the CUSTOM_IMAGE:
~iworx/bin/config.pex --set --name {CONFIG_NAME} --value /img/logos/{CUSTOM_IMAGE} --{LEVEL}
Image
Config Name
Level(s)
SiteWorx Login Page
BRANDING_SW_LOGO_LOGINServer (
--server)SiteWorx Top Bar
BRANDING_SW_LOGO_MENUServer (
--server), Per-reseller (--reseller)SiteWorx Condensed Menu
BRANDING_SW_LOGO_CONDENSEDServer (
--server), Per-reseller (--reseller)SiteWorx Overview
BRANDING_SW_LOGO_WELCOMEServer (
--server), Per-reseller (--reseller)For example, to add a custom image to the SiteWorx login page (https://server.hostname:2443/siteworx), with a custom image file named custom_logo.png, use the following command:
~iworx/bin/config.pex --set --name BRANDING_NW_LOGO_LOGIN --value /img/logos/custom_logo.png --server

Note
The SiteWorx login page can be customized per-server only (--server). All other
SiteWorx images can be customized per-server or per-reseller
Customizing SiteWorx images per-reseller will apply to all SiteWorx accounts owned by that reseller
To Remove Custom Branding
Log in to the server at the CLI as root, either via SSH or from the terminal
Run the following command, specifying the CONFIG_NAME and LEVEL from the corresponding table:
~iworx/bin/config.pex --unset --name {CONFIG_NAME} --{LEVEL}
For example, to remove the custom logo from the NodeWorx login page, and set it back to the default, use the following command:
~iworx/bin/config.pex --unset --name BRANDING_NW_LOGO_LOGIN --server